Living standards rise and construction techniques advance, leading to increased demand for dry-wet separation in bathroom renovations. This separation keeps the bathing area apart from washing and cleaning areas, preventing water from spreading across the floor after each bath.
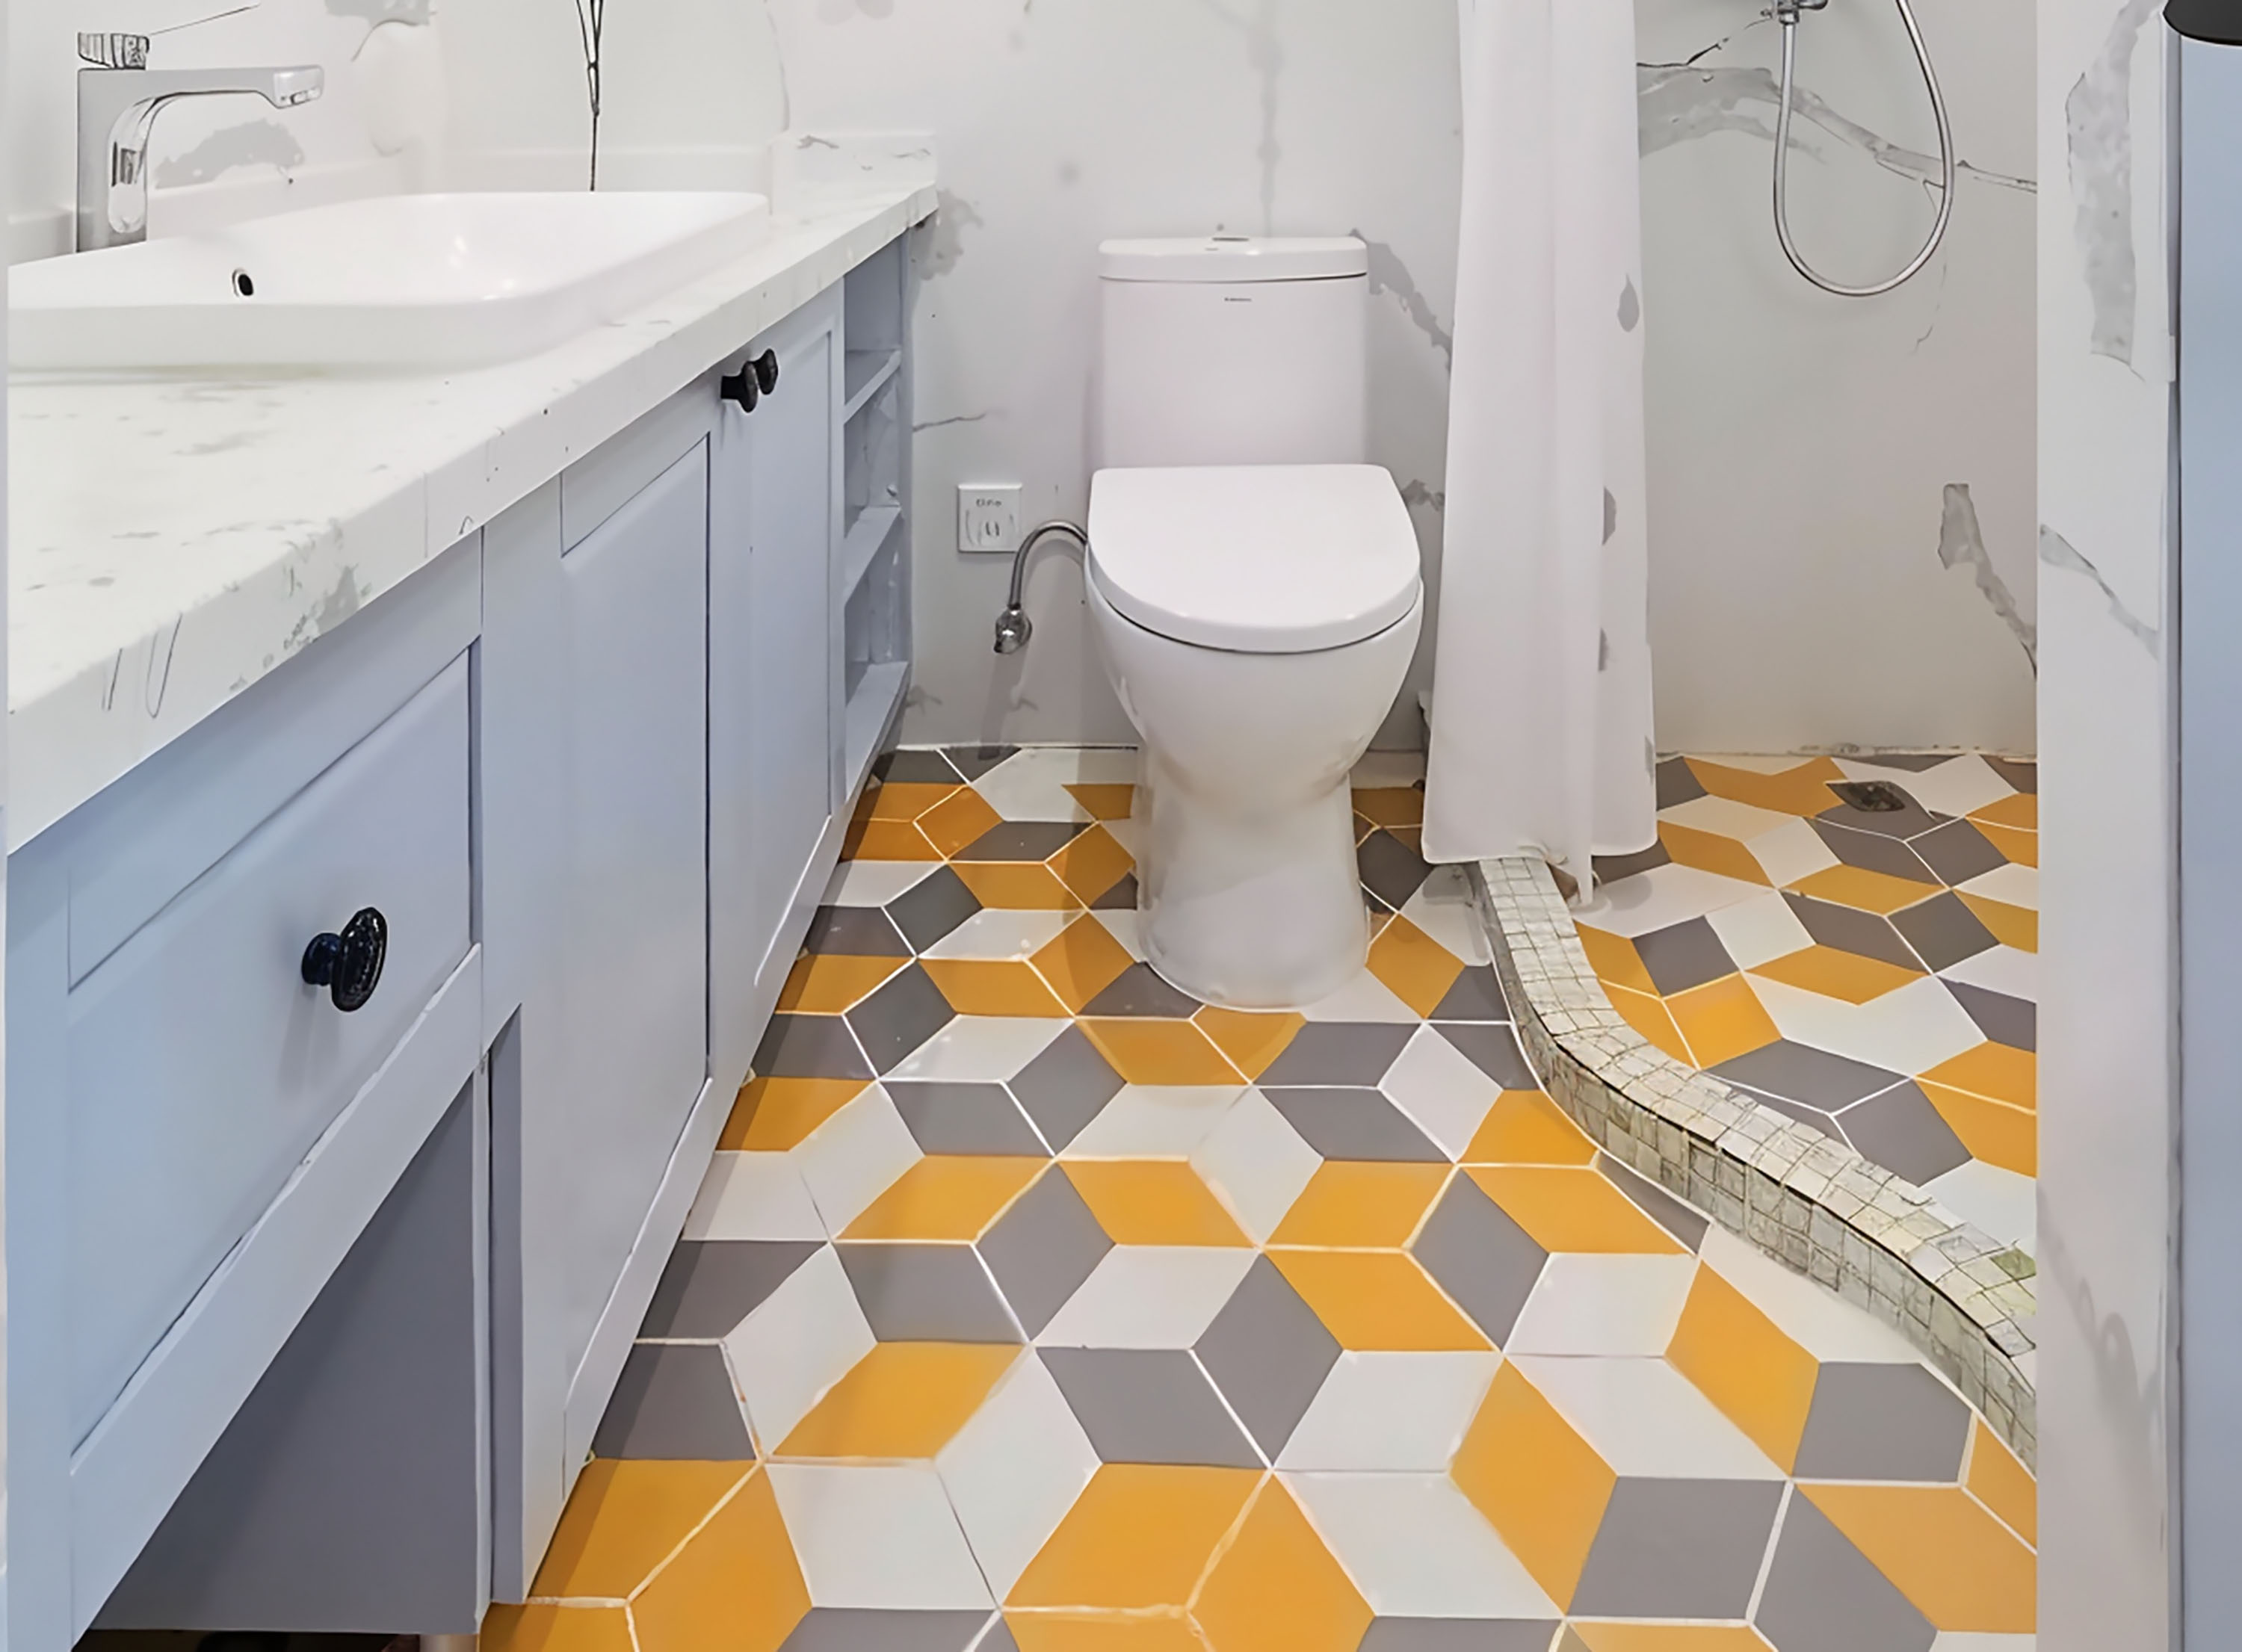
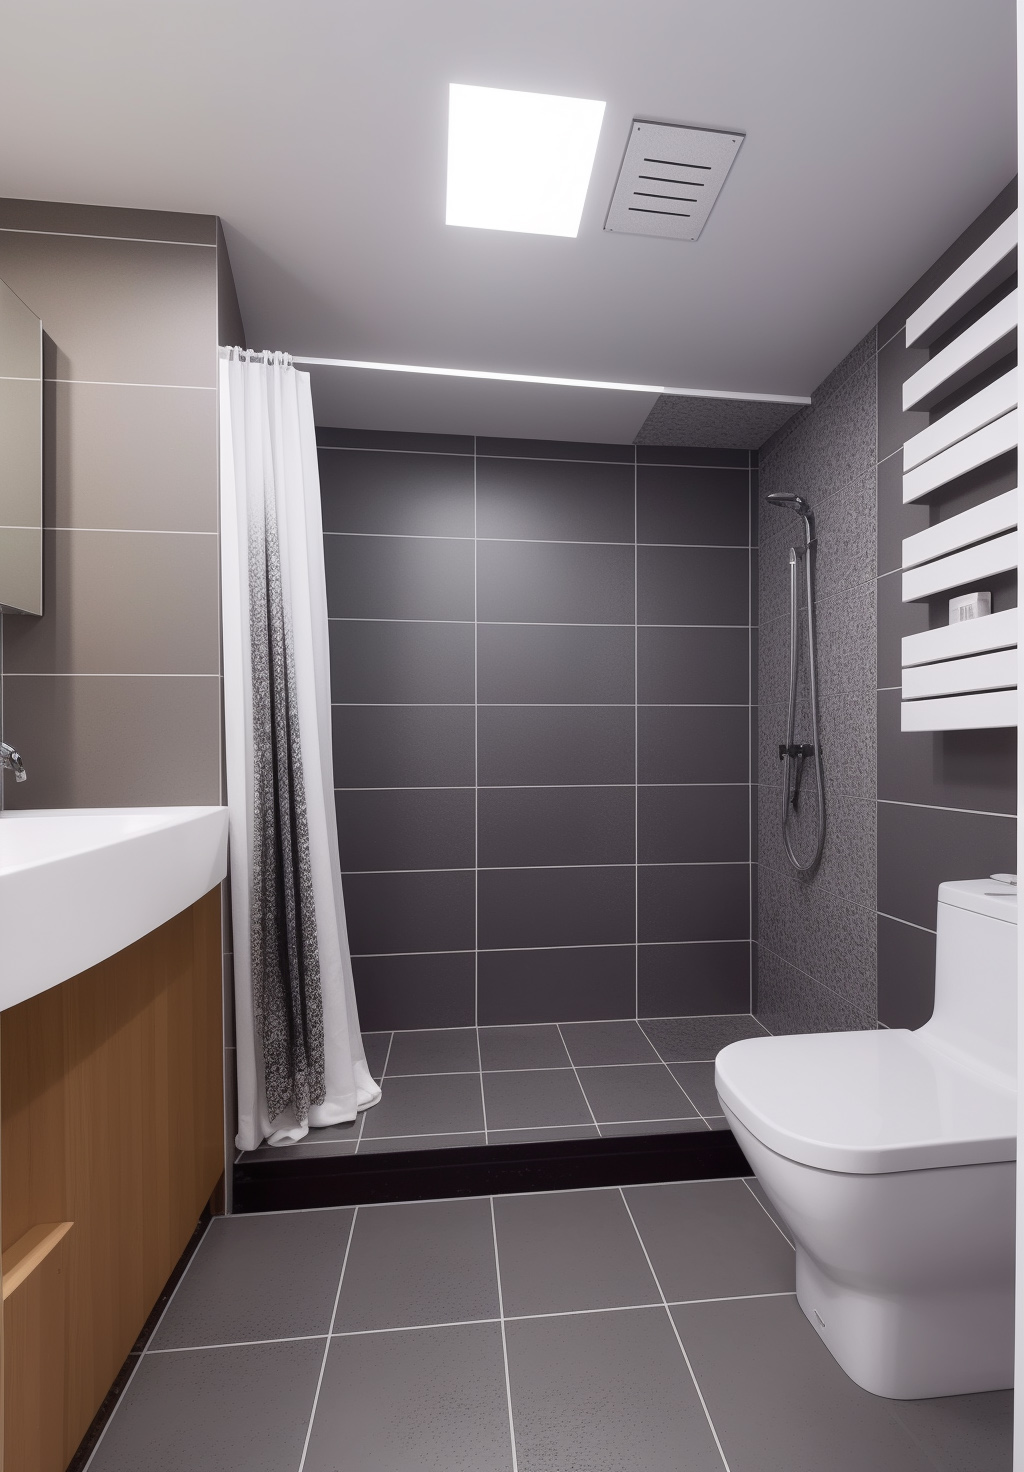
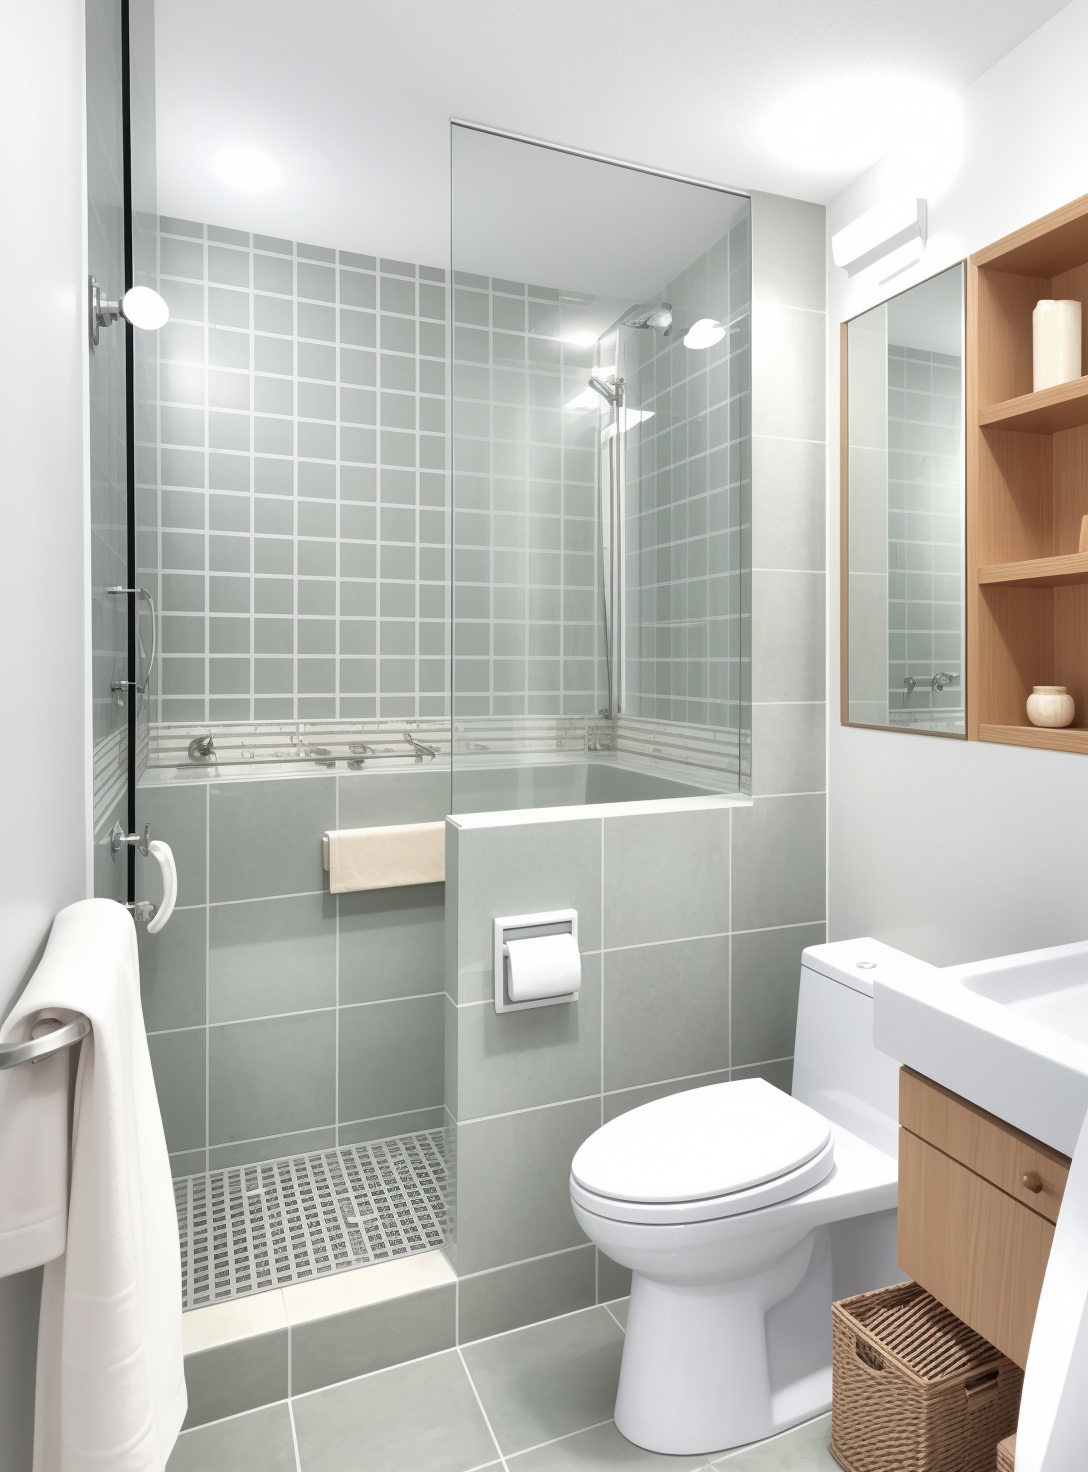
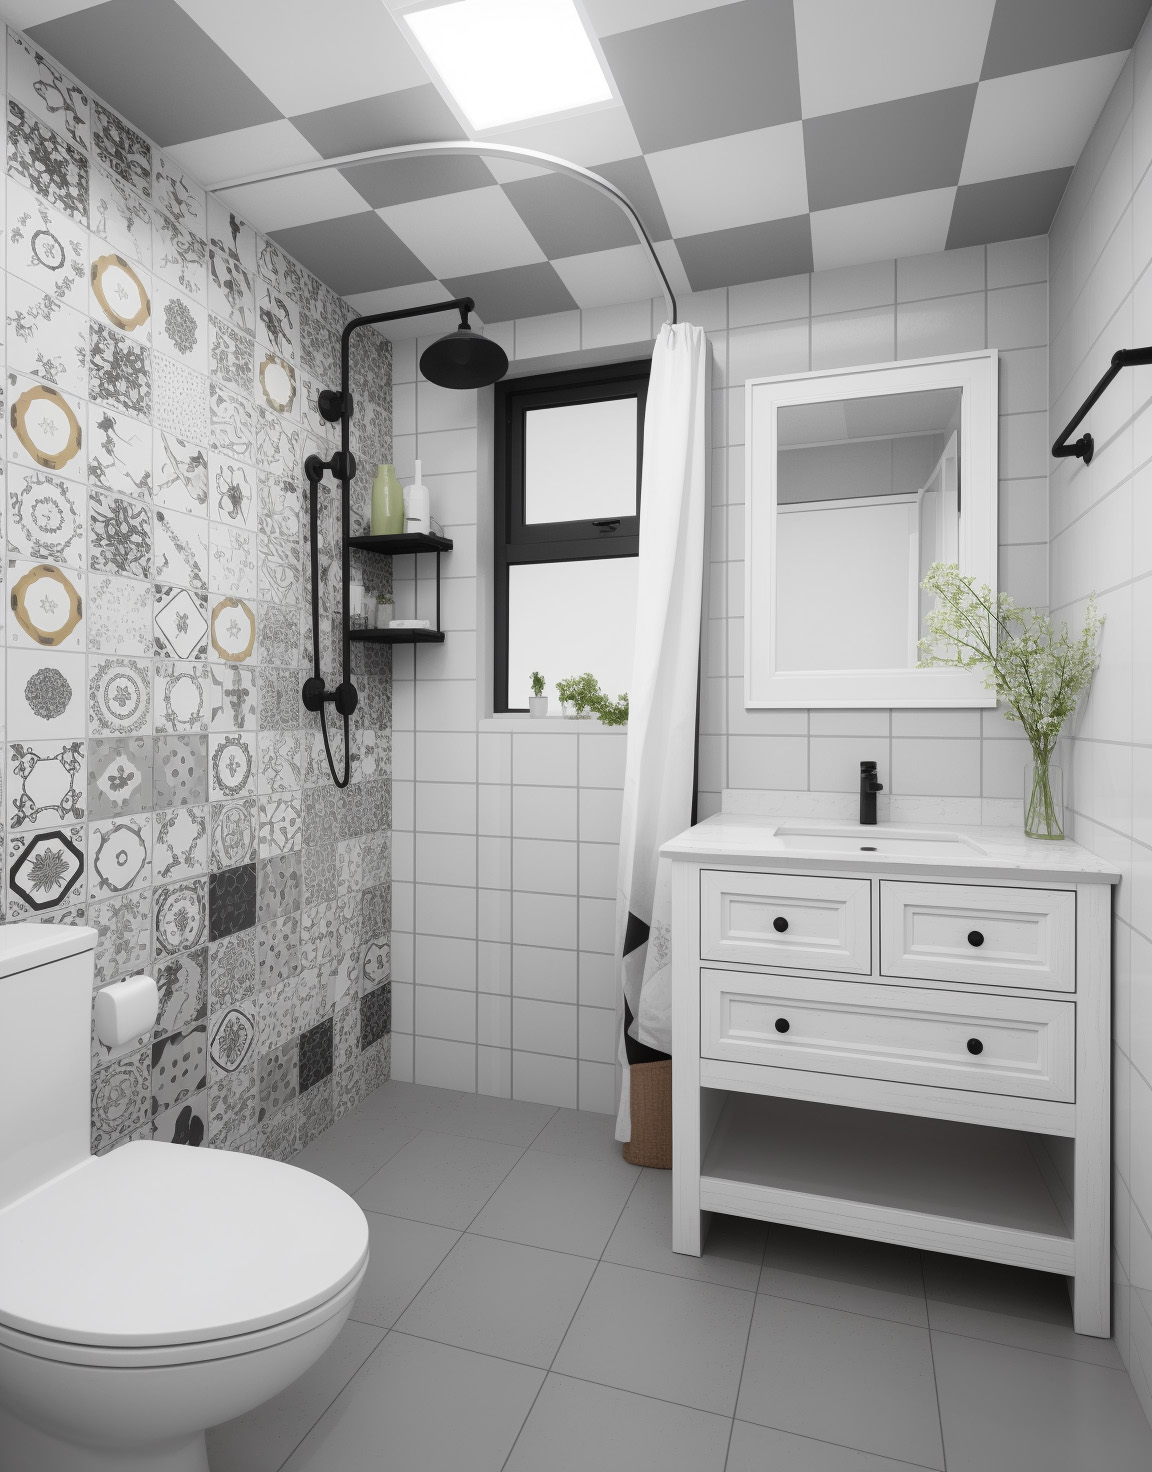
The so-called dry-wet separation does not necessarily require a separate shower room. It can exist in many forms. For instance, in a small bathroom, if a shower room makes the space feel cramped, the most common way to achieve dry-wet separation is to install a water barrier at the transition between the sanitary area and the shower area, or to add a shower curtain, as shown in the following figure. The effects will also be very good. There are many ways to separate the dry and wet areas in the bathroom.
01. What material is good for the water barrier strip of a shower enclosure?
1. Plastic:
Plastic water barriers are relatively affordable in price, have a long service life, are lightweight, easy to install and have good sealing performance. It will change according to the variations at the edge of the shower enclosure and can be flexibly arranged in various shapes
2. Artificial stone:

Artificial stone water barriers have relatively strong advantages in terms of corrosiveness, acidity and alkalinity, and impact resistance. The material itself does not produce any toxic substances or radioactive materials. Due to its smooth surface, it is relatively easy to maintain. Therefore, many families choose to use this material.
3. Marble (natural stone)

The marble water barrier strip is relatively soft in texture and has strong processing performance. Each piece of marble has a different texture and a smooth and fine surface. It is a very high-end water barrier strip. So its price is also relatively high. However, many homeowners like its beautiful and elegant style and will also choose the marble water barrier.
4. Granite (natural stone)
When choosing a water barrier, it is essential to consider the hardness issue. Since the upper part of the water barrier is the glass door of the shower room, it must have a strong load-bearing capacity. Granite water barriers are harder than marble in terms of natural material. Due to this reason, they have stronger wear resistance, good sealing performance, low water absorption rate, better waterproof effect and certain load-bearing capacity.
5. Self-built water barrier strips
▲Build the shape of a water barrier with bricks and then lay floor tiles or stone slabs.
6. Concrete cast-in-place water barrier strips
How should we choose? First of all, we need to choose the appropriate type of water barrier. These materials of water barriers each have their own advantages and disadvantages. Plastic water barriers are the most commonly used type. They are easy to install and can be stuck with plastic glue. Moreover, they are economical, durable and lightweight. However, they are not as aesthetically pleasing as stone ones. Natural stone is mainly made of marble, which is beautiful and elegant. However, the color limitation may cause it to not match the floor, and the price is relatively high. Artificial stone material, this kind of material is hard in texture, waterproof, corrosion-resistant, impact-resistant, easy to clean, not expensive, and has the functions of anti-clogging and anti-odor. It is the most popular. If it is to be used in conjunction with a shower curtain, natural stone is the most suitable. Of course, artificial water barriers are also very popular.
Finally, when choosing water-blocking strips, we should be careful to distinguish between good and bad ones to avoid buying inferior products. Specifically, you can check its density to see if there are any obvious bubbles and if there are any obvious sand holes in the cross-section. Another thing to look at is the luster on the front. A good water-blocking strip has a very good luster. If it is made of plastic, the thickness of the gel coat and whether it is uniform also need to be checked.
02. The design style of the water barrier strip
1. The shapes of water barriers come in various forms. Let's take a look at the pictures below to learn more:
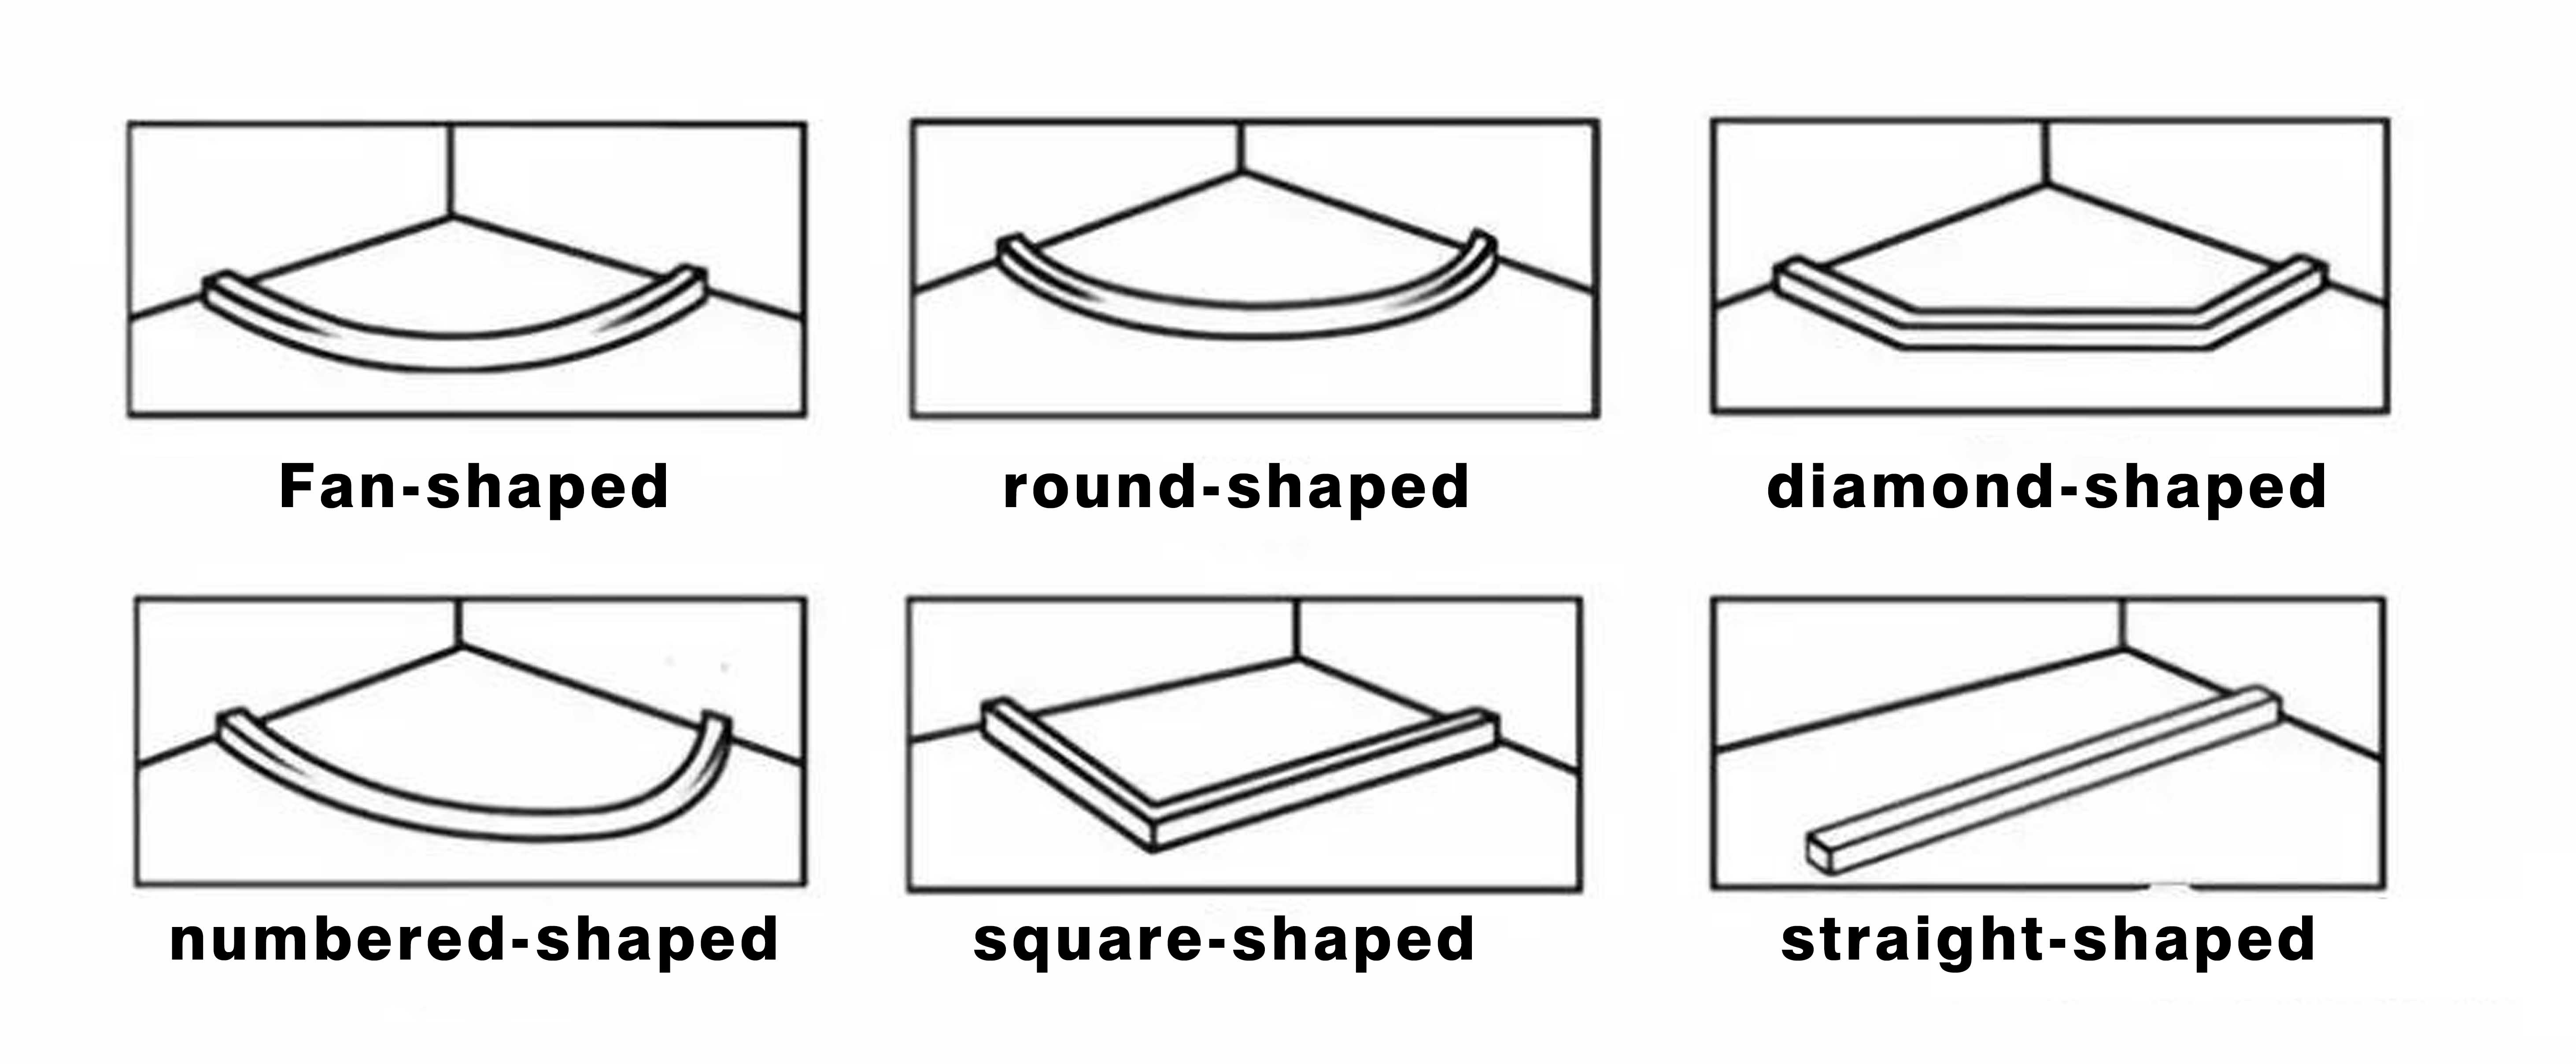
▲ Design diagram
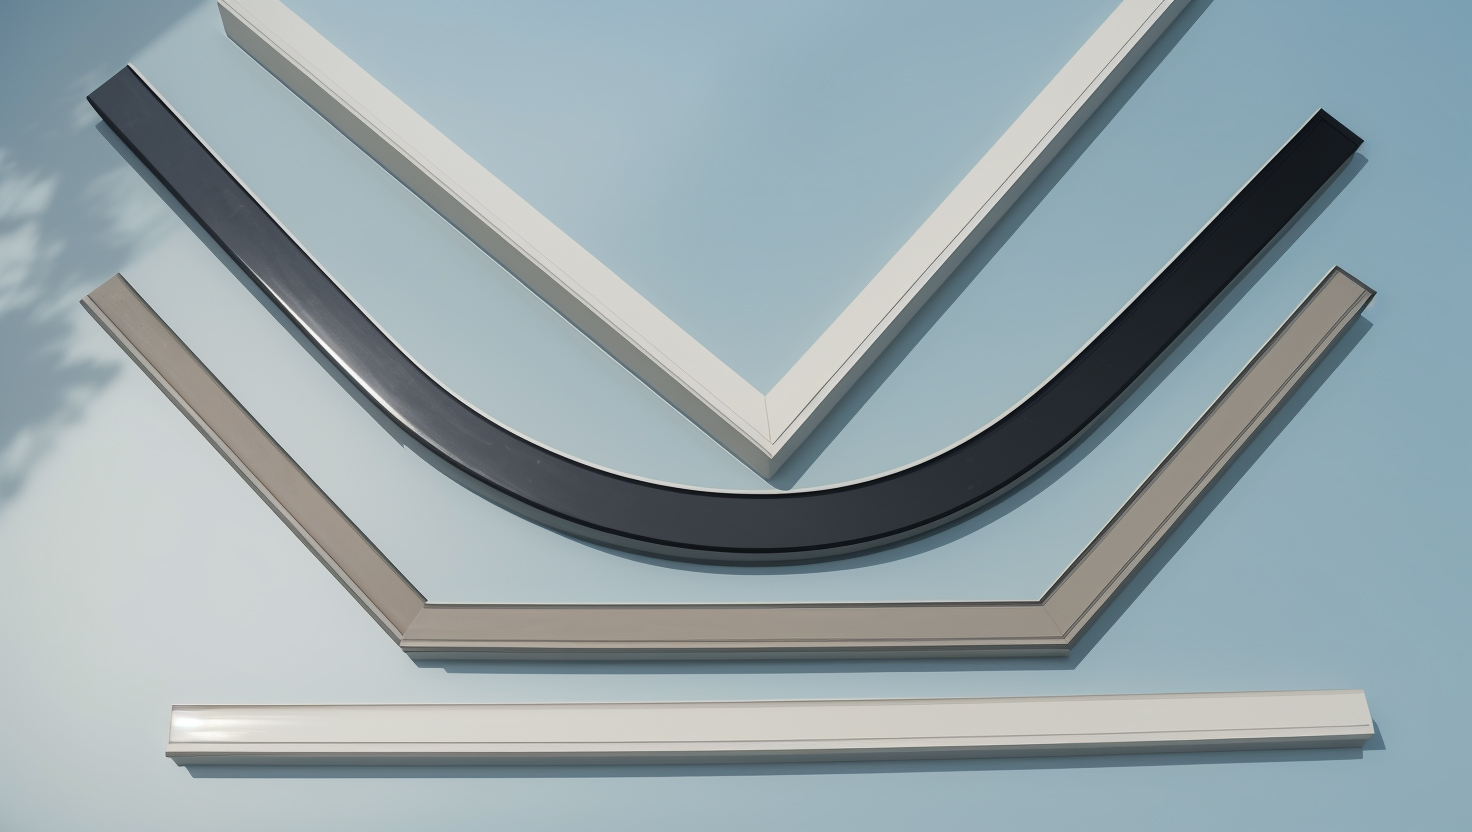
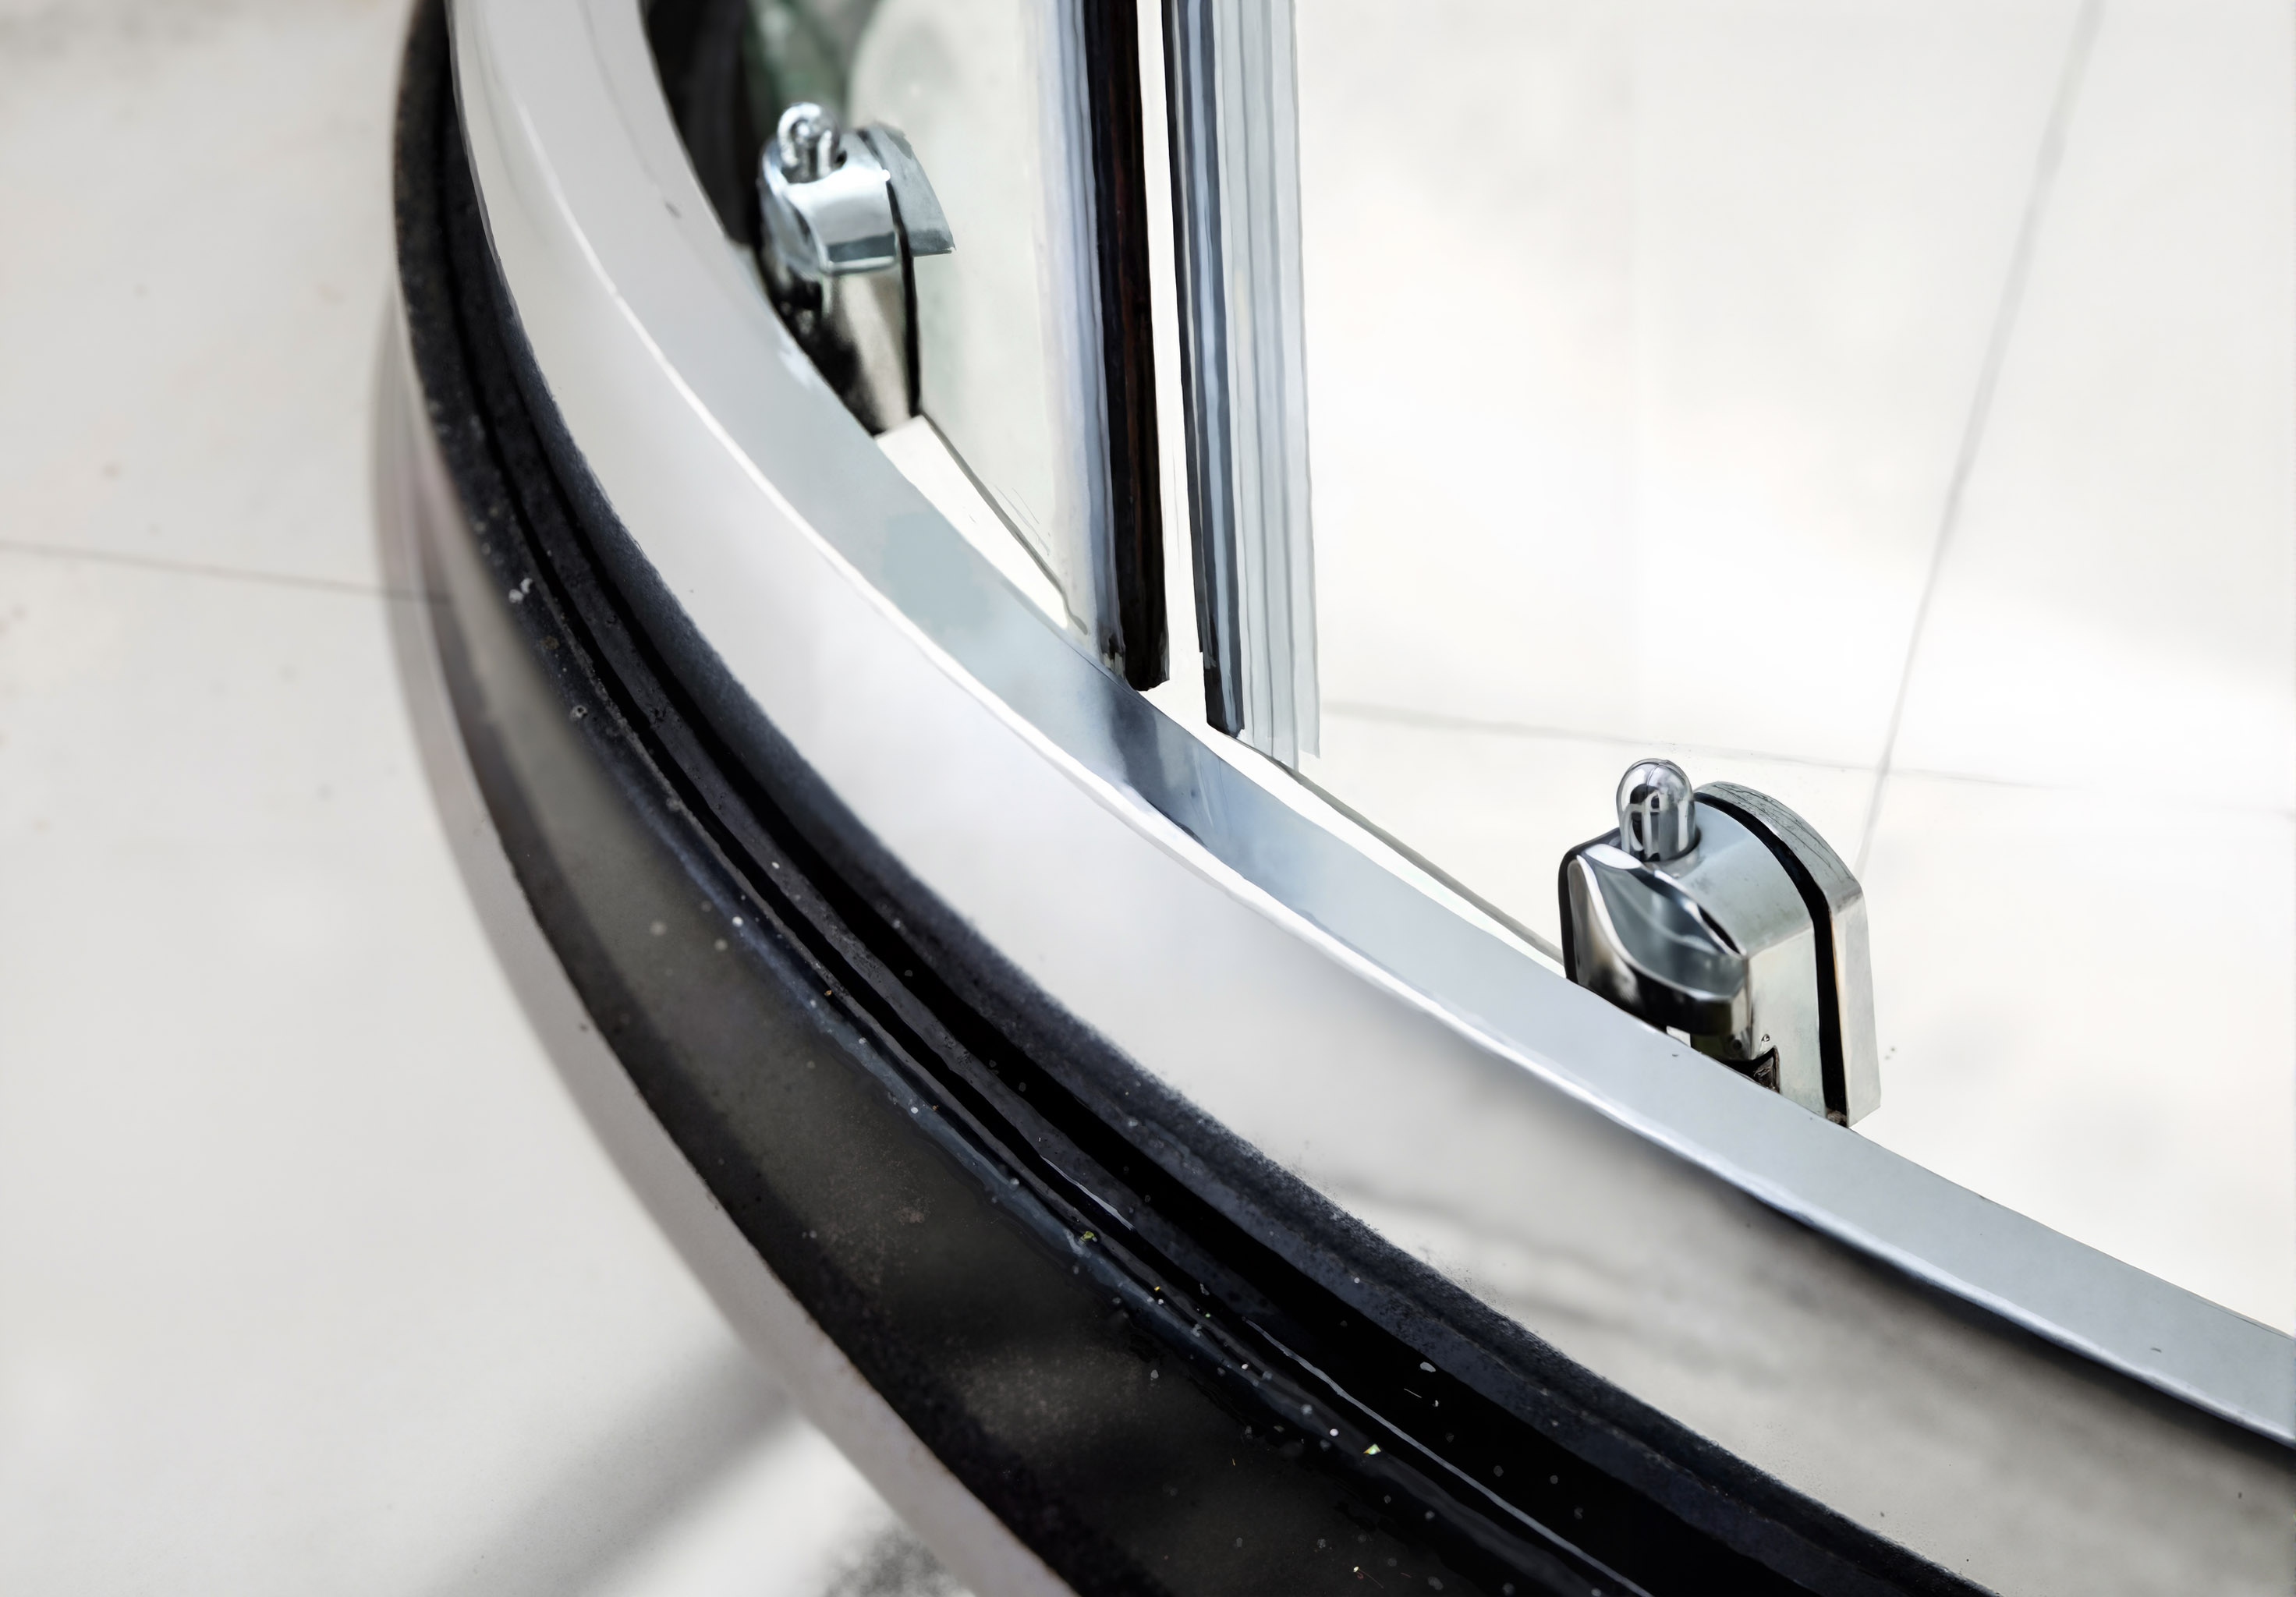
▲ Physical display picture
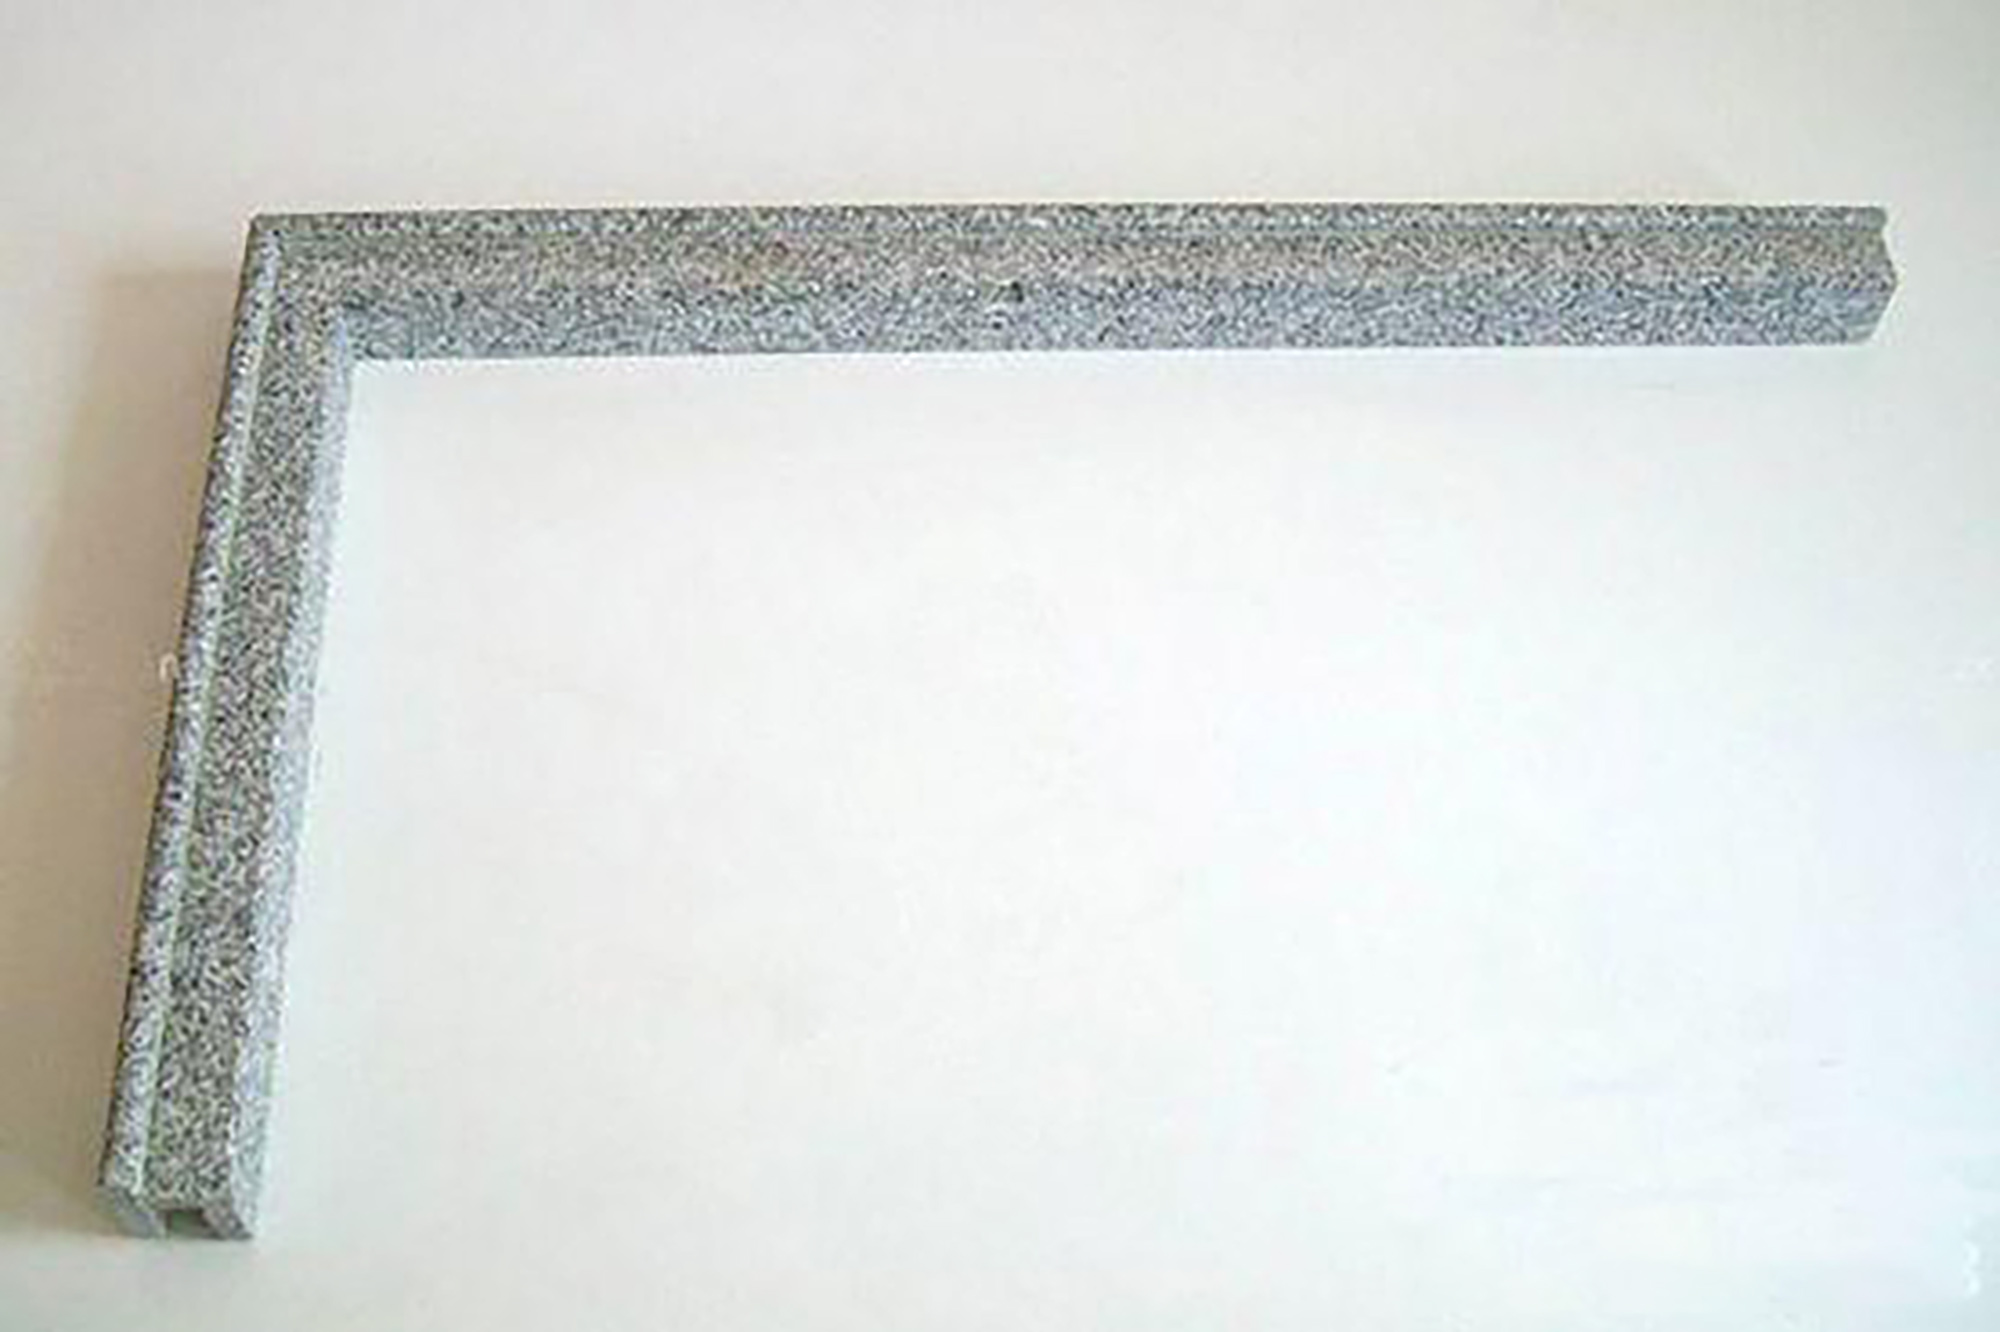
At the same time, the commonly used water barriers in daily life generally come in two forms: one without a skirt and the other with a skirt. Among them, the water barrier with a skirt is mainly used as a foundation under the glass shower room, which can make the connection between the base of the shower room and the ground more aesthetically pleasing. Of course, for homeowners who do not have a shower enclosure, there is no need to choose a water barrier with a skirt. A regular water barrier can be used directly. Because if a shower enclosure is not built, having a skirt is more likely to cause foot bumps.
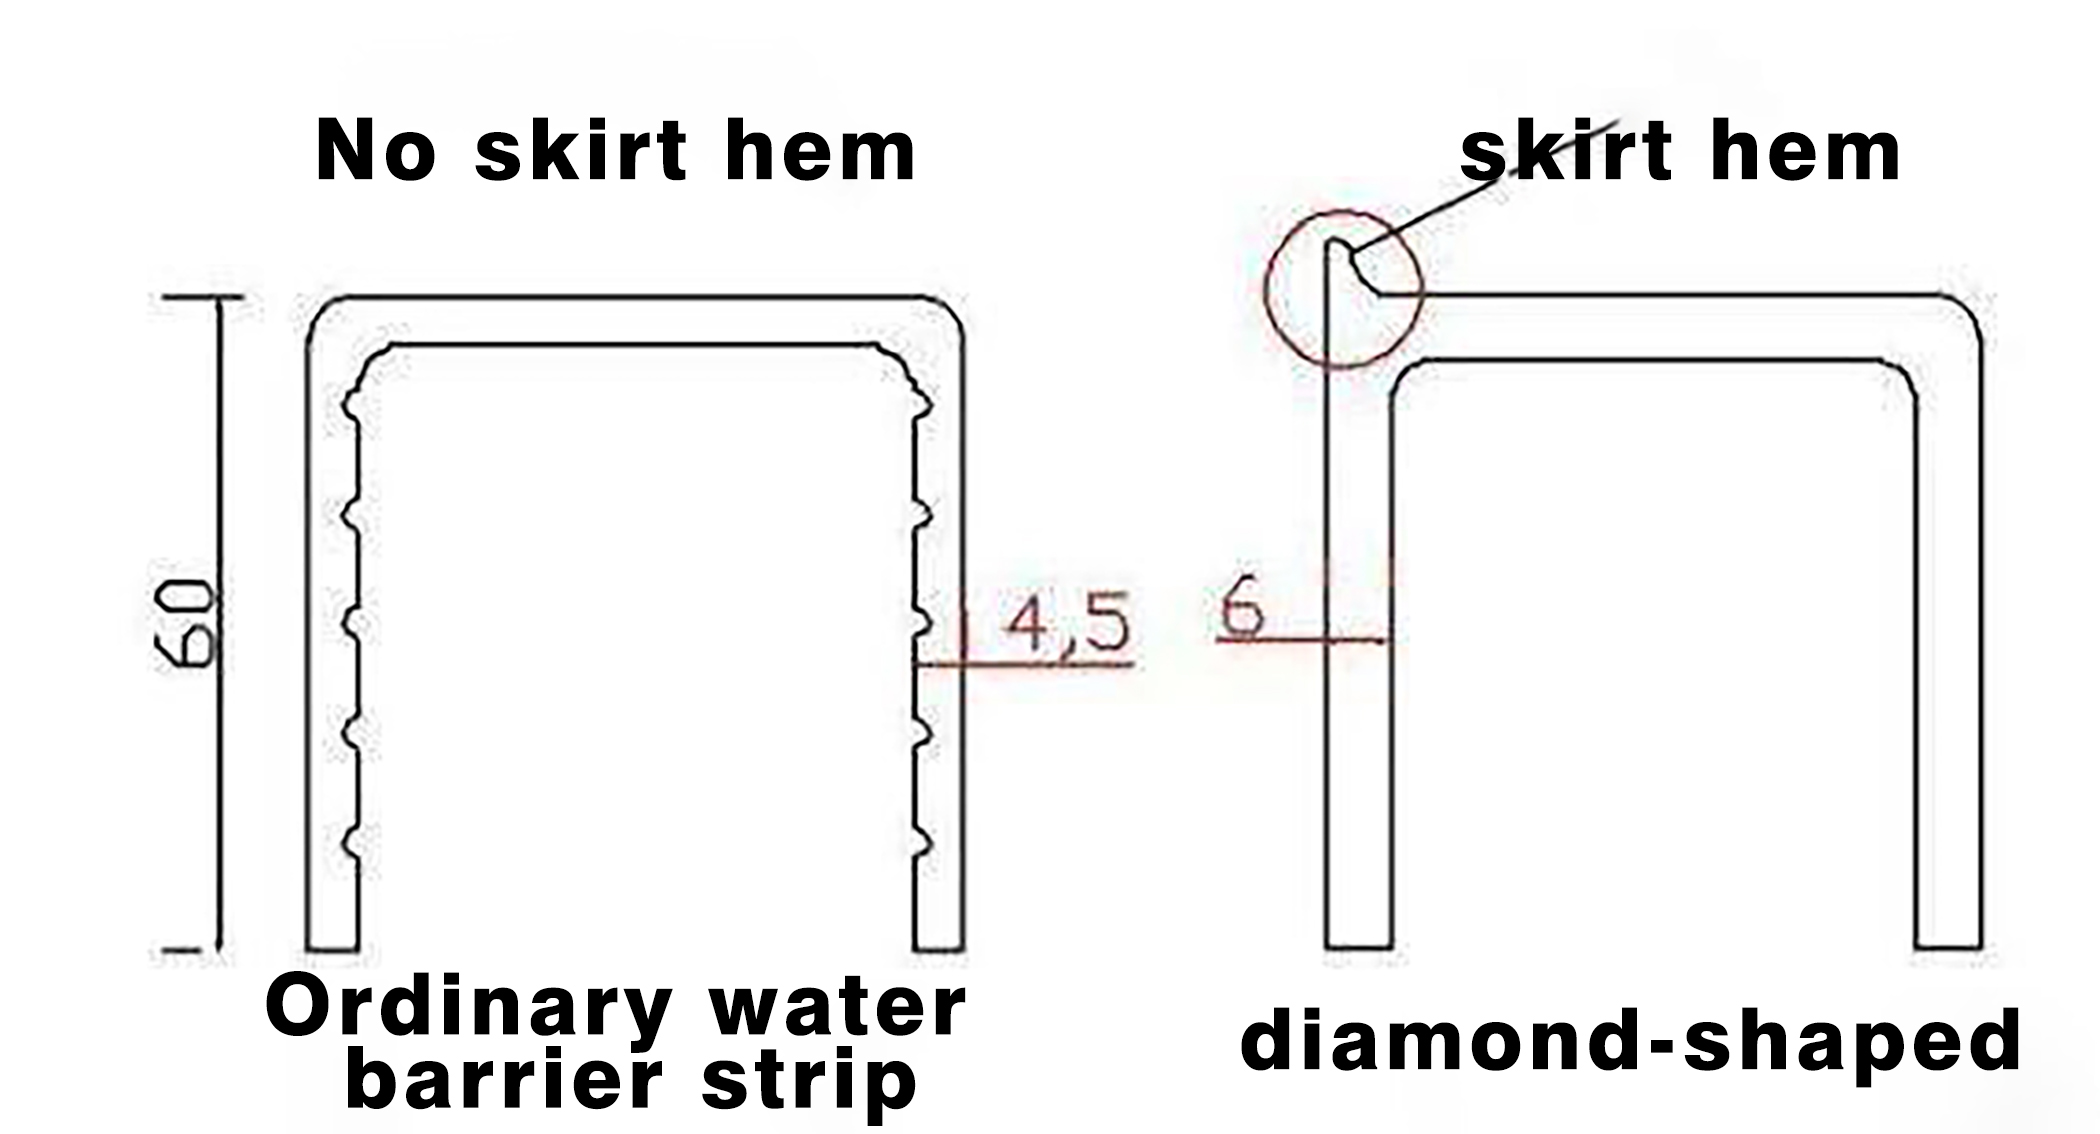
▲ Structural display
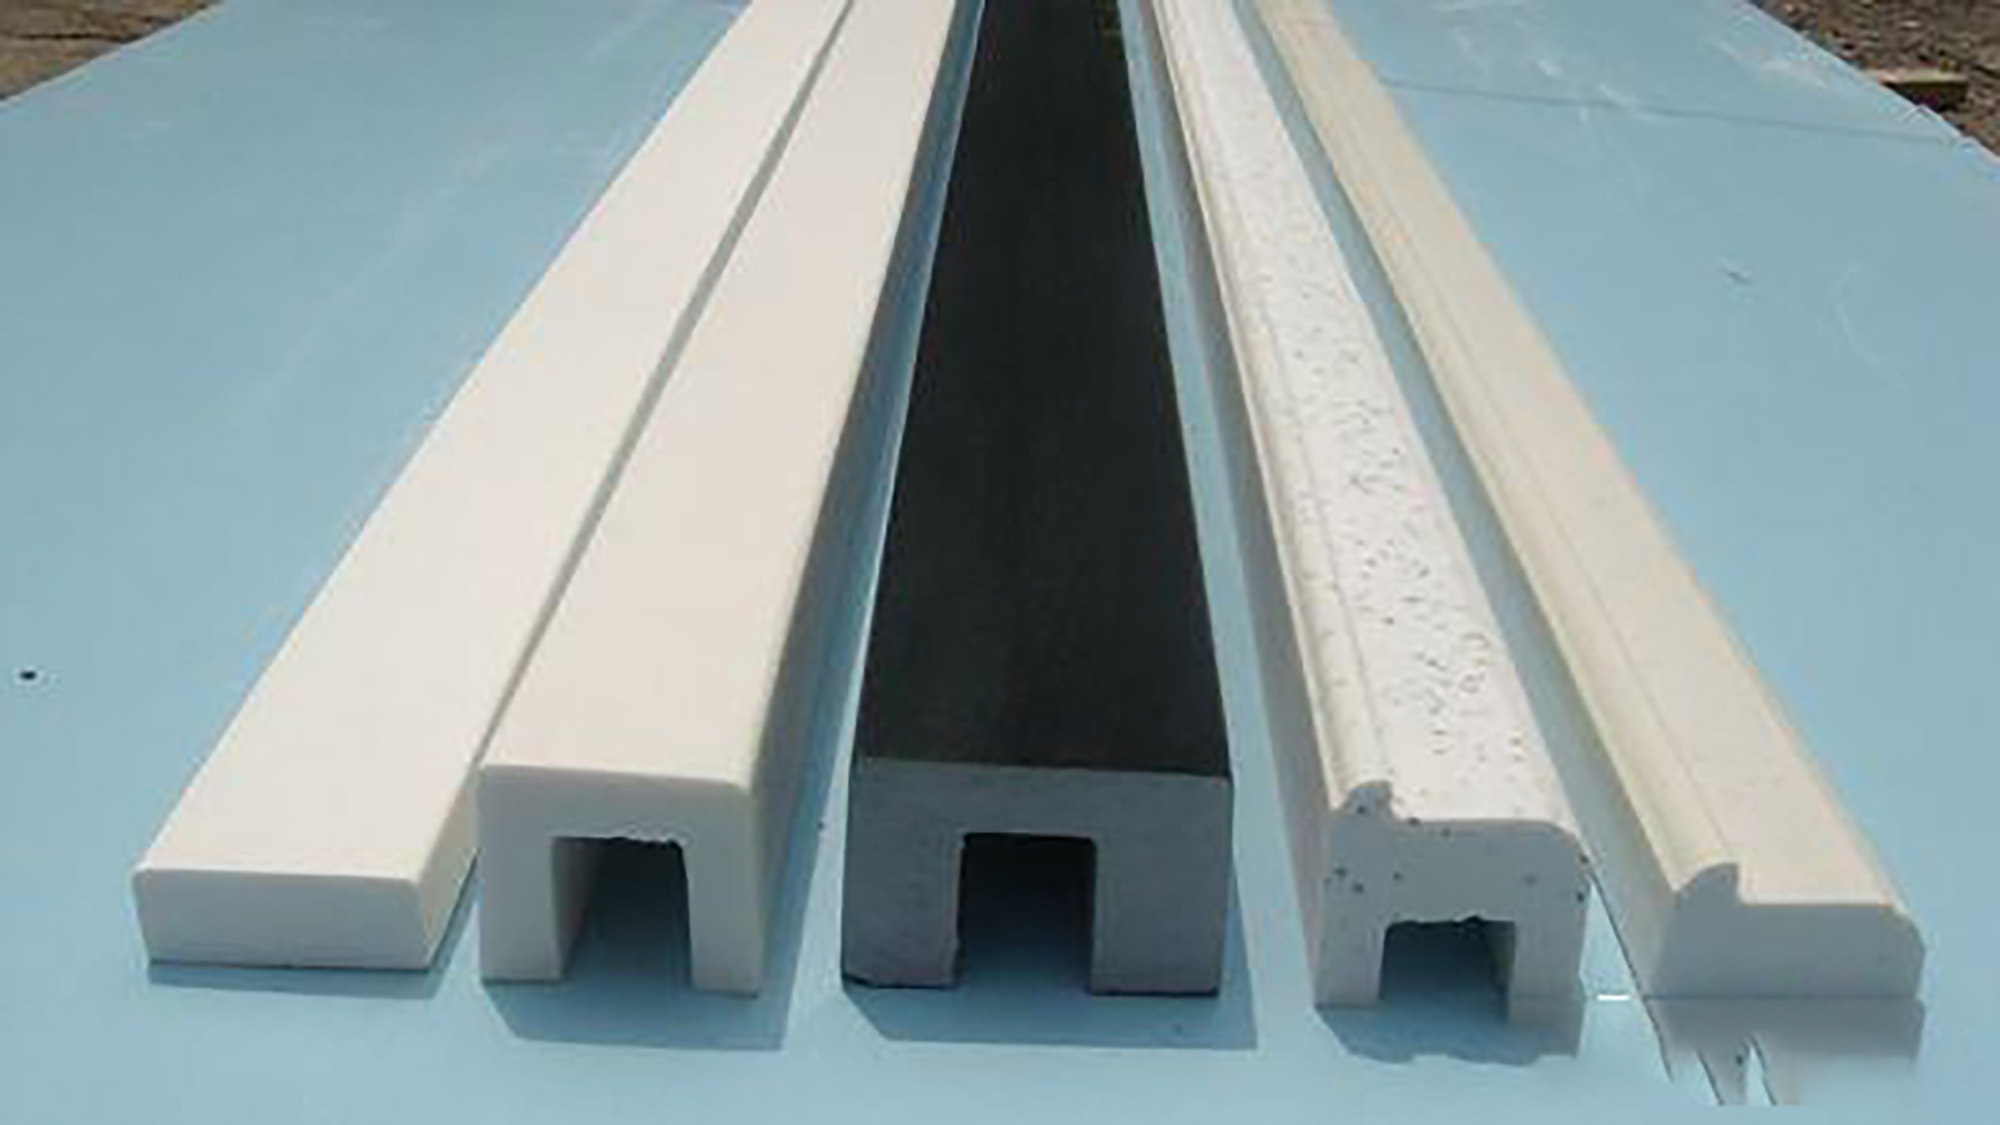
▲ Structural display
▲ Structural display
2.The size of the water barrier strip
The height of the water barrier has certain specifications. Currently, the height of water barriers on the market is generally between 40mm and 50mm, and the thickness is roughly between 30mm and 40mm. The specific size still depends on the size of the shower room. It should be able to completely block the water and control the height well to facilitate the use of the elderly who have difficulty moving around.
Secondly, we should determine the size of the water deflector for the shower enclosure. Generally speaking, it is better to choose a higher size. The width should be determined according to the size of the bathroom. For larger Spaces, it is best to use a thicker one. Of course, it is best to ask a professional for help. By measuring data such as the size of the floor drain, the layout of the bathroom, and the specifications of the showerhead, the most suitable size can be determined.
3. Should the water barrier strip be chosen with a skirt?
When laying floor tiles, embed the water-blocking strips inside the floor tiles. Some sellers boast about how good the water barrier strips with skirts are, but in fact, they are misleading consumers. The skirt is just a few millimeters higher than the outer edge of the water barrier. This kind of water barrier is actually used as a stone base under the shower room with glass. The glass is placed in the middle of the water barrier, and the skirt is to prevent water from seeping into the water barrier from under the glass. The biggest drawback of having a skirt is that if there is no glass pressing down on the water barrier, due to the uneven force on the inside and outside of the water barrier, over time, the glass glue below will loosen and lose its water-blocking effect, which may cause the entire bathroom cabinet to become damp and moldy. So Water Brother still recommends using water barriers without skirts
03. How to install the water barrier strip for a shower enclosure?
1.Whether it is a common water barrier or an upgraded one with a skirt, there are basically four situations during installation, as shown in the following figure:
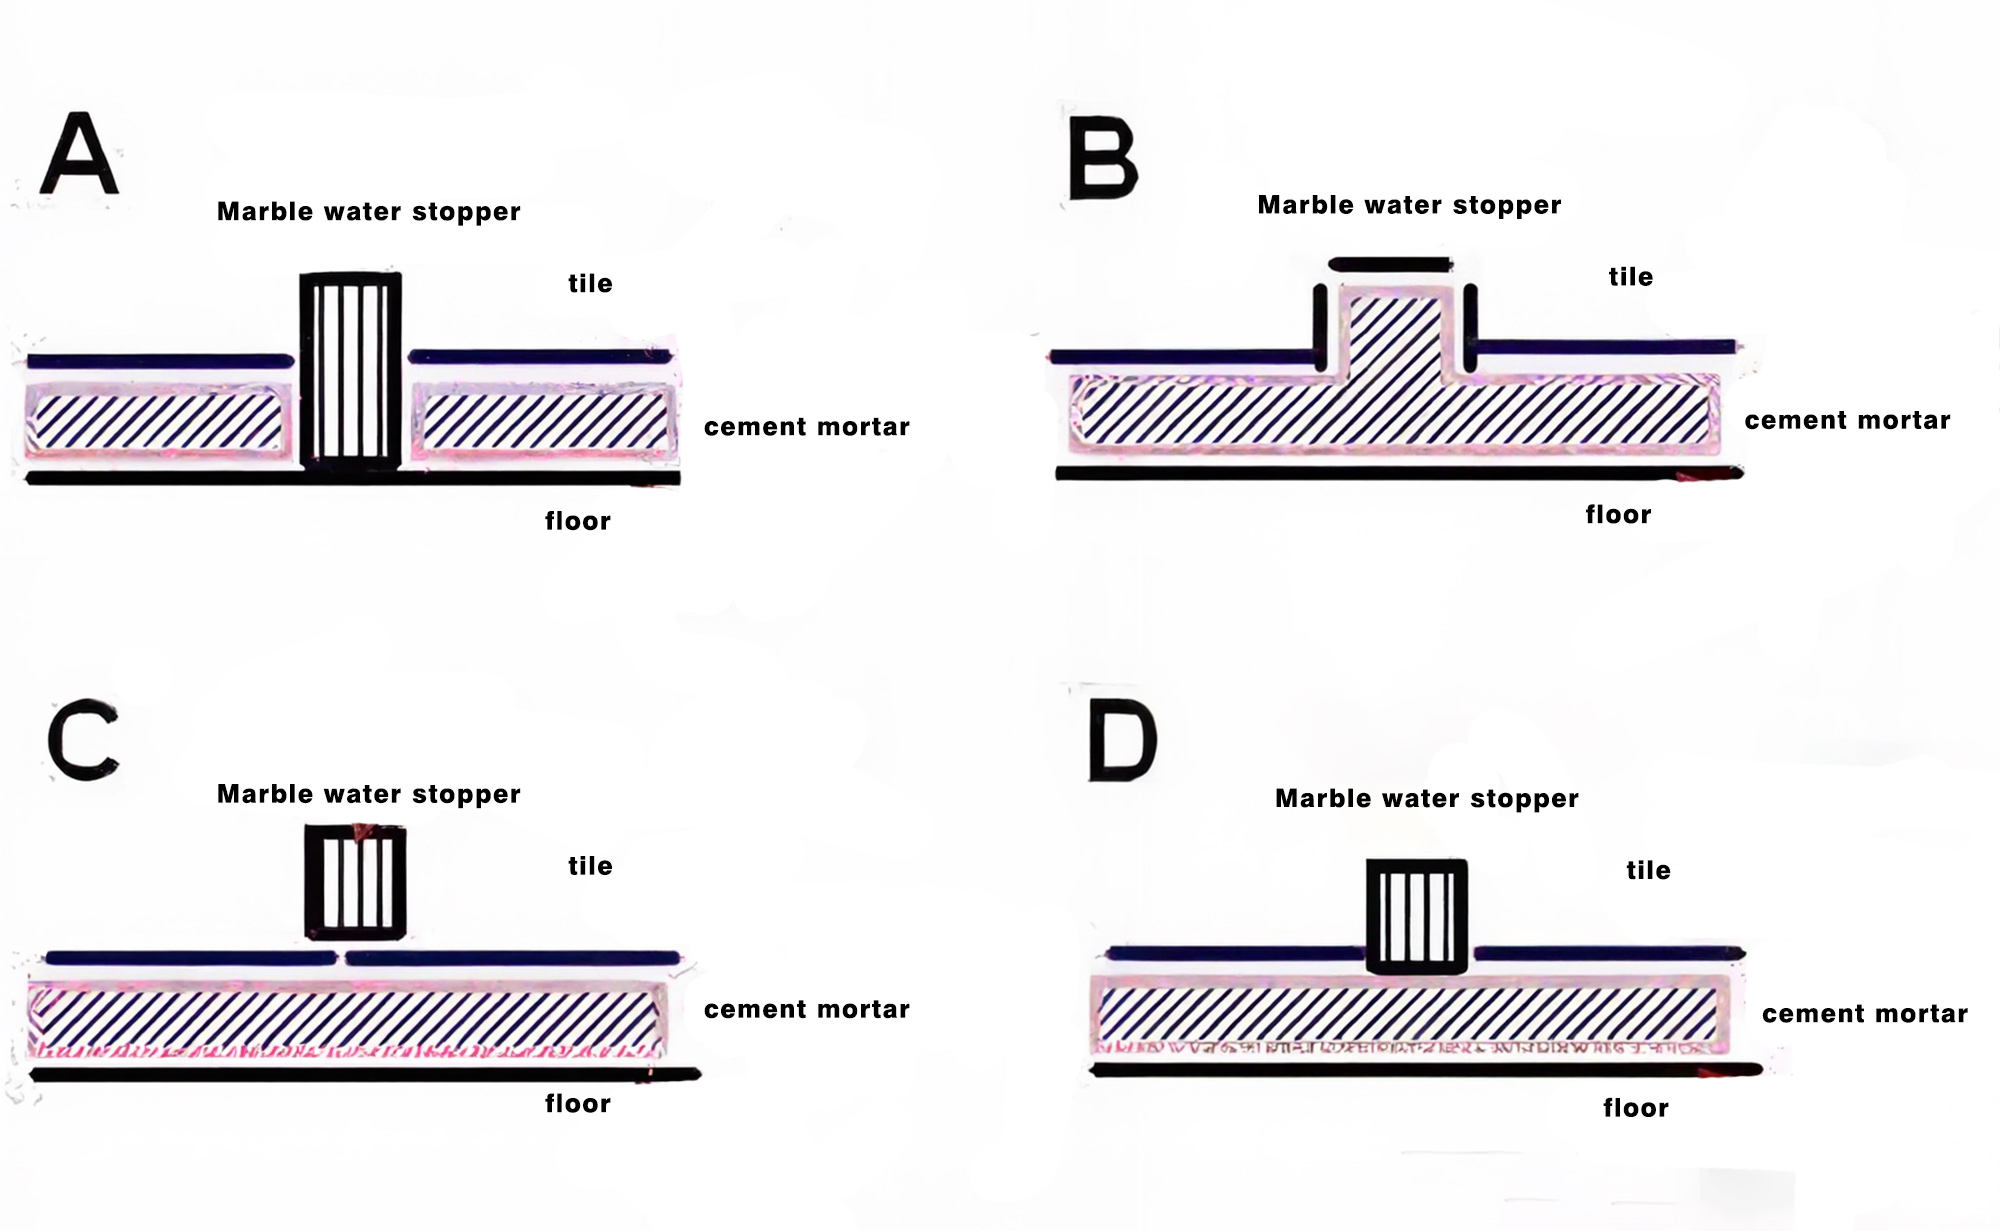
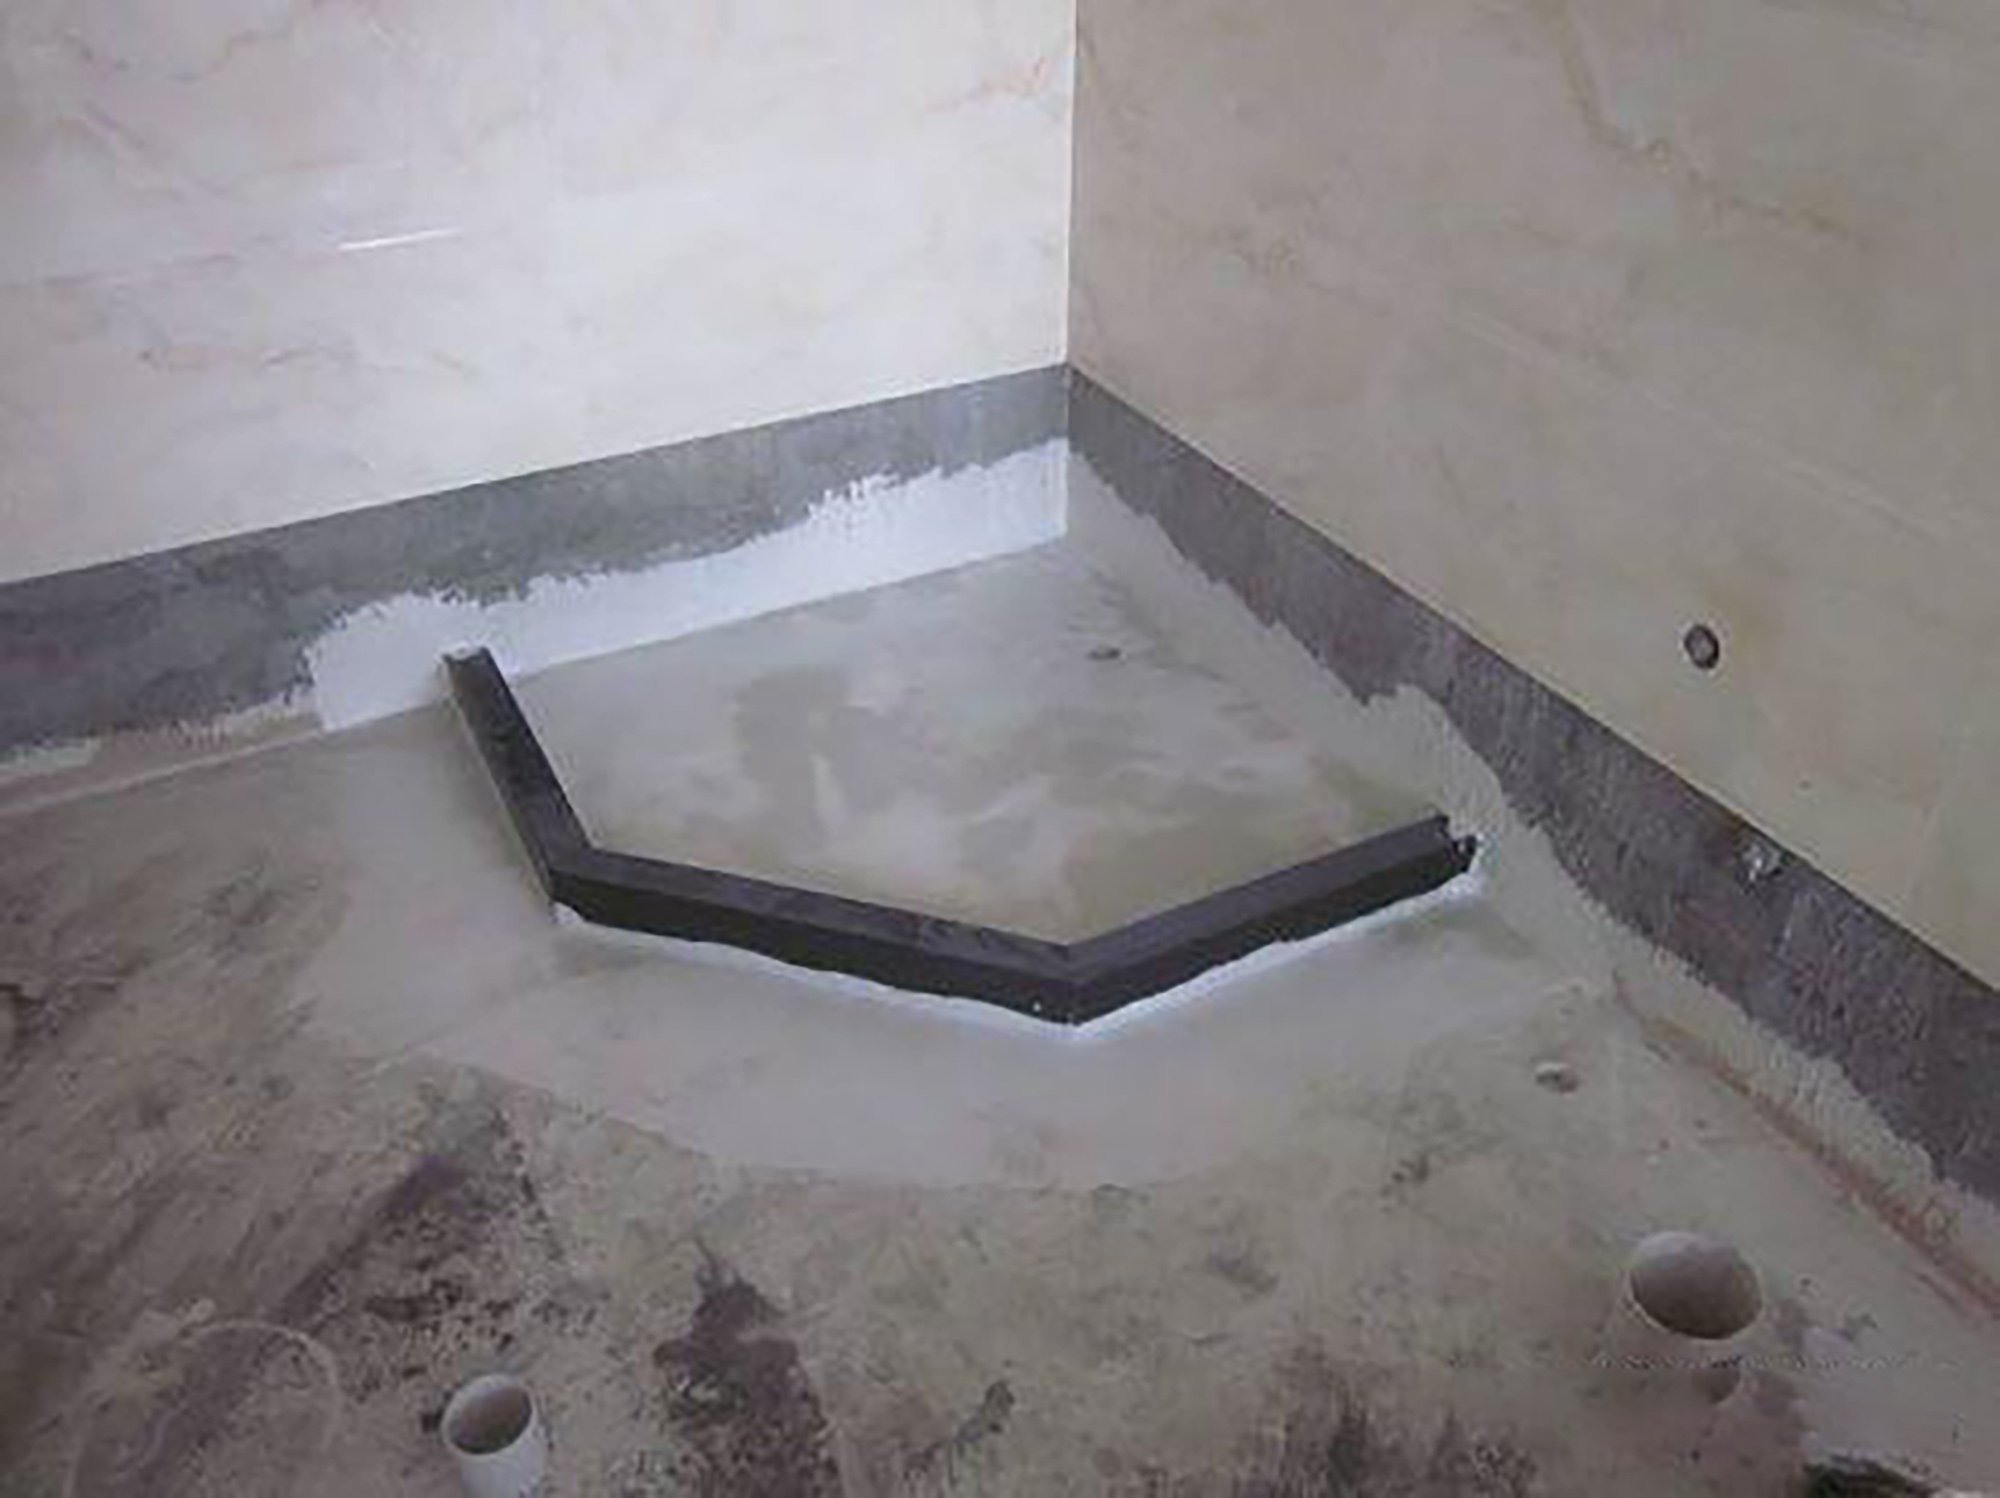
In Plan A, when laying the bathroom floor tiles, a water-blocking strip is installed first, and then the entire floor is tiled. This method has a very good water-blocking effect and leakage is generally unlikely to occur, but it may cause some trouble for the tiling project.
▲ Presentation of Plan A
The water-blocking strip of Plan B is directly connected to the ground. It mainly uses a single piece of marble to decorate the ground or piles up an extra part of cement mortar as a whole. Although it has the best water-blocking effect, it is difficult to be consistent with the overall style, so it is rarely used.
Plan C is the simplest one. First, lay the floor tiles on the flat surface and then install the water-blocking strips at the appropriate positions and directly stick them on the floor tiles. It is convenient and effortless. Most workers are willing to install it this way. The work is simple and the money is easy to earn. However, its drawback is that its service life is relatively short and it is prone to leakage.
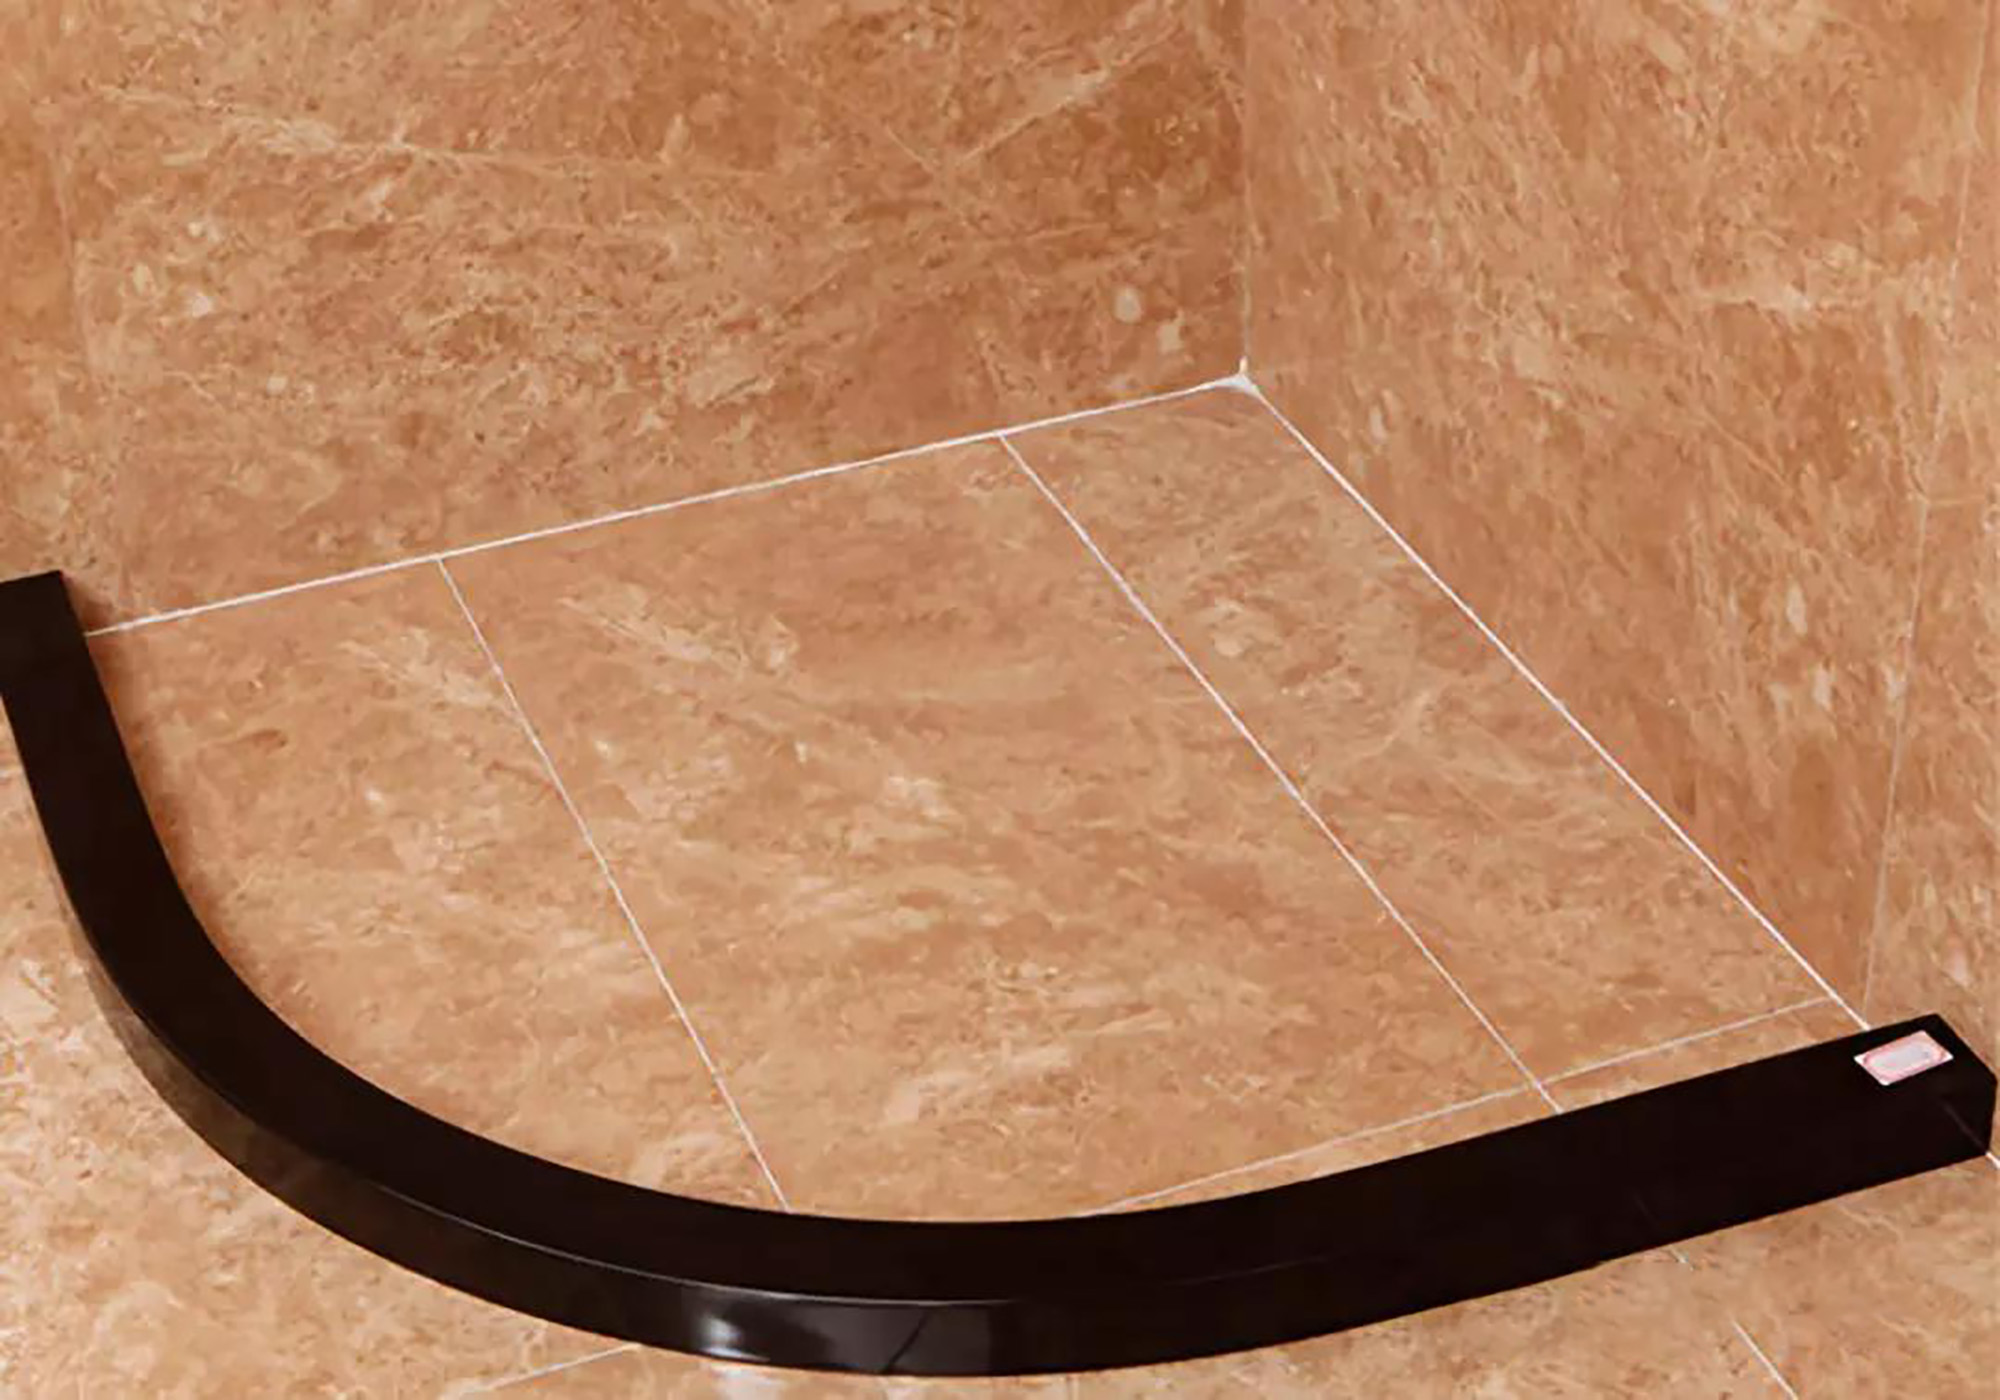
▲ Presentation of Plan C
Plan D is similar to the method of inserting grooves. When laying floor tiles, leave A groove and insert the water-blocking strip in it. If the floor tiles have already been laid, grooves can also be made on the ground to embed them. However, the water-blocking effect is not as good as Plan A, and it is troublesome to make grooves later. Generally, it is not used
2. Comparison of the advantages and disadvantages of the four methods
Both Plan A and Plan B are suitable for implementation during basic decoration. Plan A has high requirements for the hardness of the material of the water barrier strips, and the sealing property at both ends is often overlooked. If installed improperly, it may cause permanent hidden dangers.
This approach of Plan C is like mending the fence after the sheep are lost. Just stick it together with glass glue, but you may need to frequently remove and reapply the glue. It can't get wet for a few days, which is rather troublesome in the later stage.
Plan D is relatively flexible in operation. It can be implemented whether the tiling is completed or not. Plan D is easier to replace than Plan A, but the corner joints must be treated with waterproofing and adhesive; otherwise, all efforts will be in vain.
For the two methods C and D, one is to directly stick the tiles to the floor with glass glue after tiling, and the other is to first make a shallow groove on the tiles and then insert the water-blocking strip. Although the methods seem different, their effects are basically the same, that is, neither can completely prevent the water from the shower area from seeping into the sanitary area. Over time, the glass glue is prone to water immersion, aging, oxidation and peeling. At this point, the water barrier strip will no longer play a significant role.
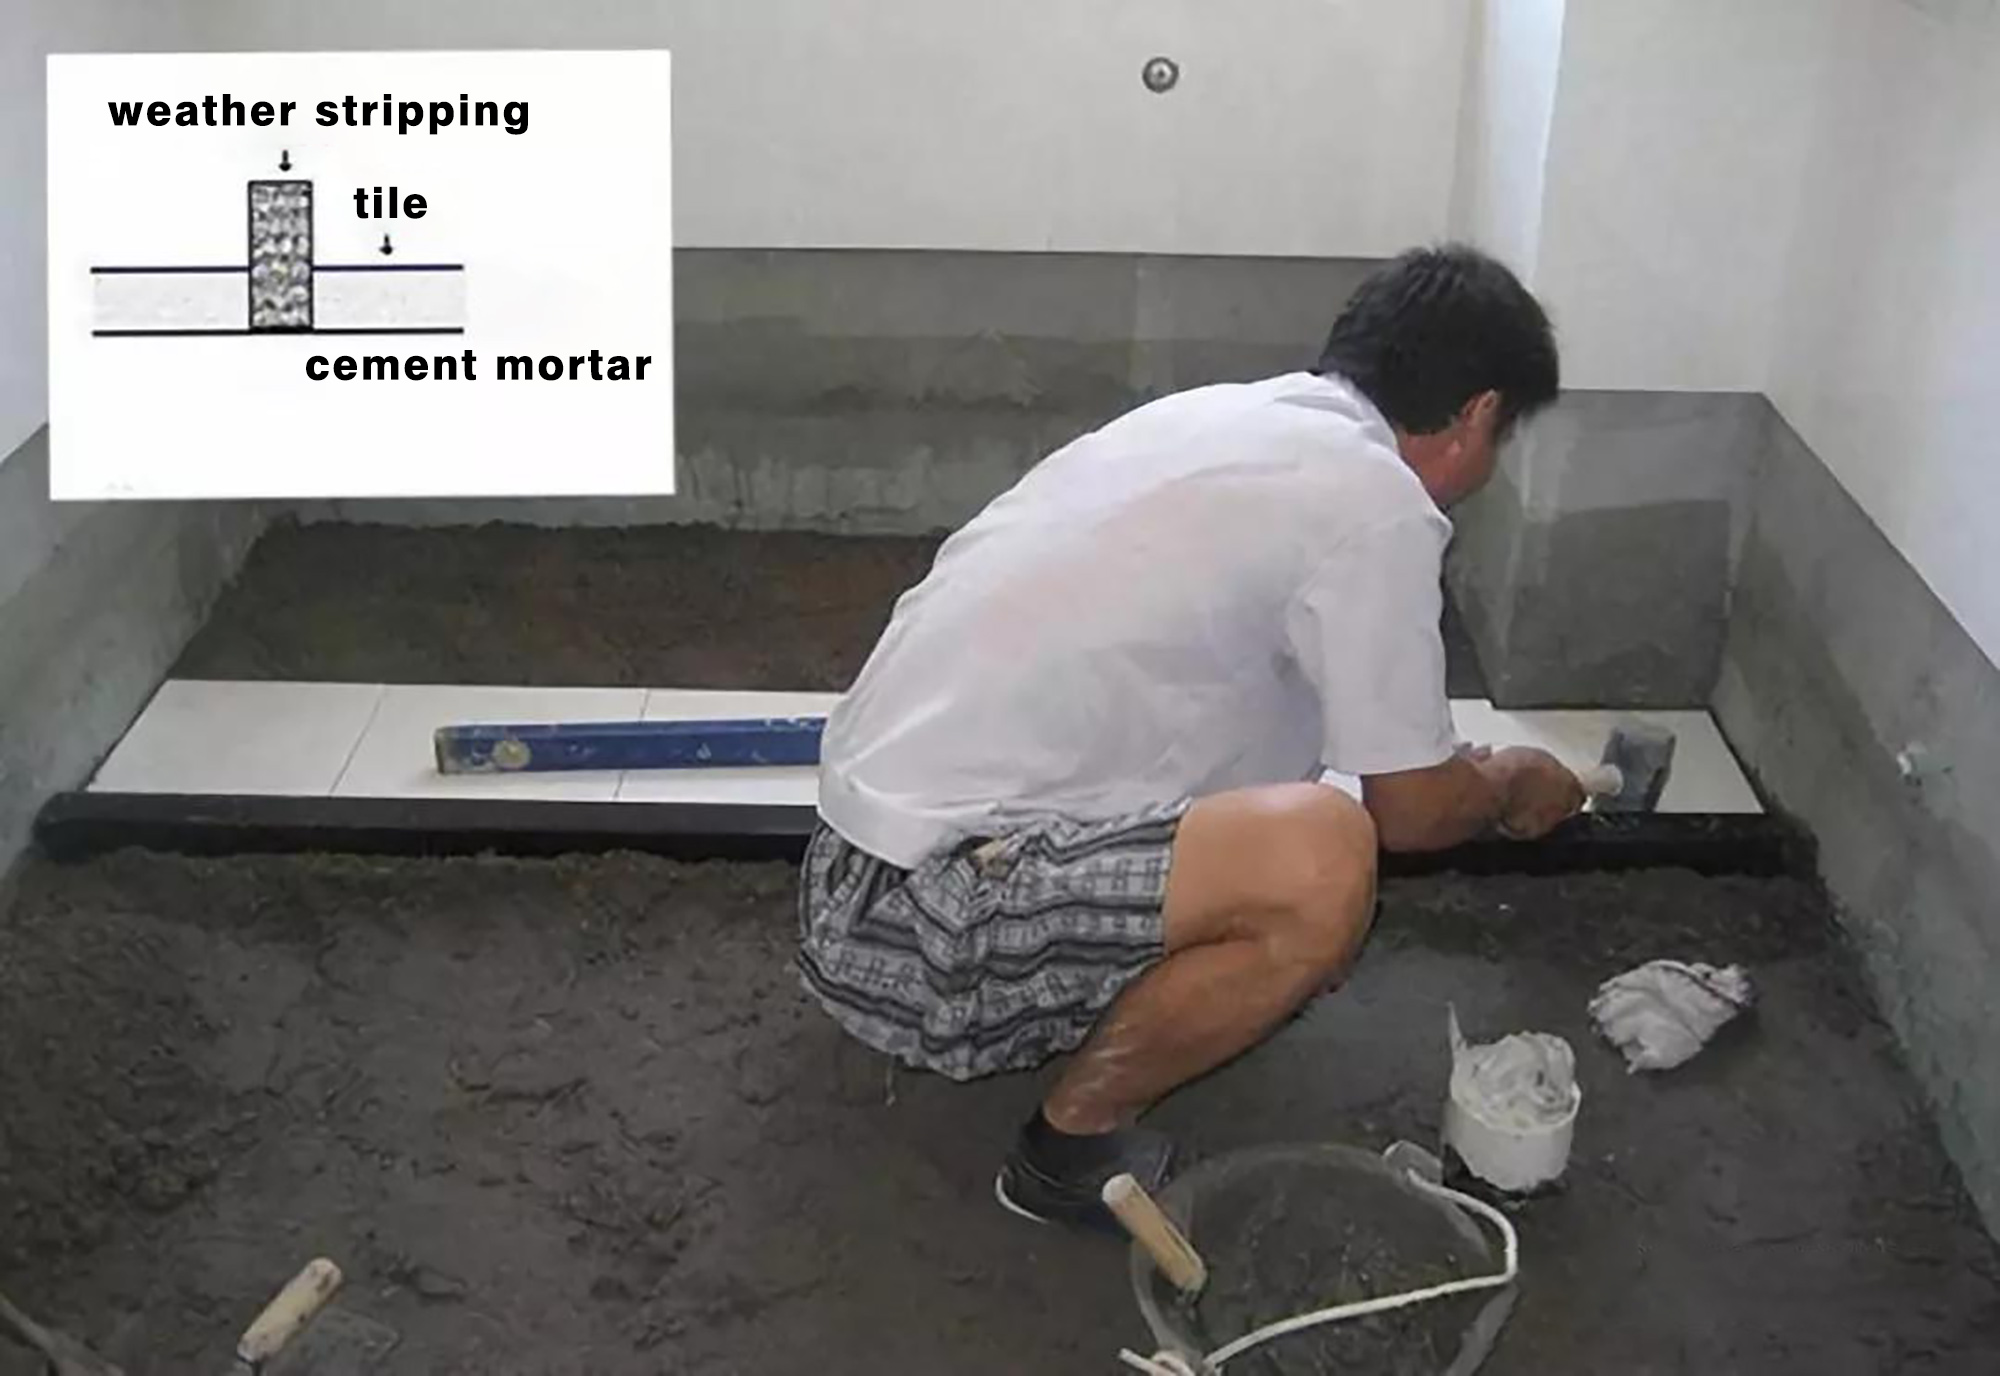
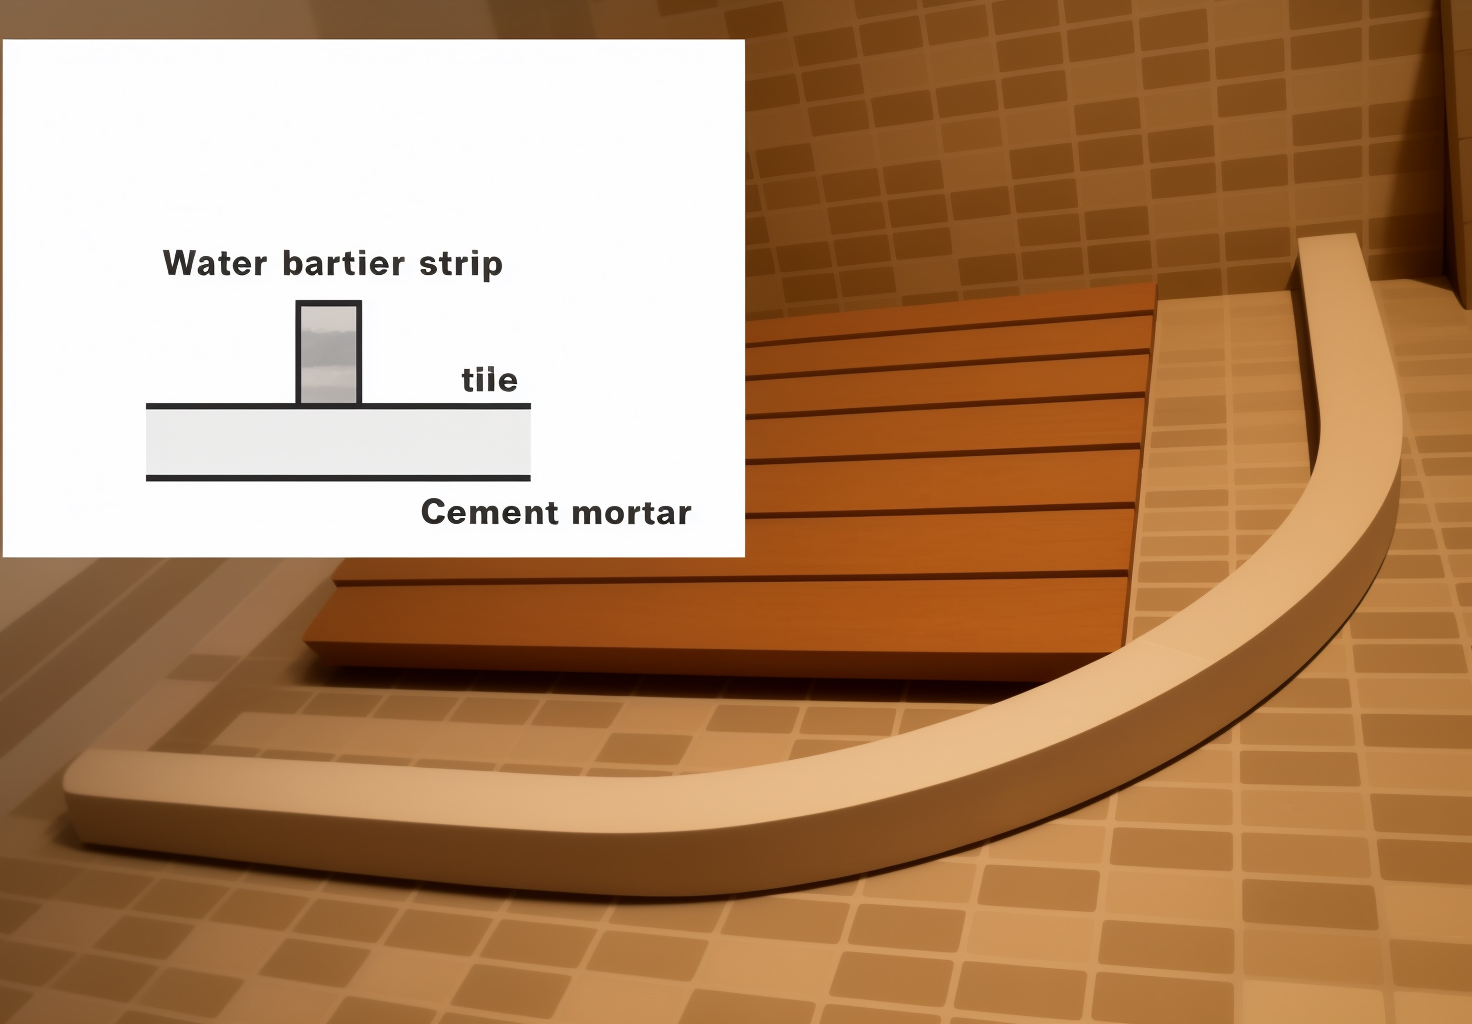
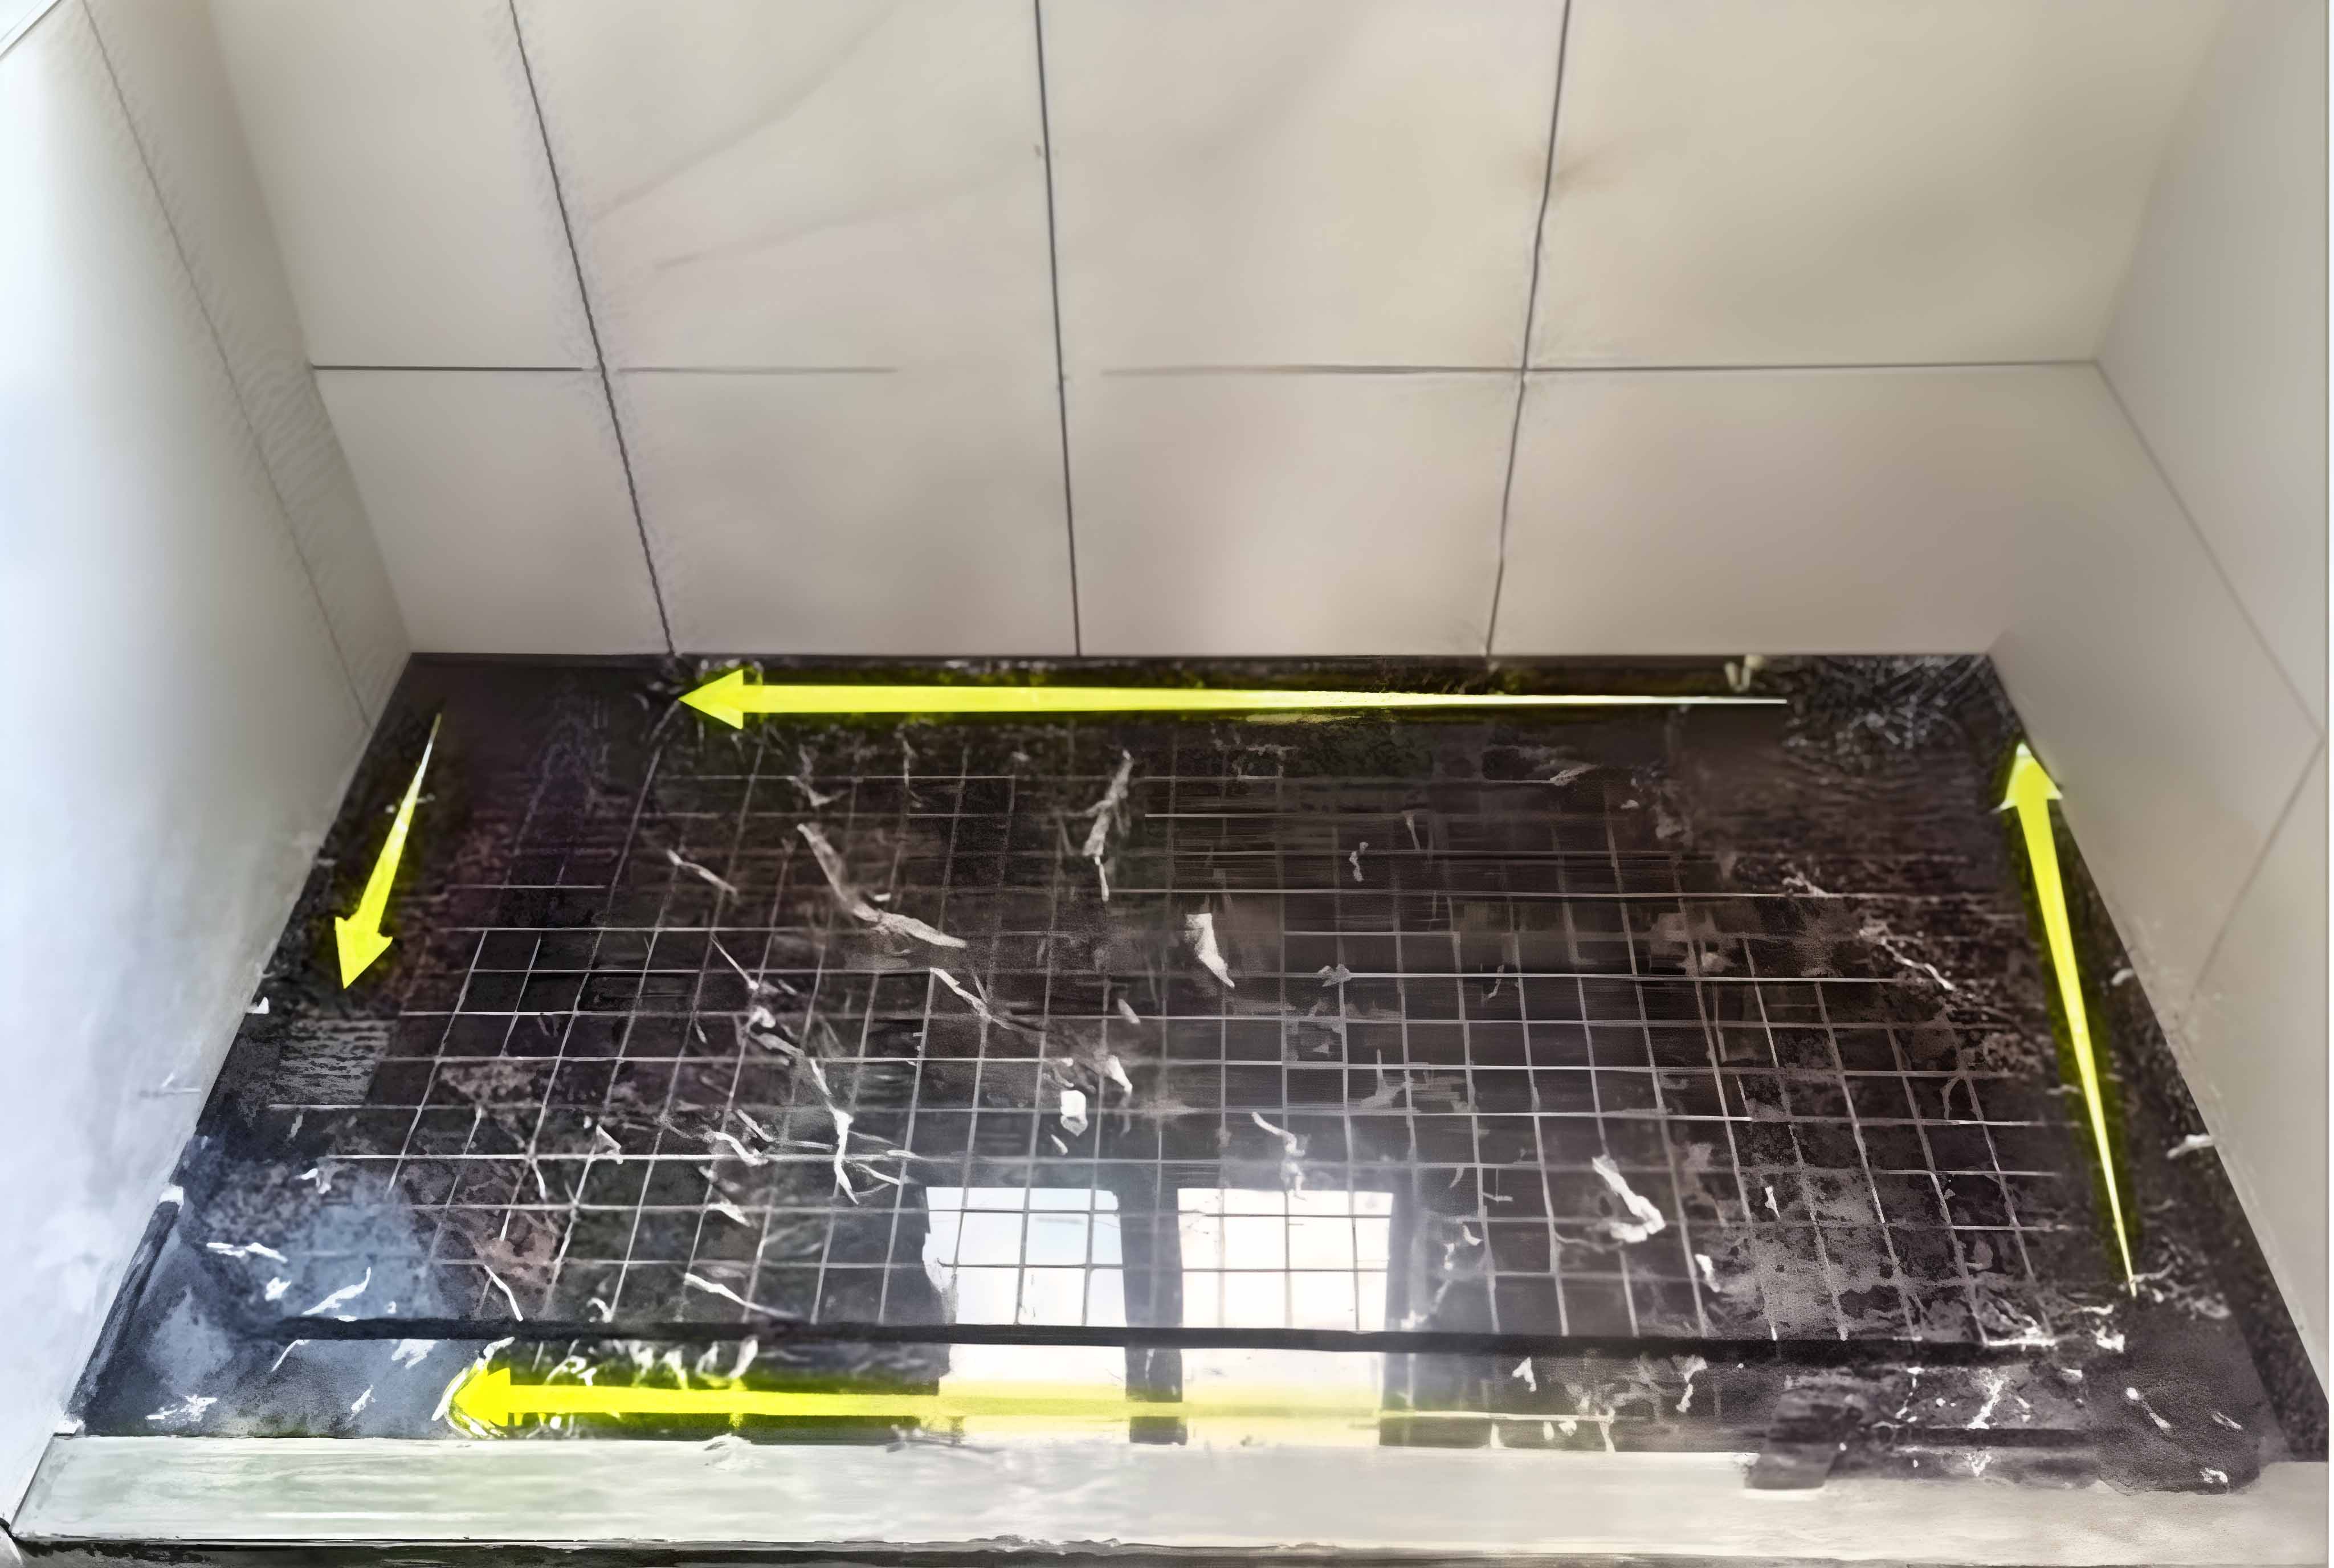
2. The most commonly used and effective operation steps of Plan A:
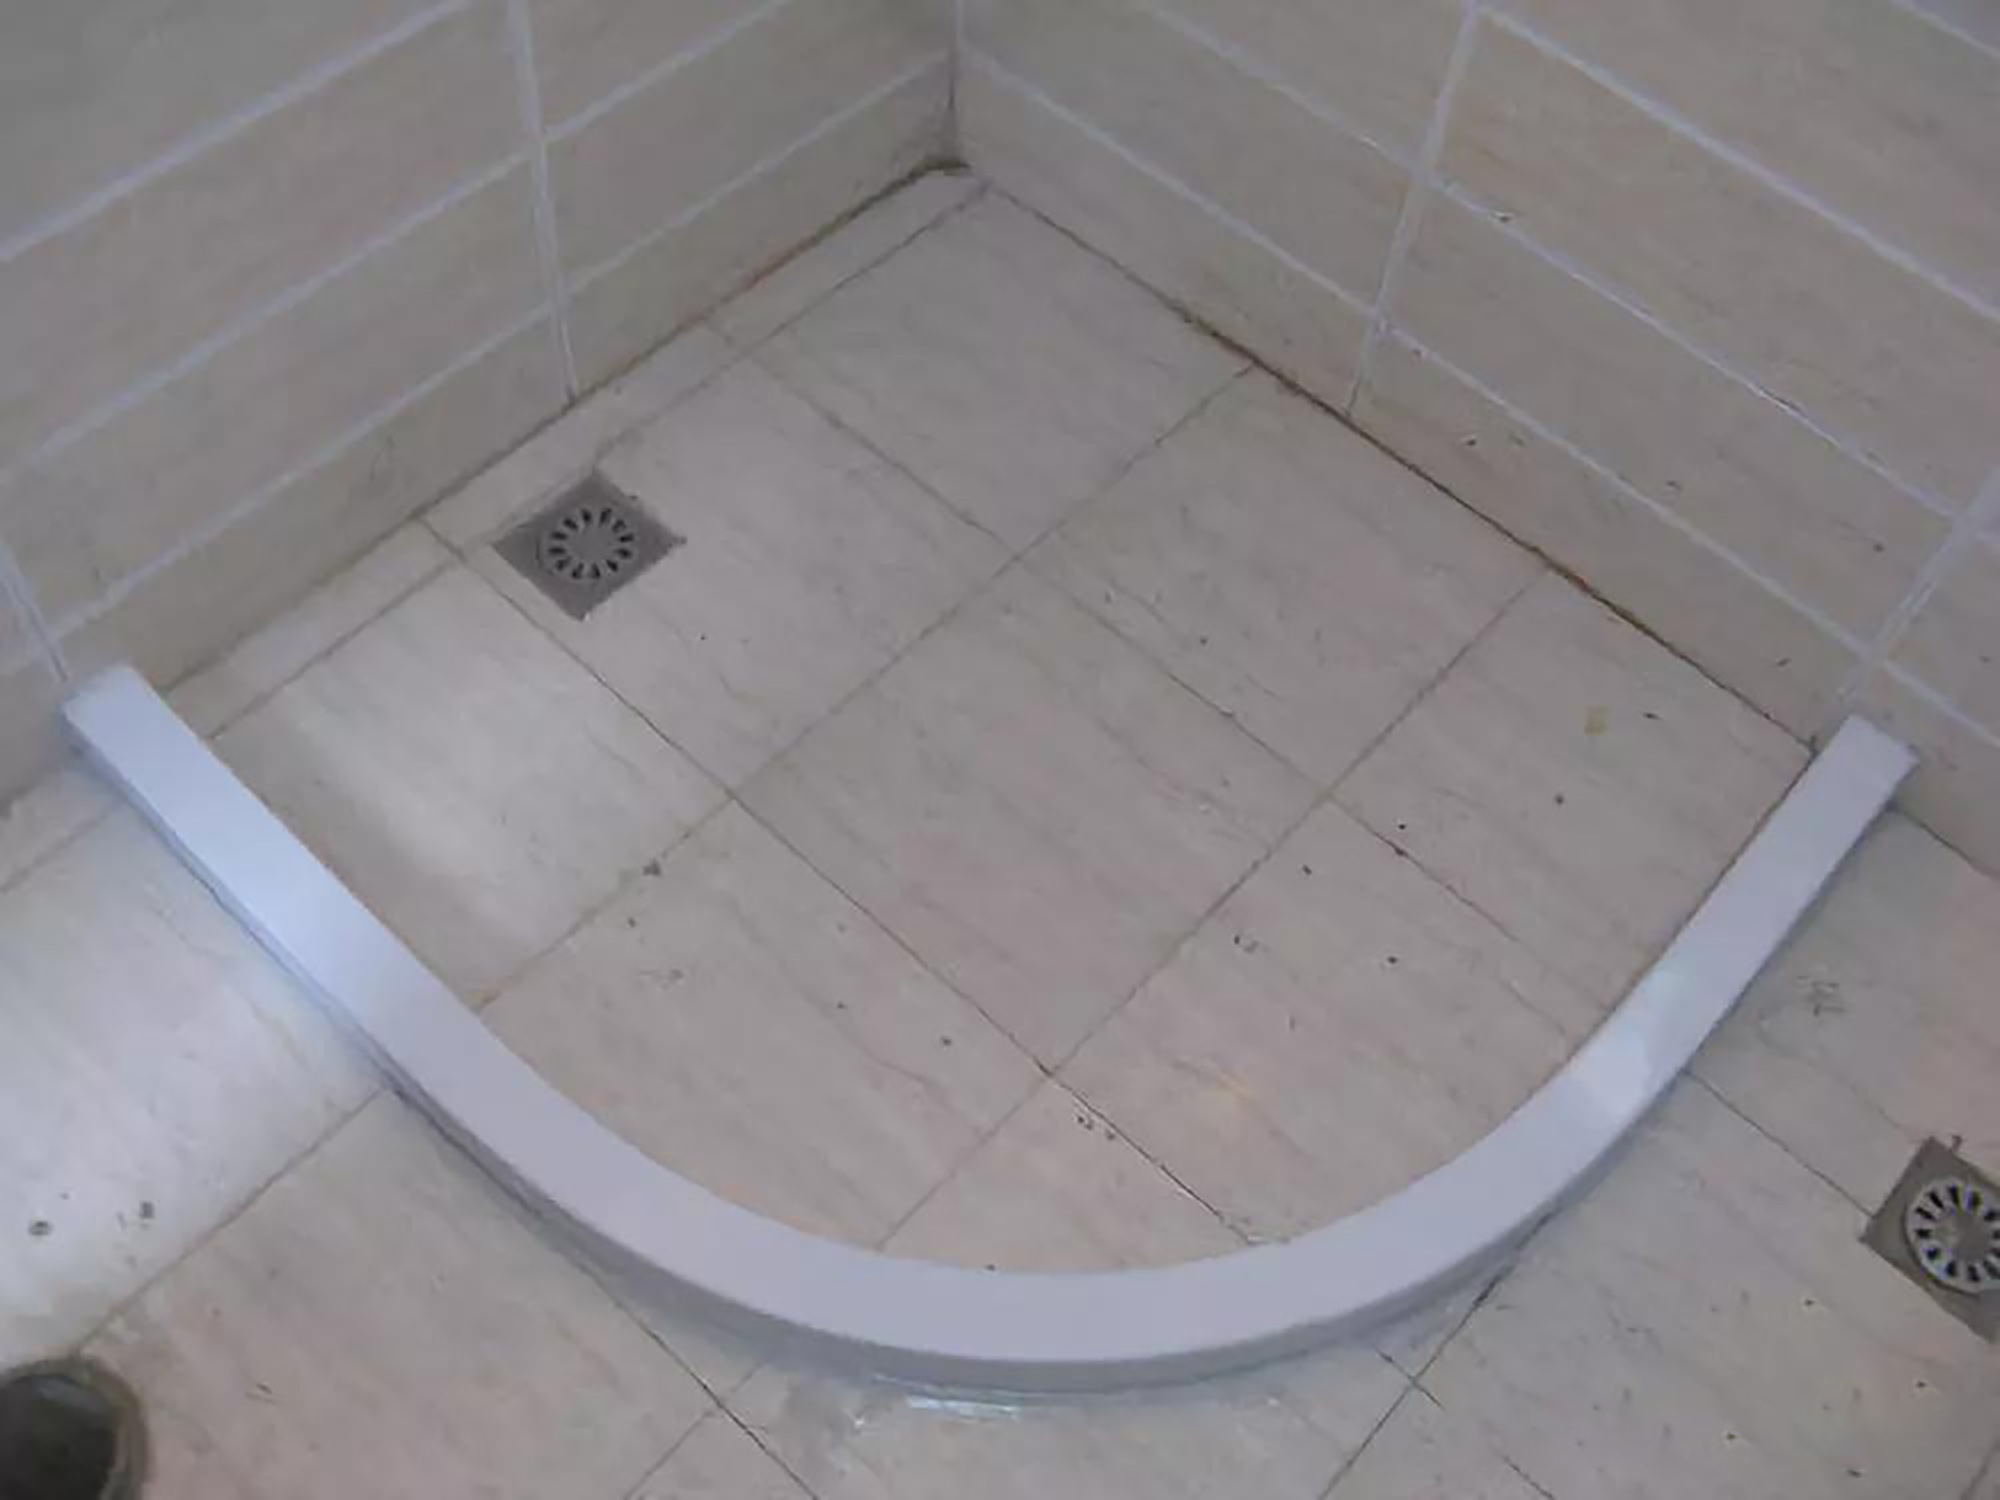
With the continuous improvement of construction technology, many experienced people are advised to install the water barrier strips in this way: after completing the waterproofing during construction, do not rush to lay the tiles. Instead, first fix the water barrier strips tightly against the waterproof ground, as shown in the following picture. If you make a mistake without experience, water will seep in soon. It is necessary to know this in advance.
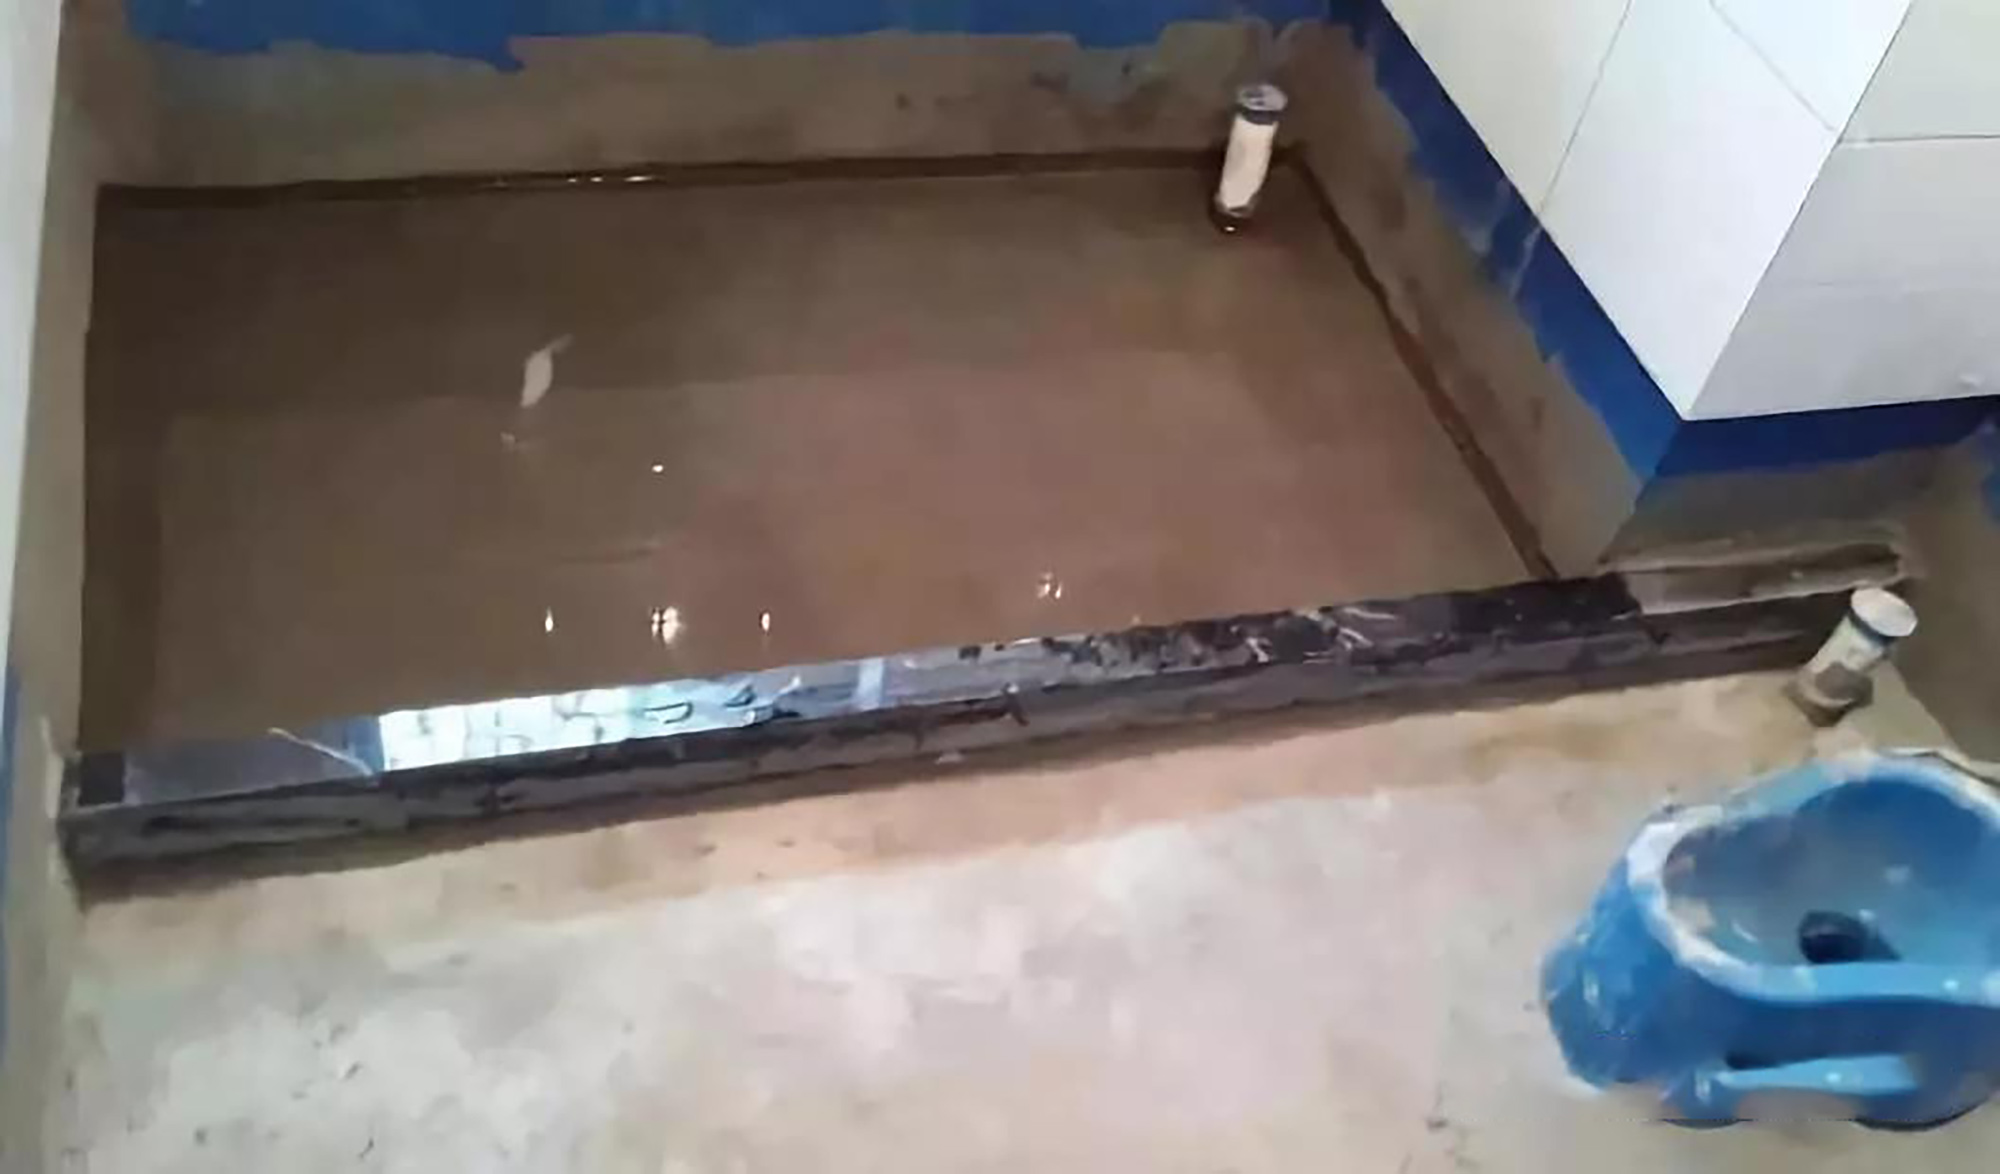
It is recommended to install the water barrier in this way because when tiling, the water barrier is directly embedded in the middle of the tiles. Coupled with the sealing of double-layer glass glue, a completely closed state is formed. Moreover, the water barrier has already come into contact with the ground waterproof layer. Even if it has been over time and the glass glue has oxidized and fallen off, the dirty water on the shower area floor will not flow to the sanitary area, and the effect is very good.
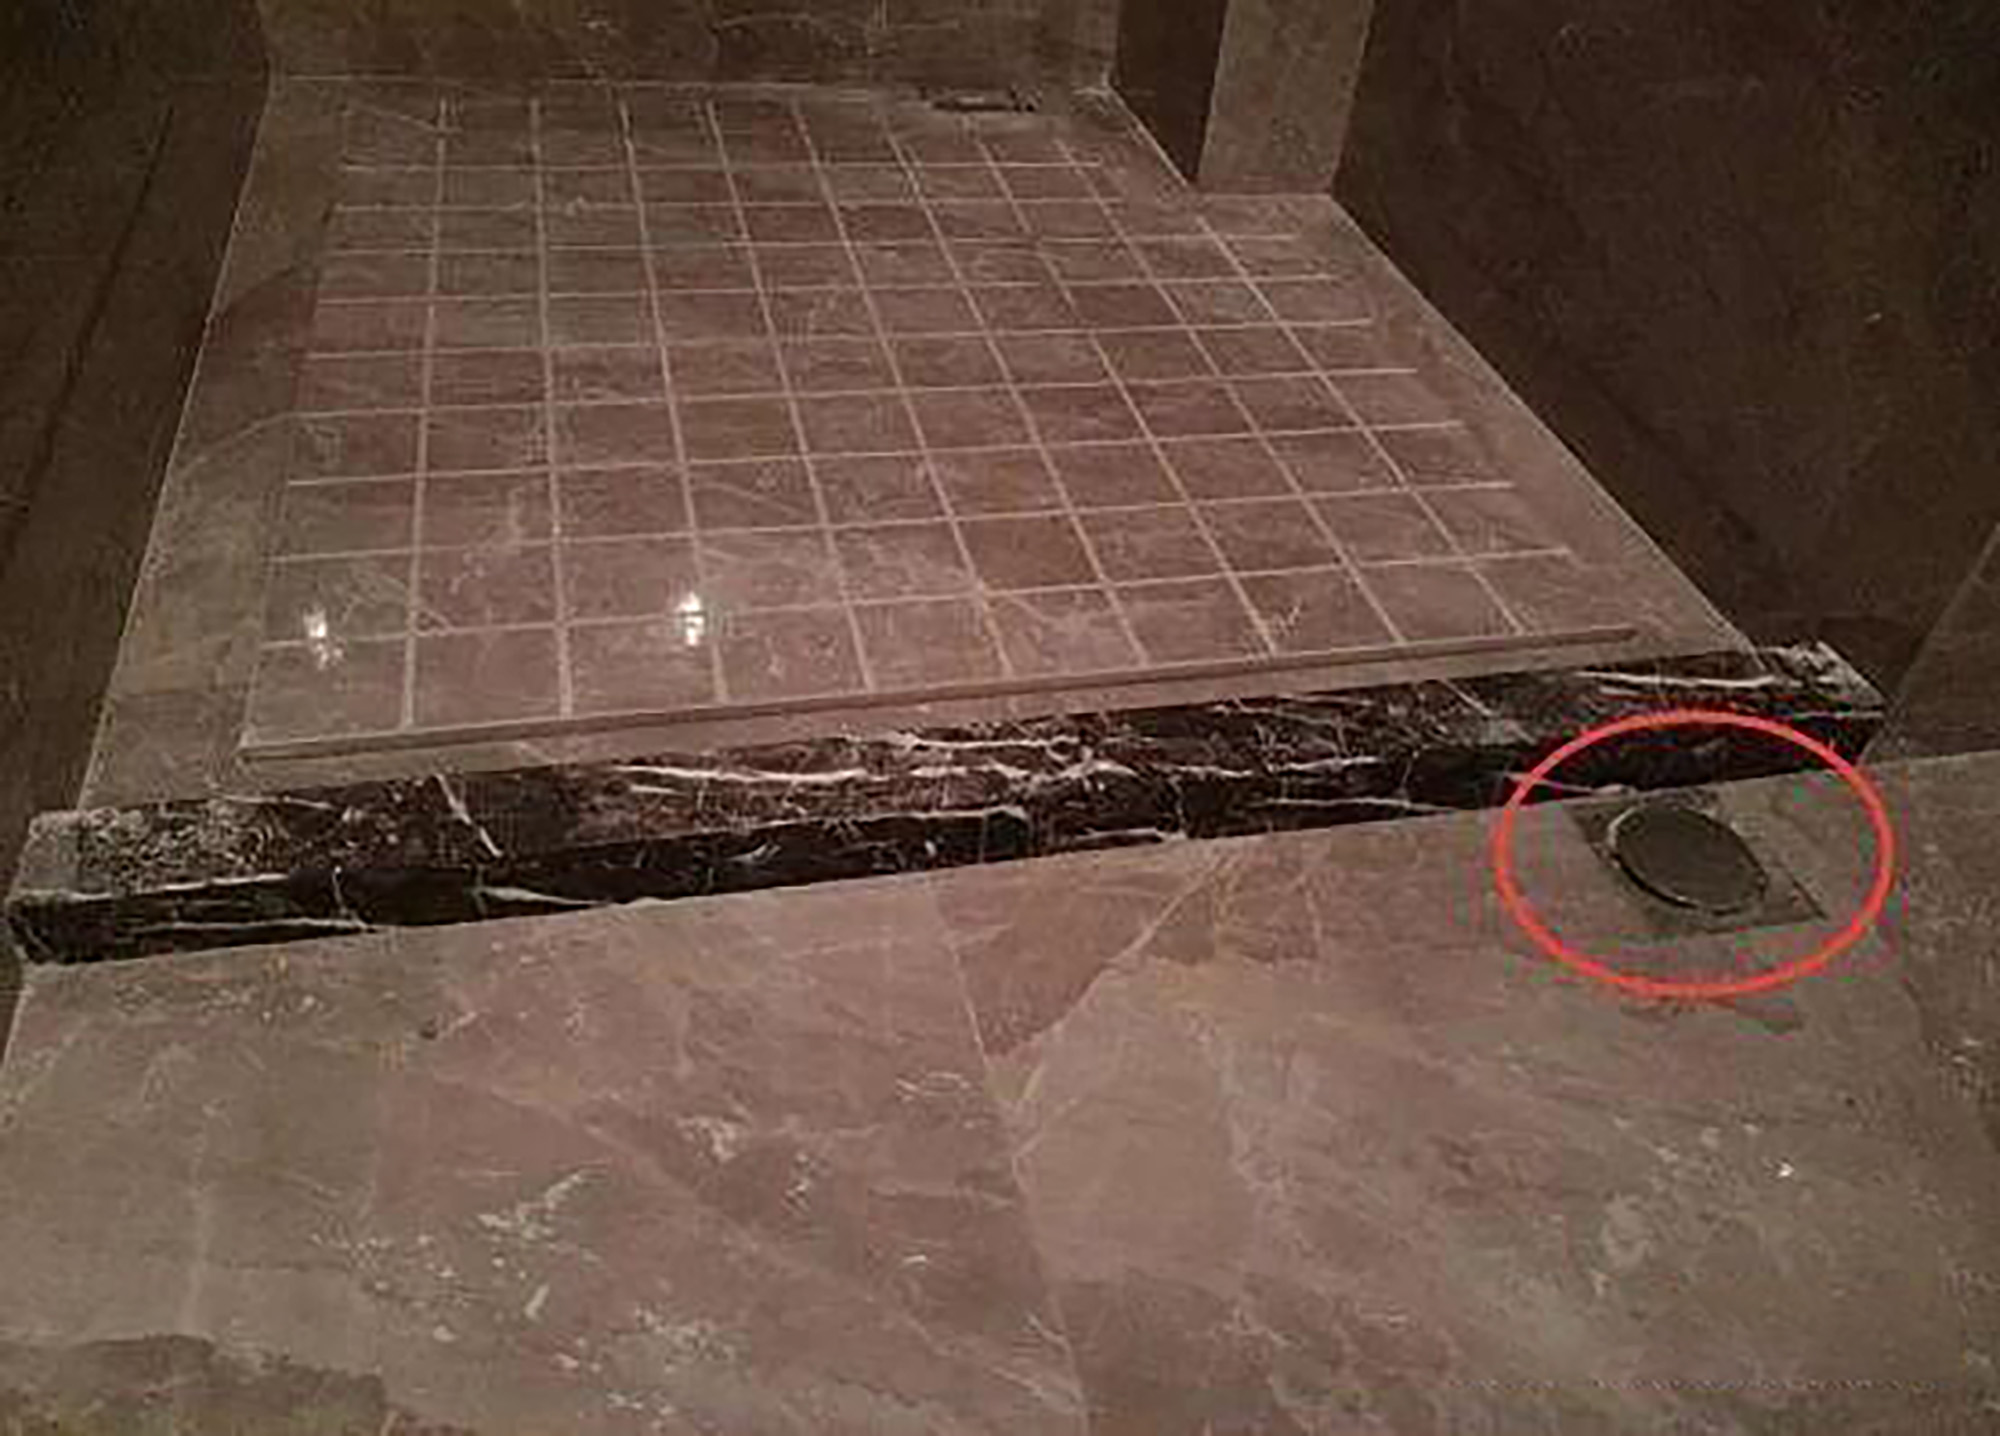
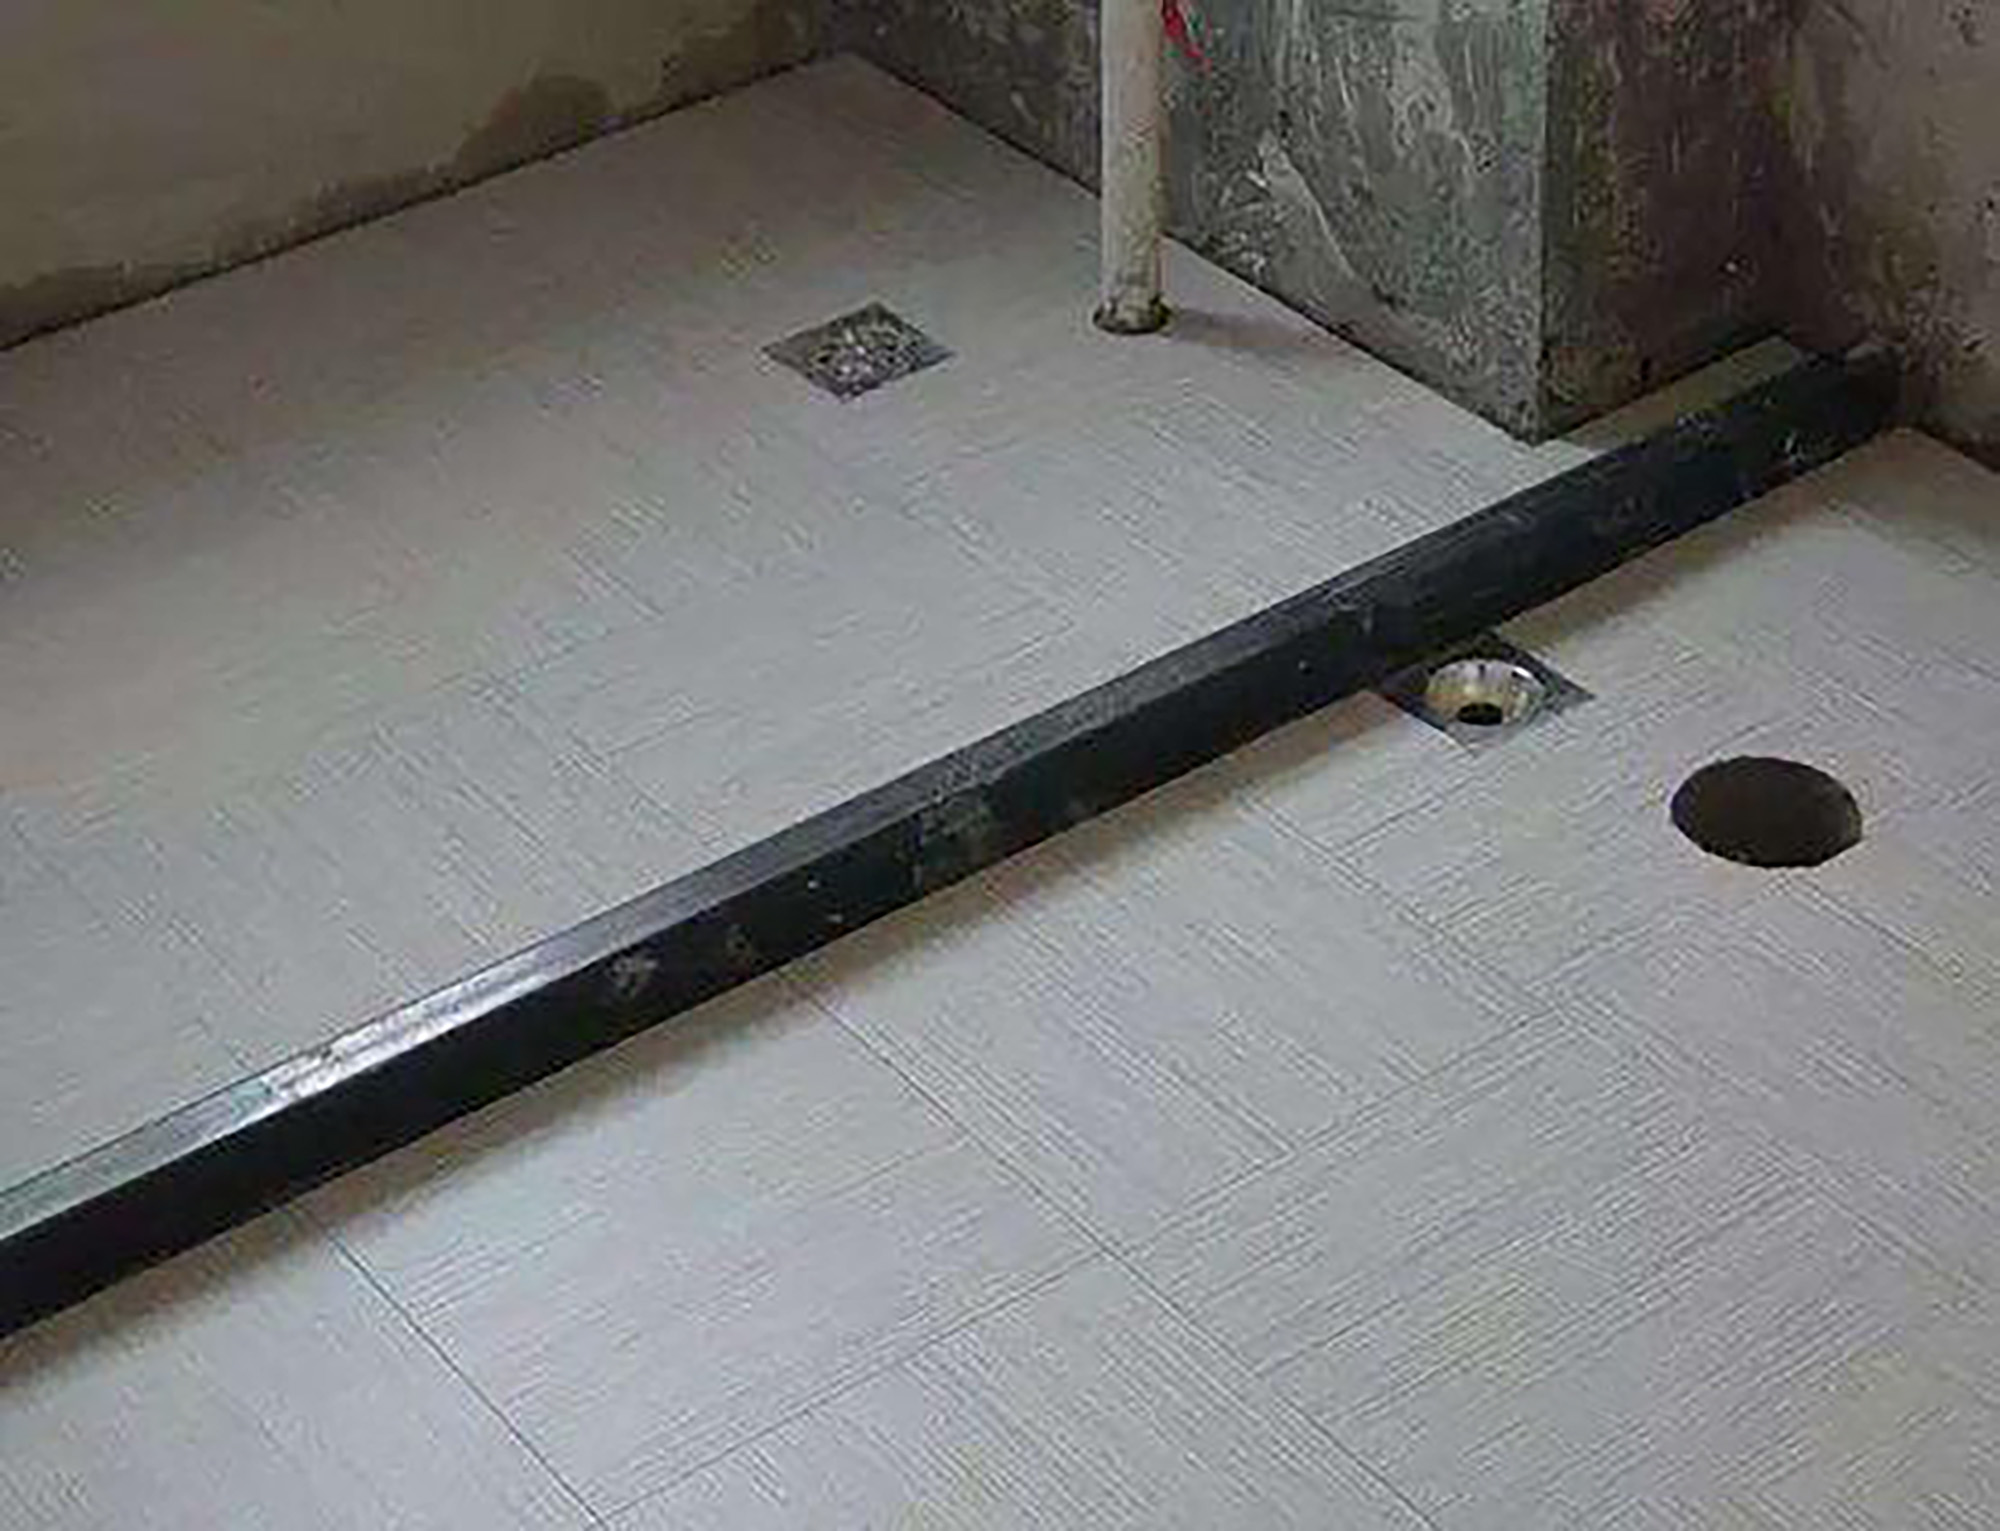
In addition, when renovating the bathroom: Even if the bathroom is separated into dry and wet areas, a double floor drain should be installed. That is, an extra floor drain should be reserved near the water barrier. When not in use, it can be covered with a floor drain cover to prevent dirt from falling in and causing blockages. In case of an emergency such as a cracked water pipe or a clogged floor drain in the shower area, this small floor drain can play a crucial role.
04. Common floor treatment methods for shower areas

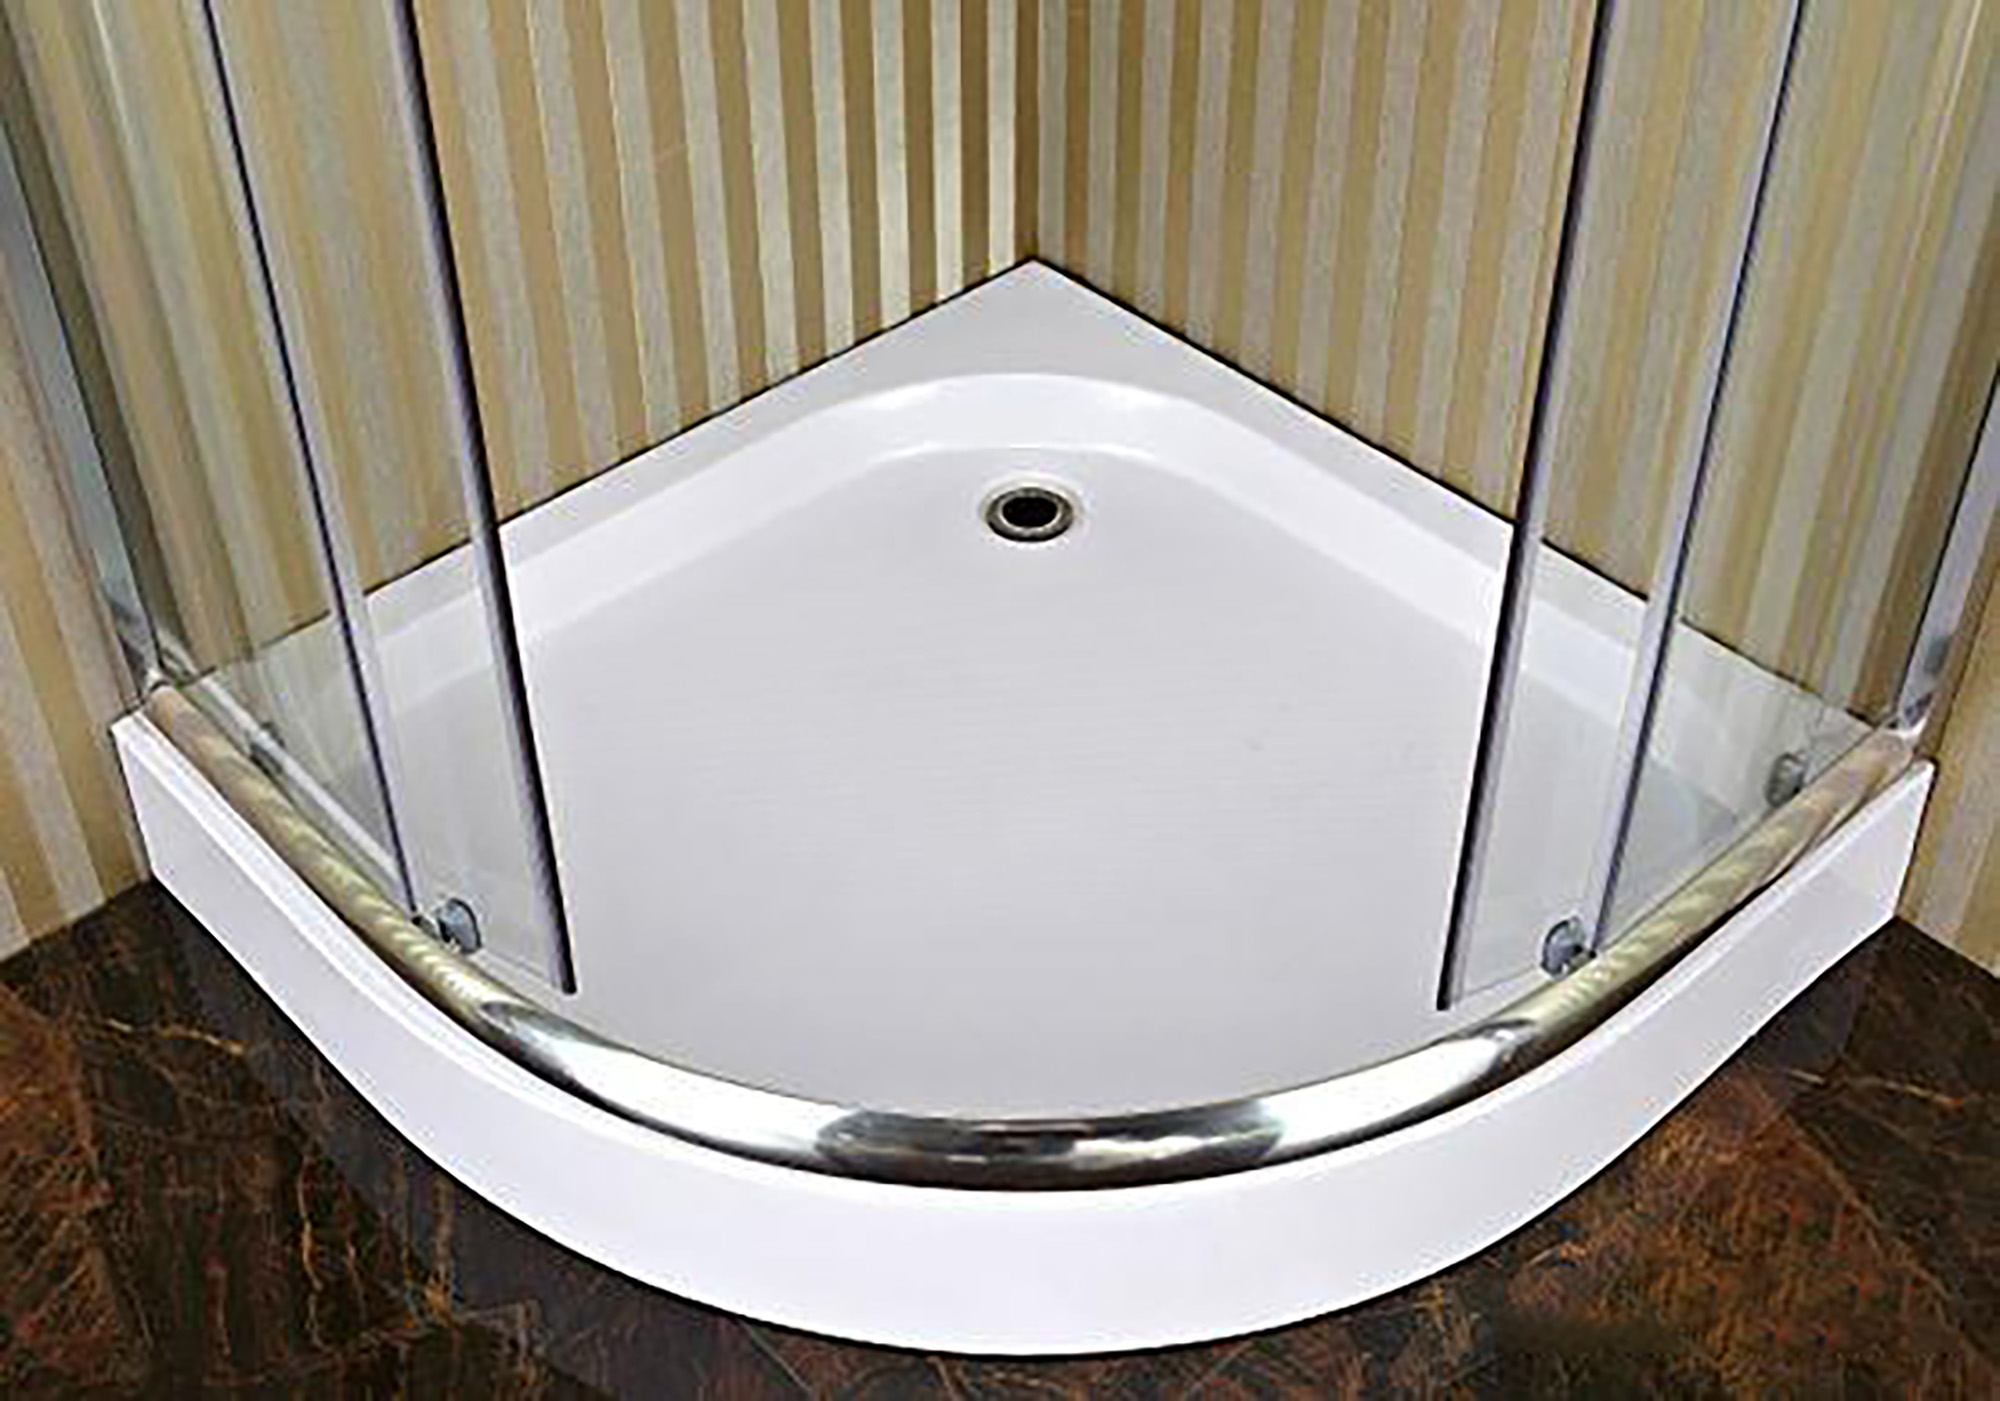
▲No water barrier strip is needed. It's an integrated shower enclosure.
TIPS: Integrated shower enclosure
If you want to make an integrated shower enclosure, it is best to consider everything thoroughly when installing water and electricity at the beginning of the decoration. Consider the size of the water barrier strip, the reserved lines for the shower head, faucet, electrical socket, etc. When it is time to install water and electricity, the shower enclosure should be determined. It is also necessary to carefully confirm with the manufacturer the precautions before installation.
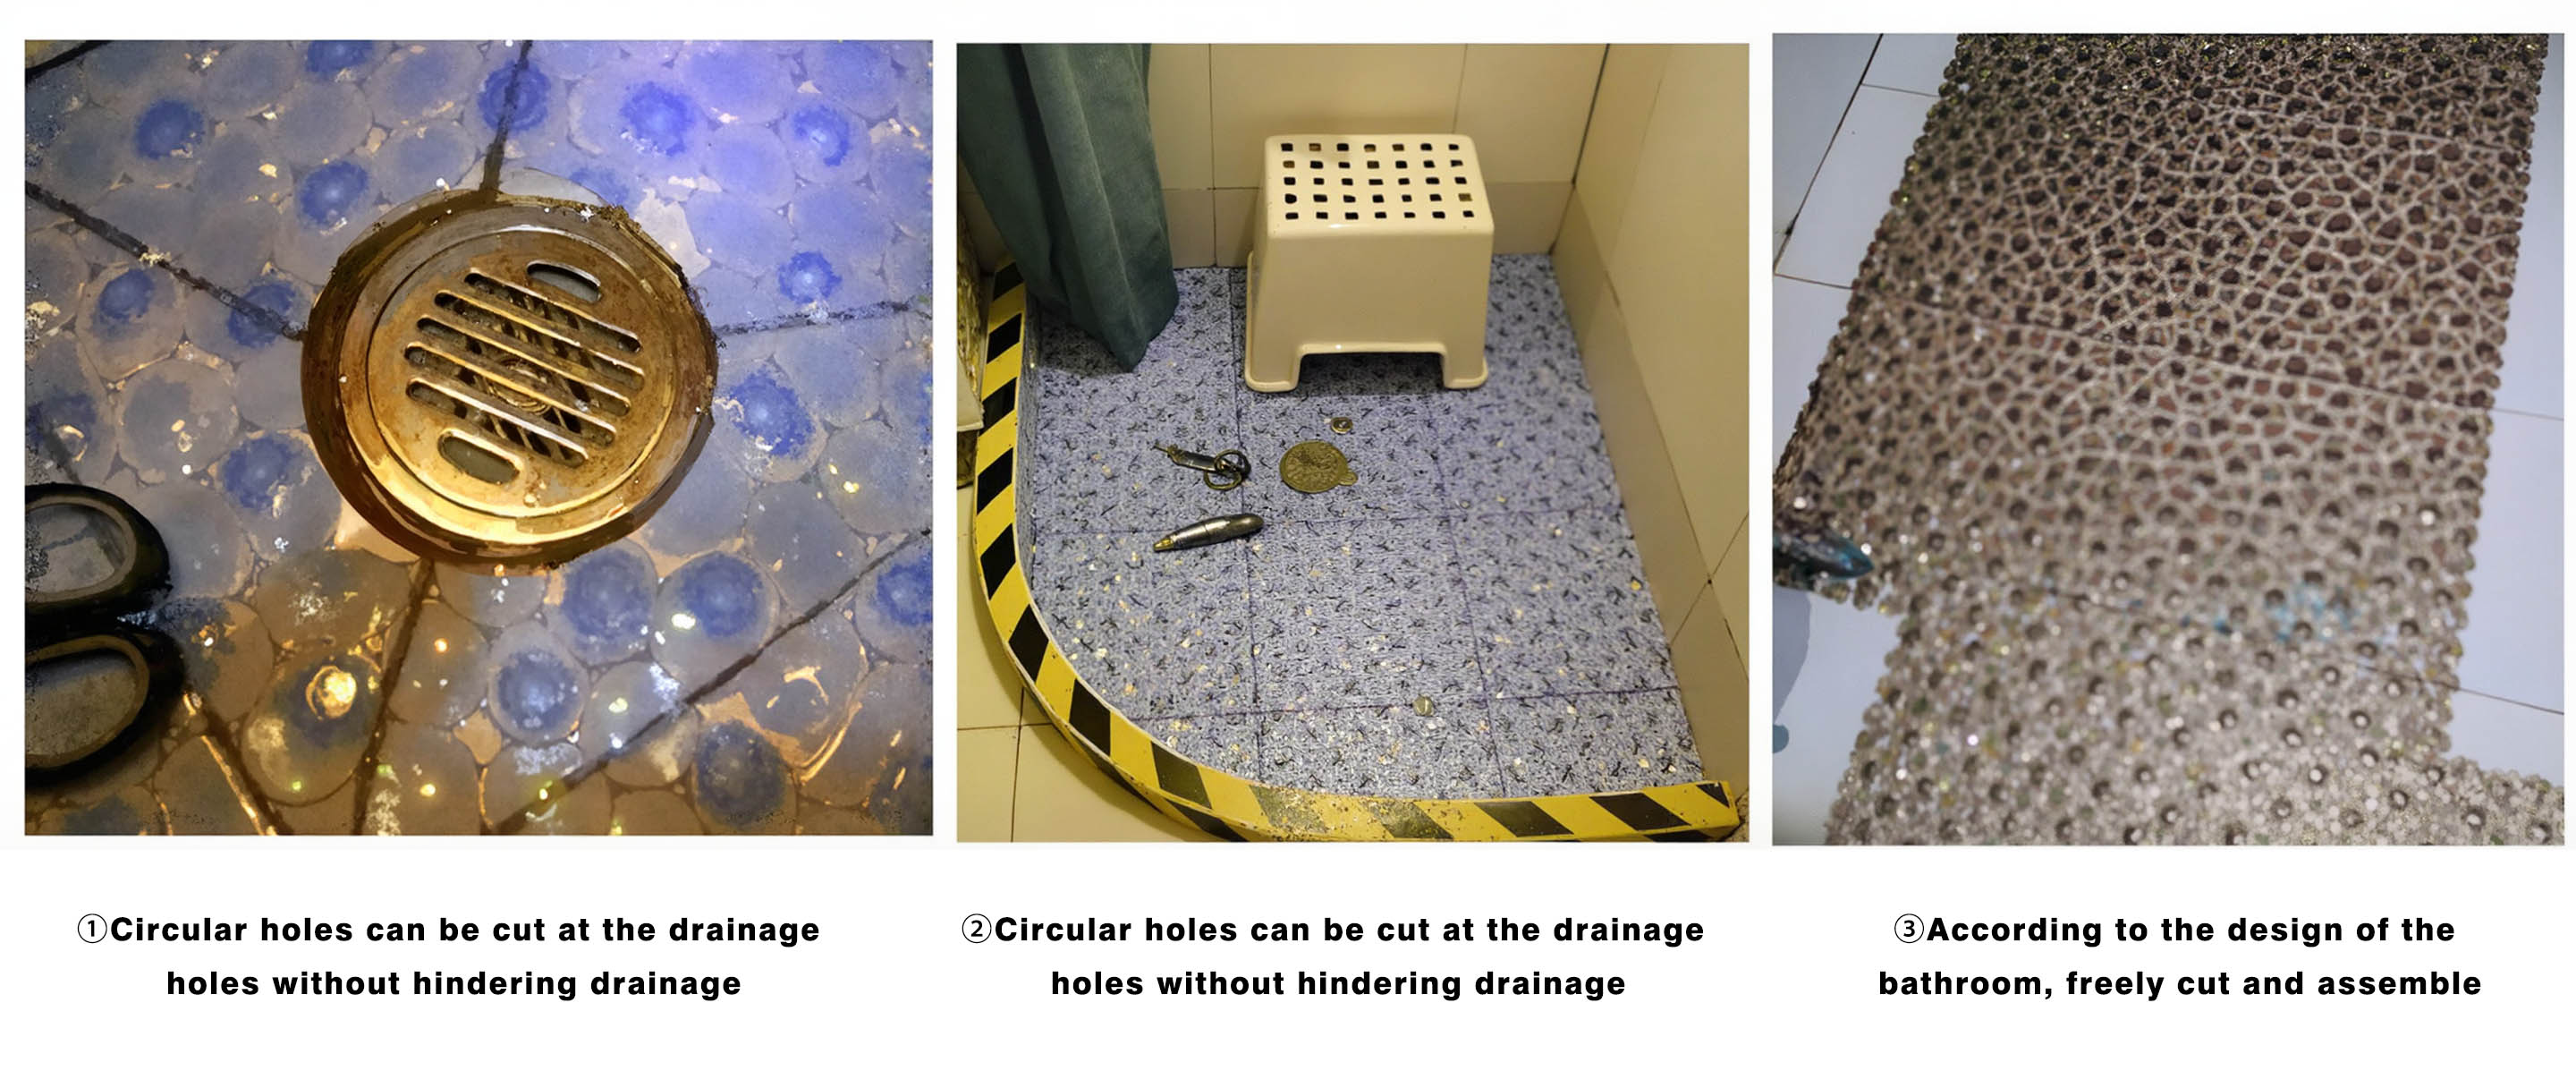
▲Elliptical pvc pebble shower room anti-slip mat, bathroom foot mat, bathroom anti-slip suction cup for bathing.
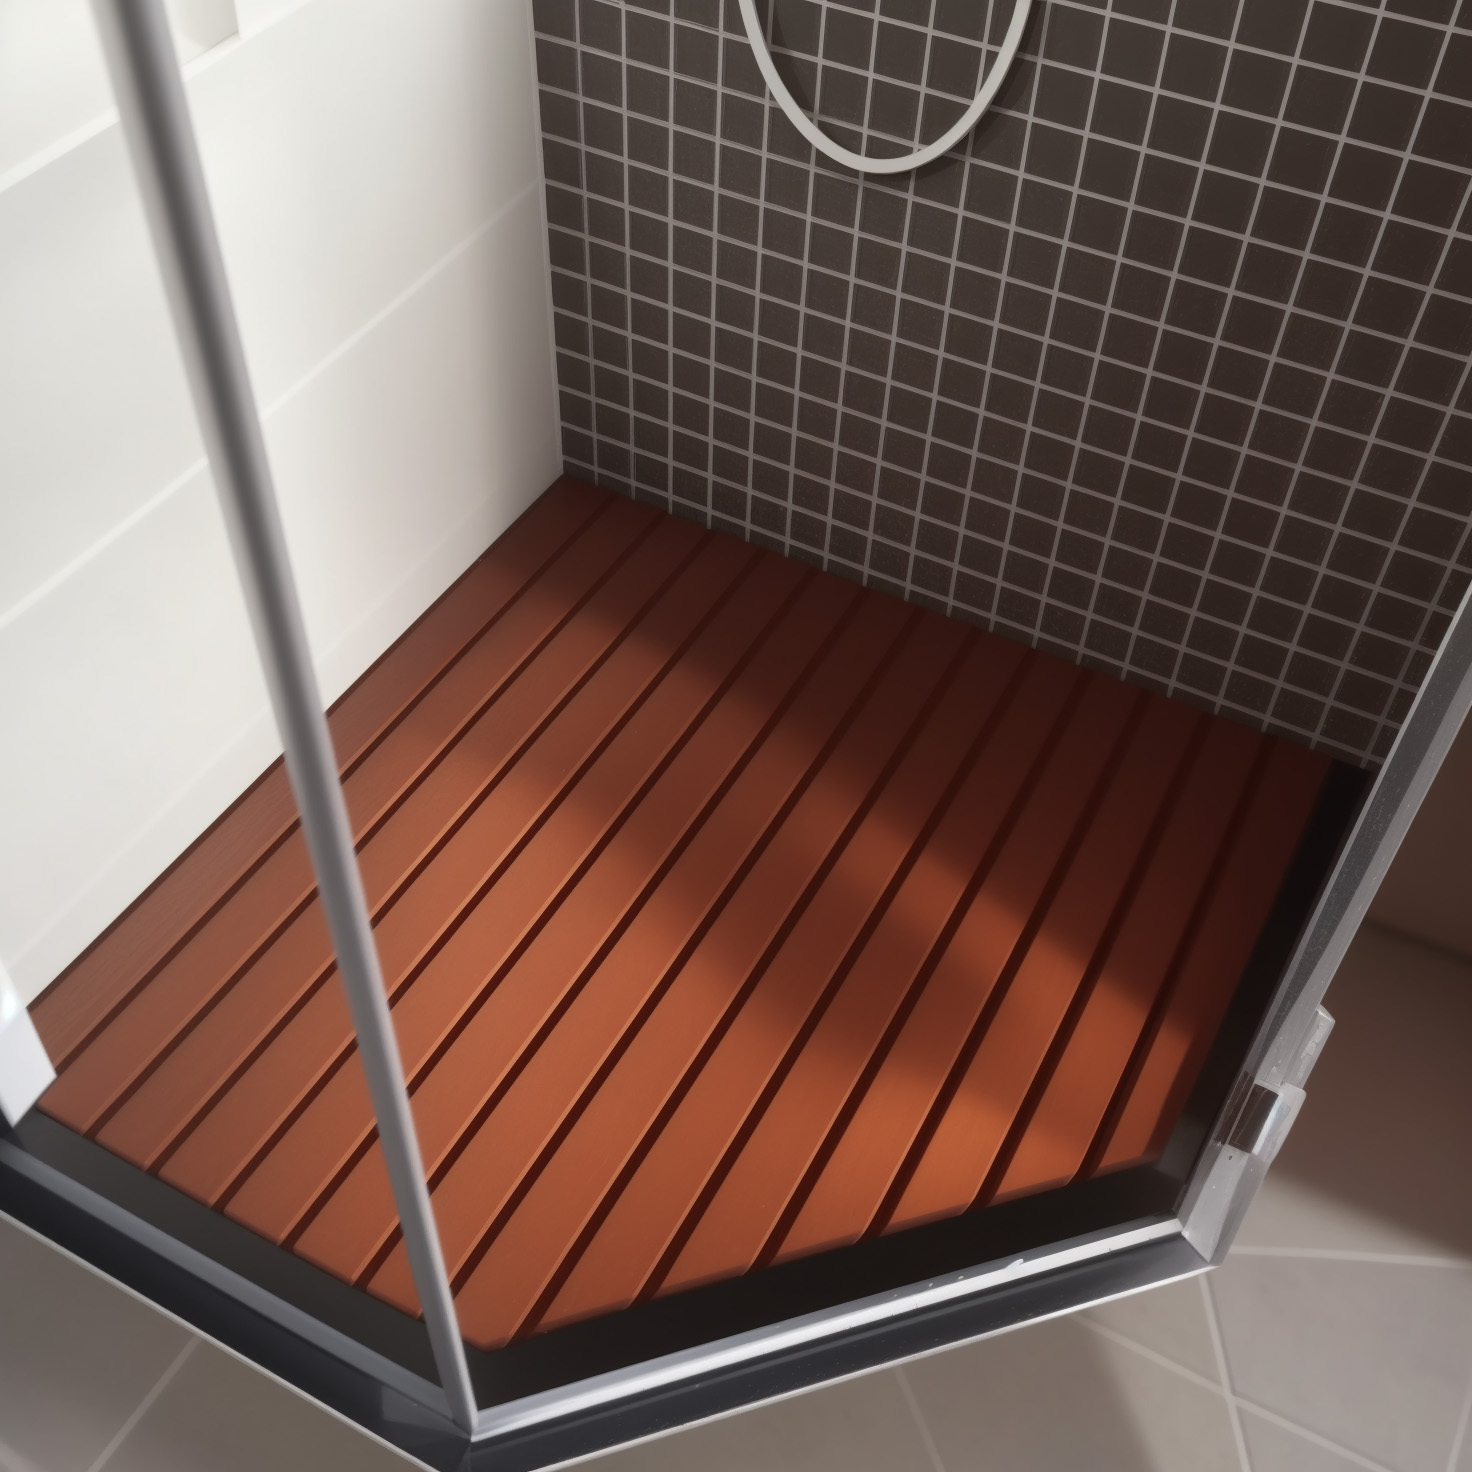
▲ Anti-corrosion wood treads
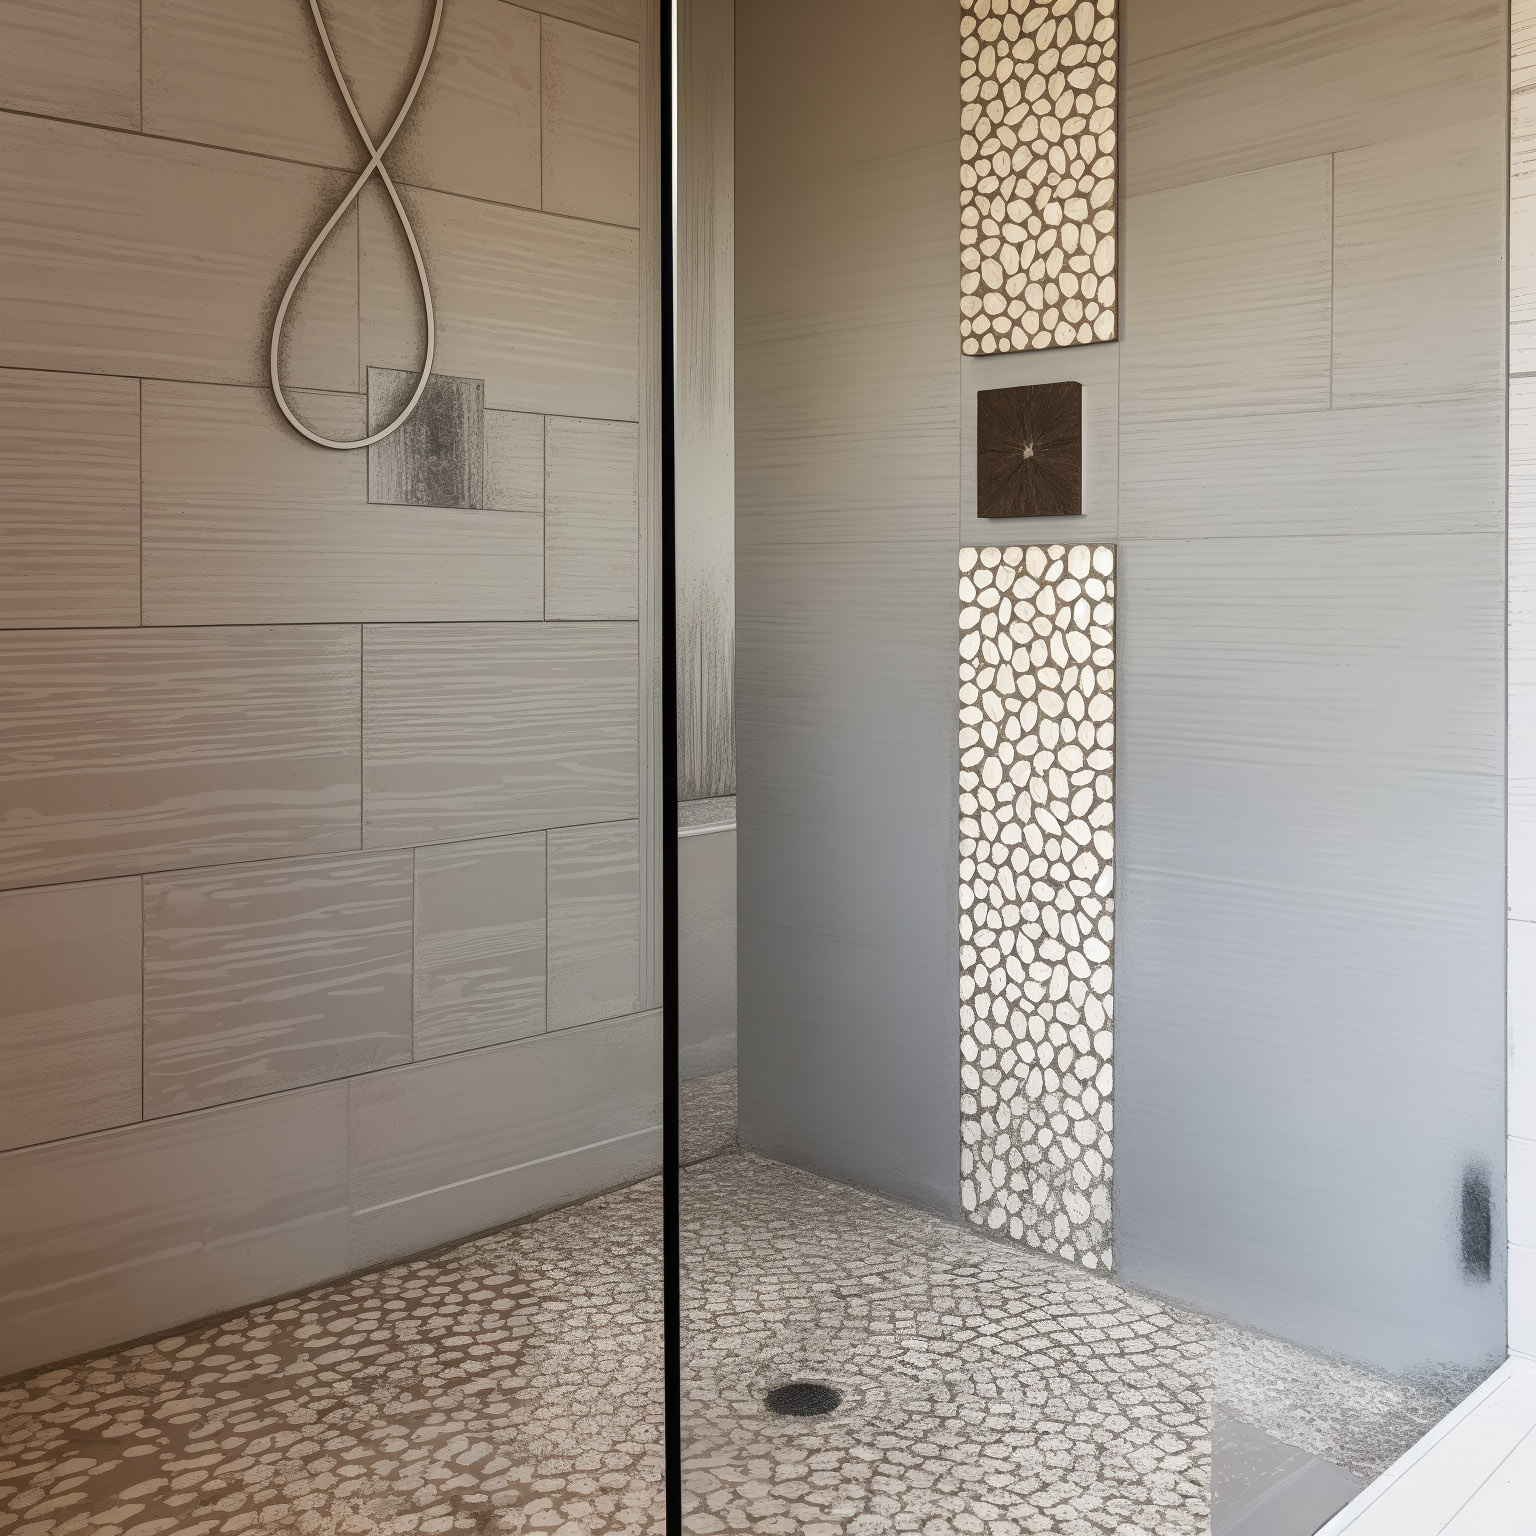
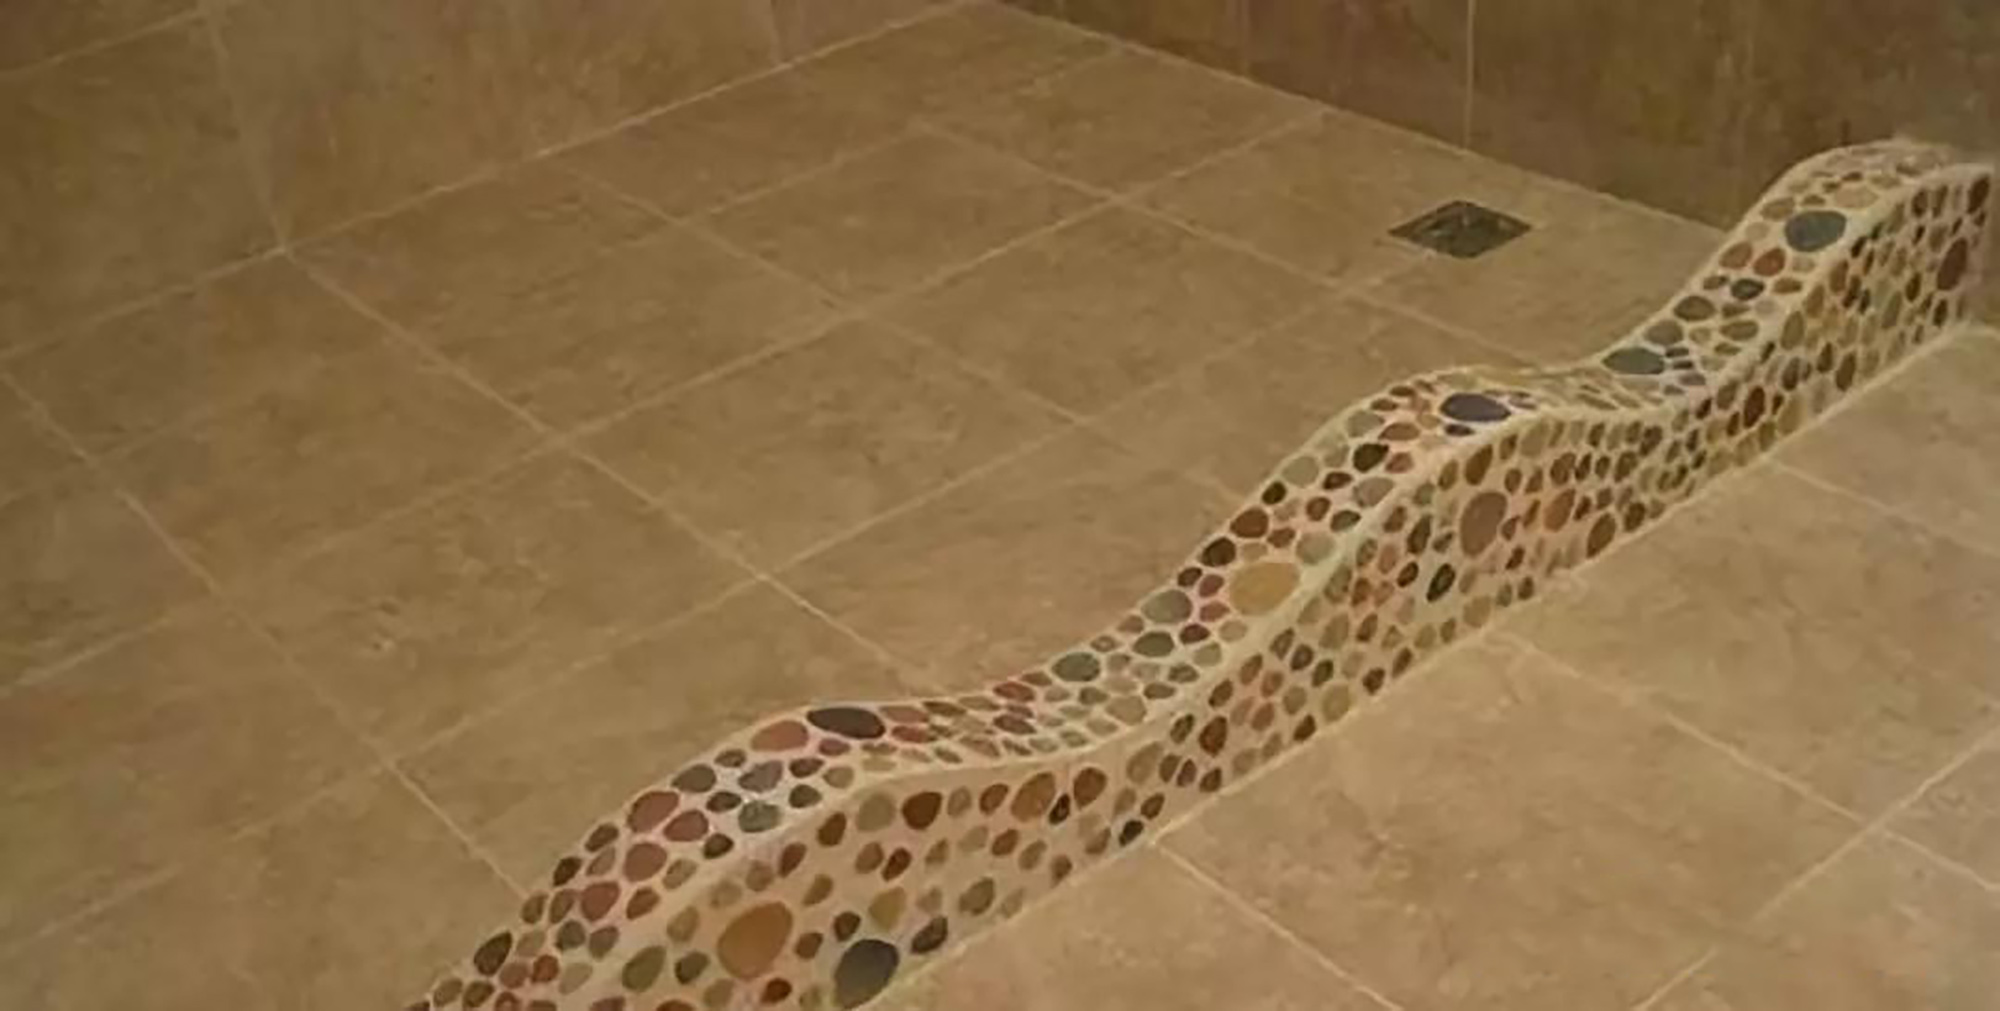
▲ Real pebble ground
▲ Marble grooved shower panel (lower sink)
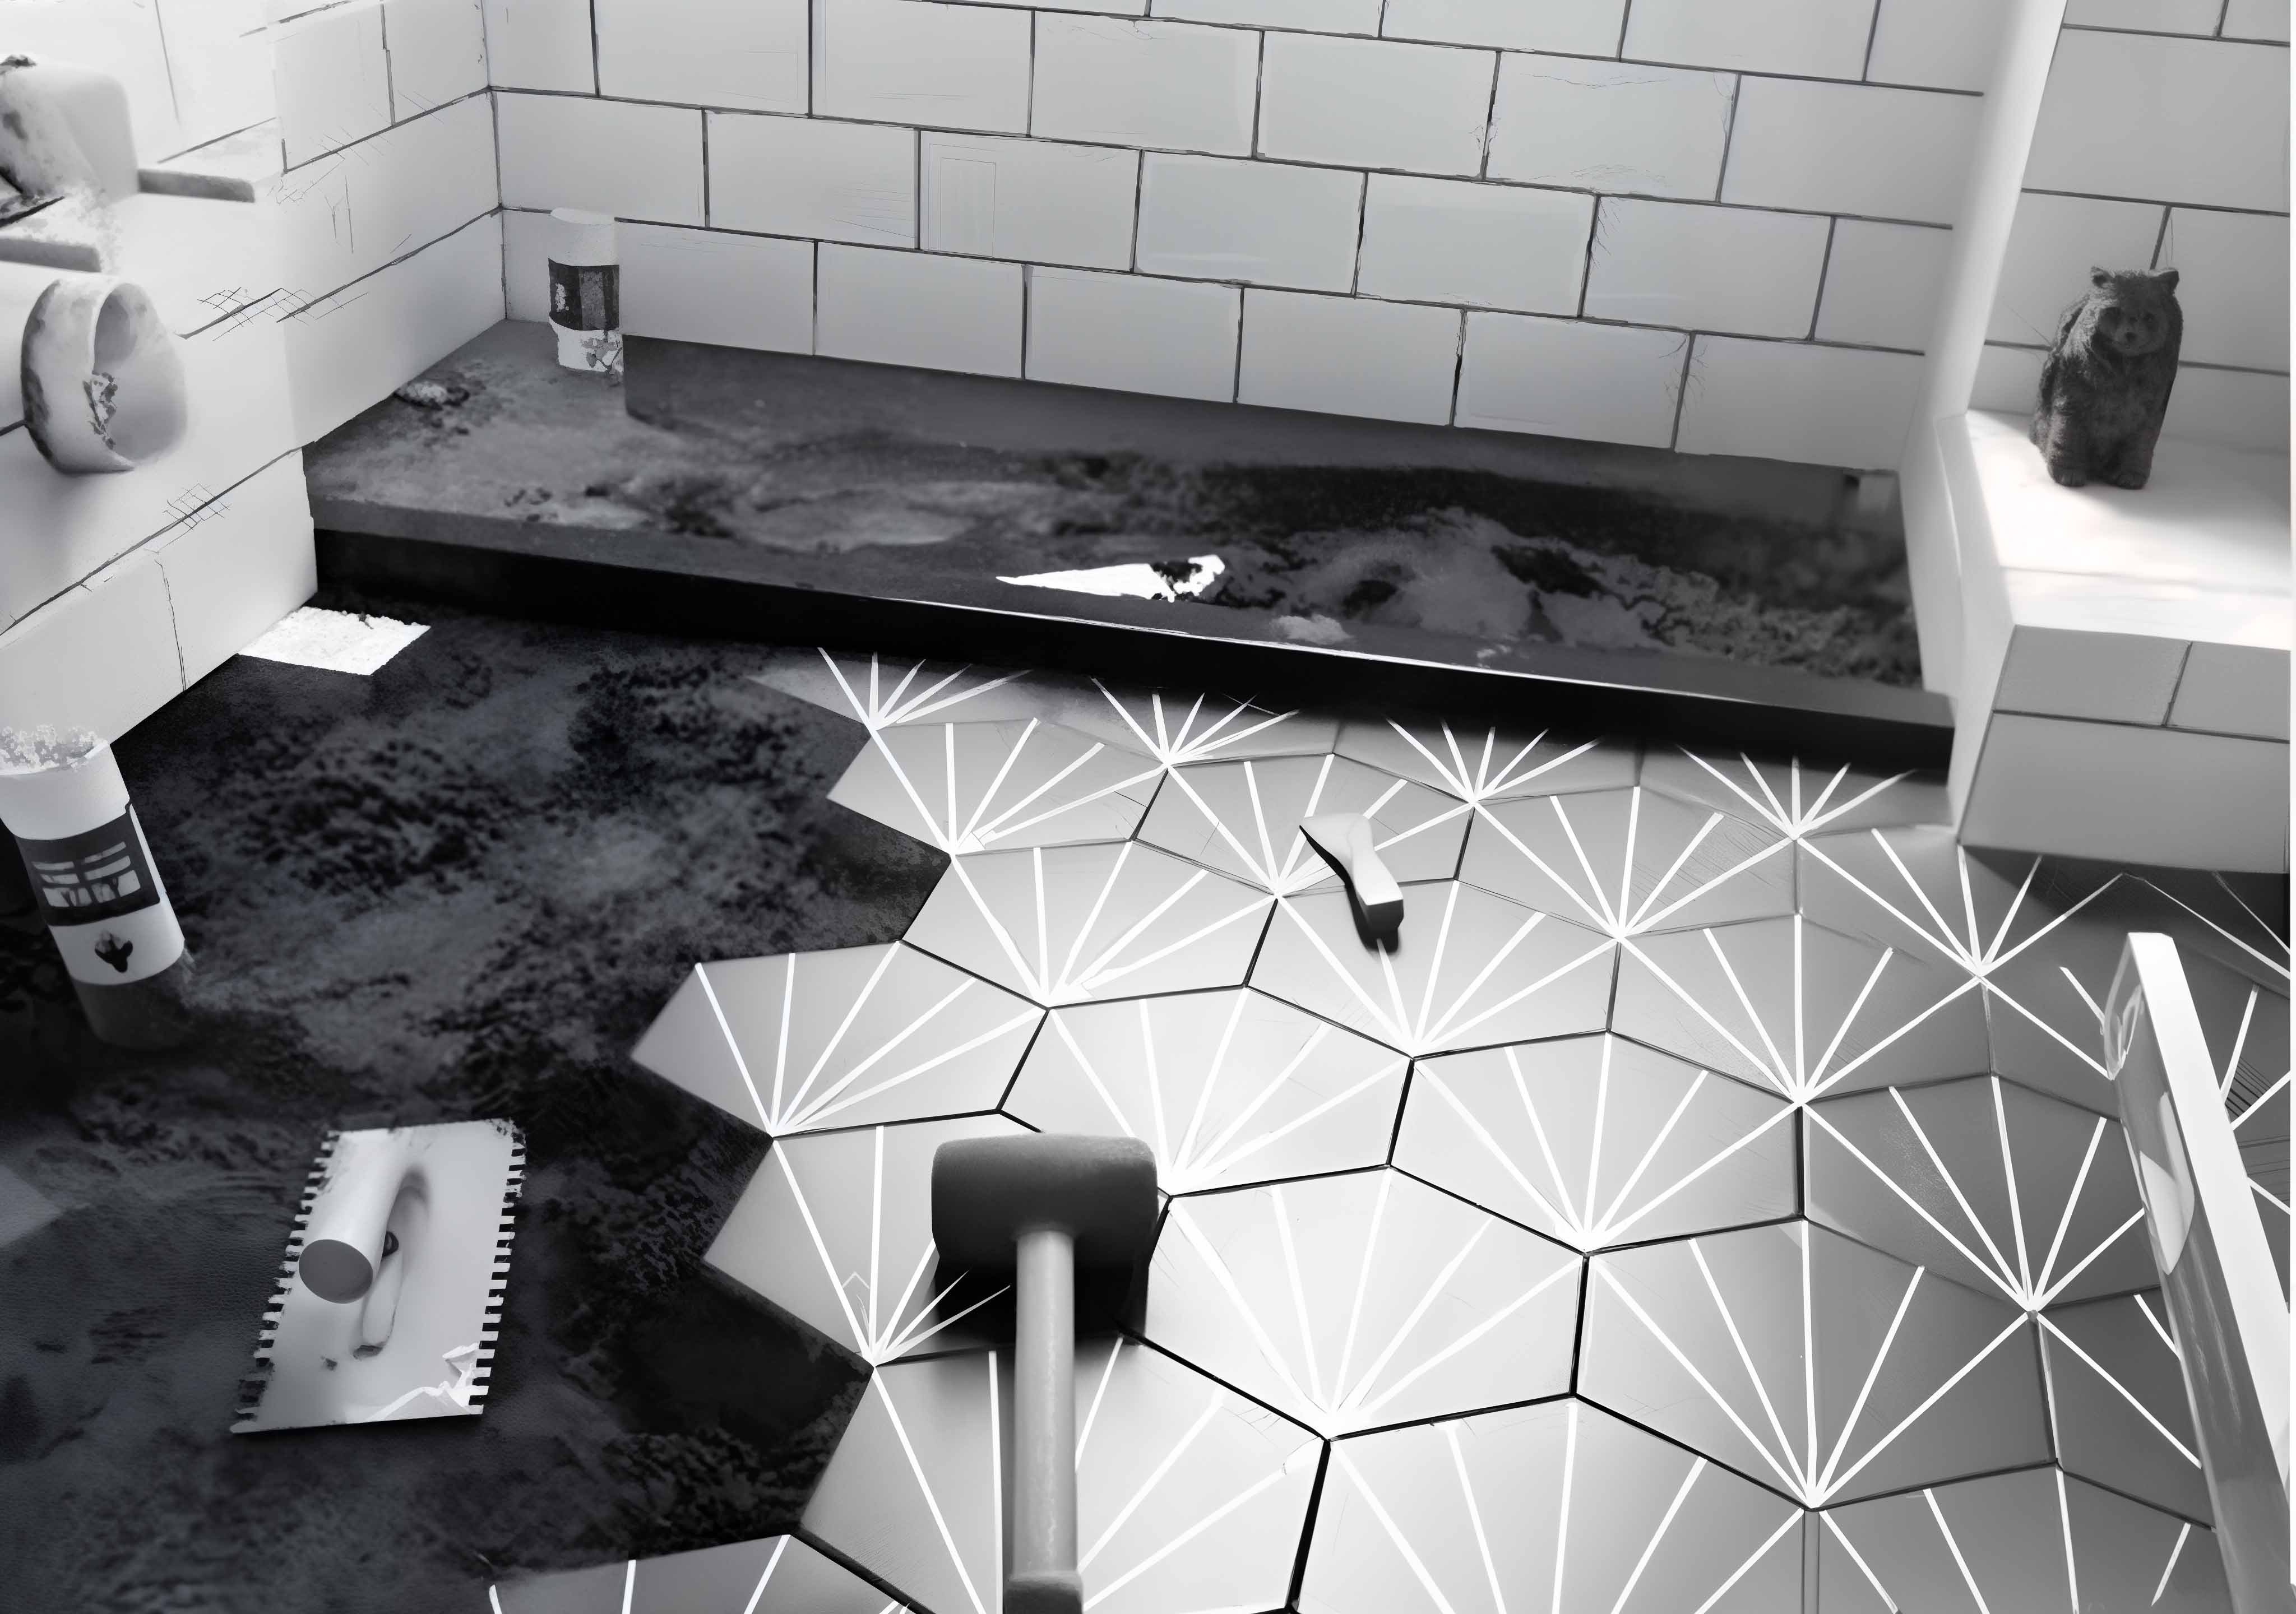
▲The most common type of tiled floor
TIPS: Simple shower enclosure
First, consider the reserved dimensions, faucets, showerheads, electrical circuits, etc. The water barrier strip can be embedded before laying the tiles, so that water won't seep out over time. However, the drawback is that it is very difficult to maintain and replace. It can also be left unburied and sealed with glue. It can still prevent water, but over time, when it ages, it will lose its sealing effect and water will seep in.
TIPS: For the water deflector used with the shower curtain, measure the installation height accurately during installation. Let the shower curtain naturally hang down, about three centimeters into the water deflector. This is the best installation effect, and after installation in this way, water will basically not splash out.
05. Treatment method for dry-wet separation shower area
The bathroom decoration requires waterproofing on the outside and separation of dry and wet areas on the inside. The common ways to separate the dry and wet areas of a shower room are a shower curtain with a water barrier, glass with a water barrier, or glass with a drain. However, all of these methods have drawbacks: the shower curtain is prone to mold, the glass may shatter, and the drain is difficult to clean. Taking all factors into consideration, the brick masonry method is chosen as it is cost-effective and the partition style can be customized without affecting usage or height.
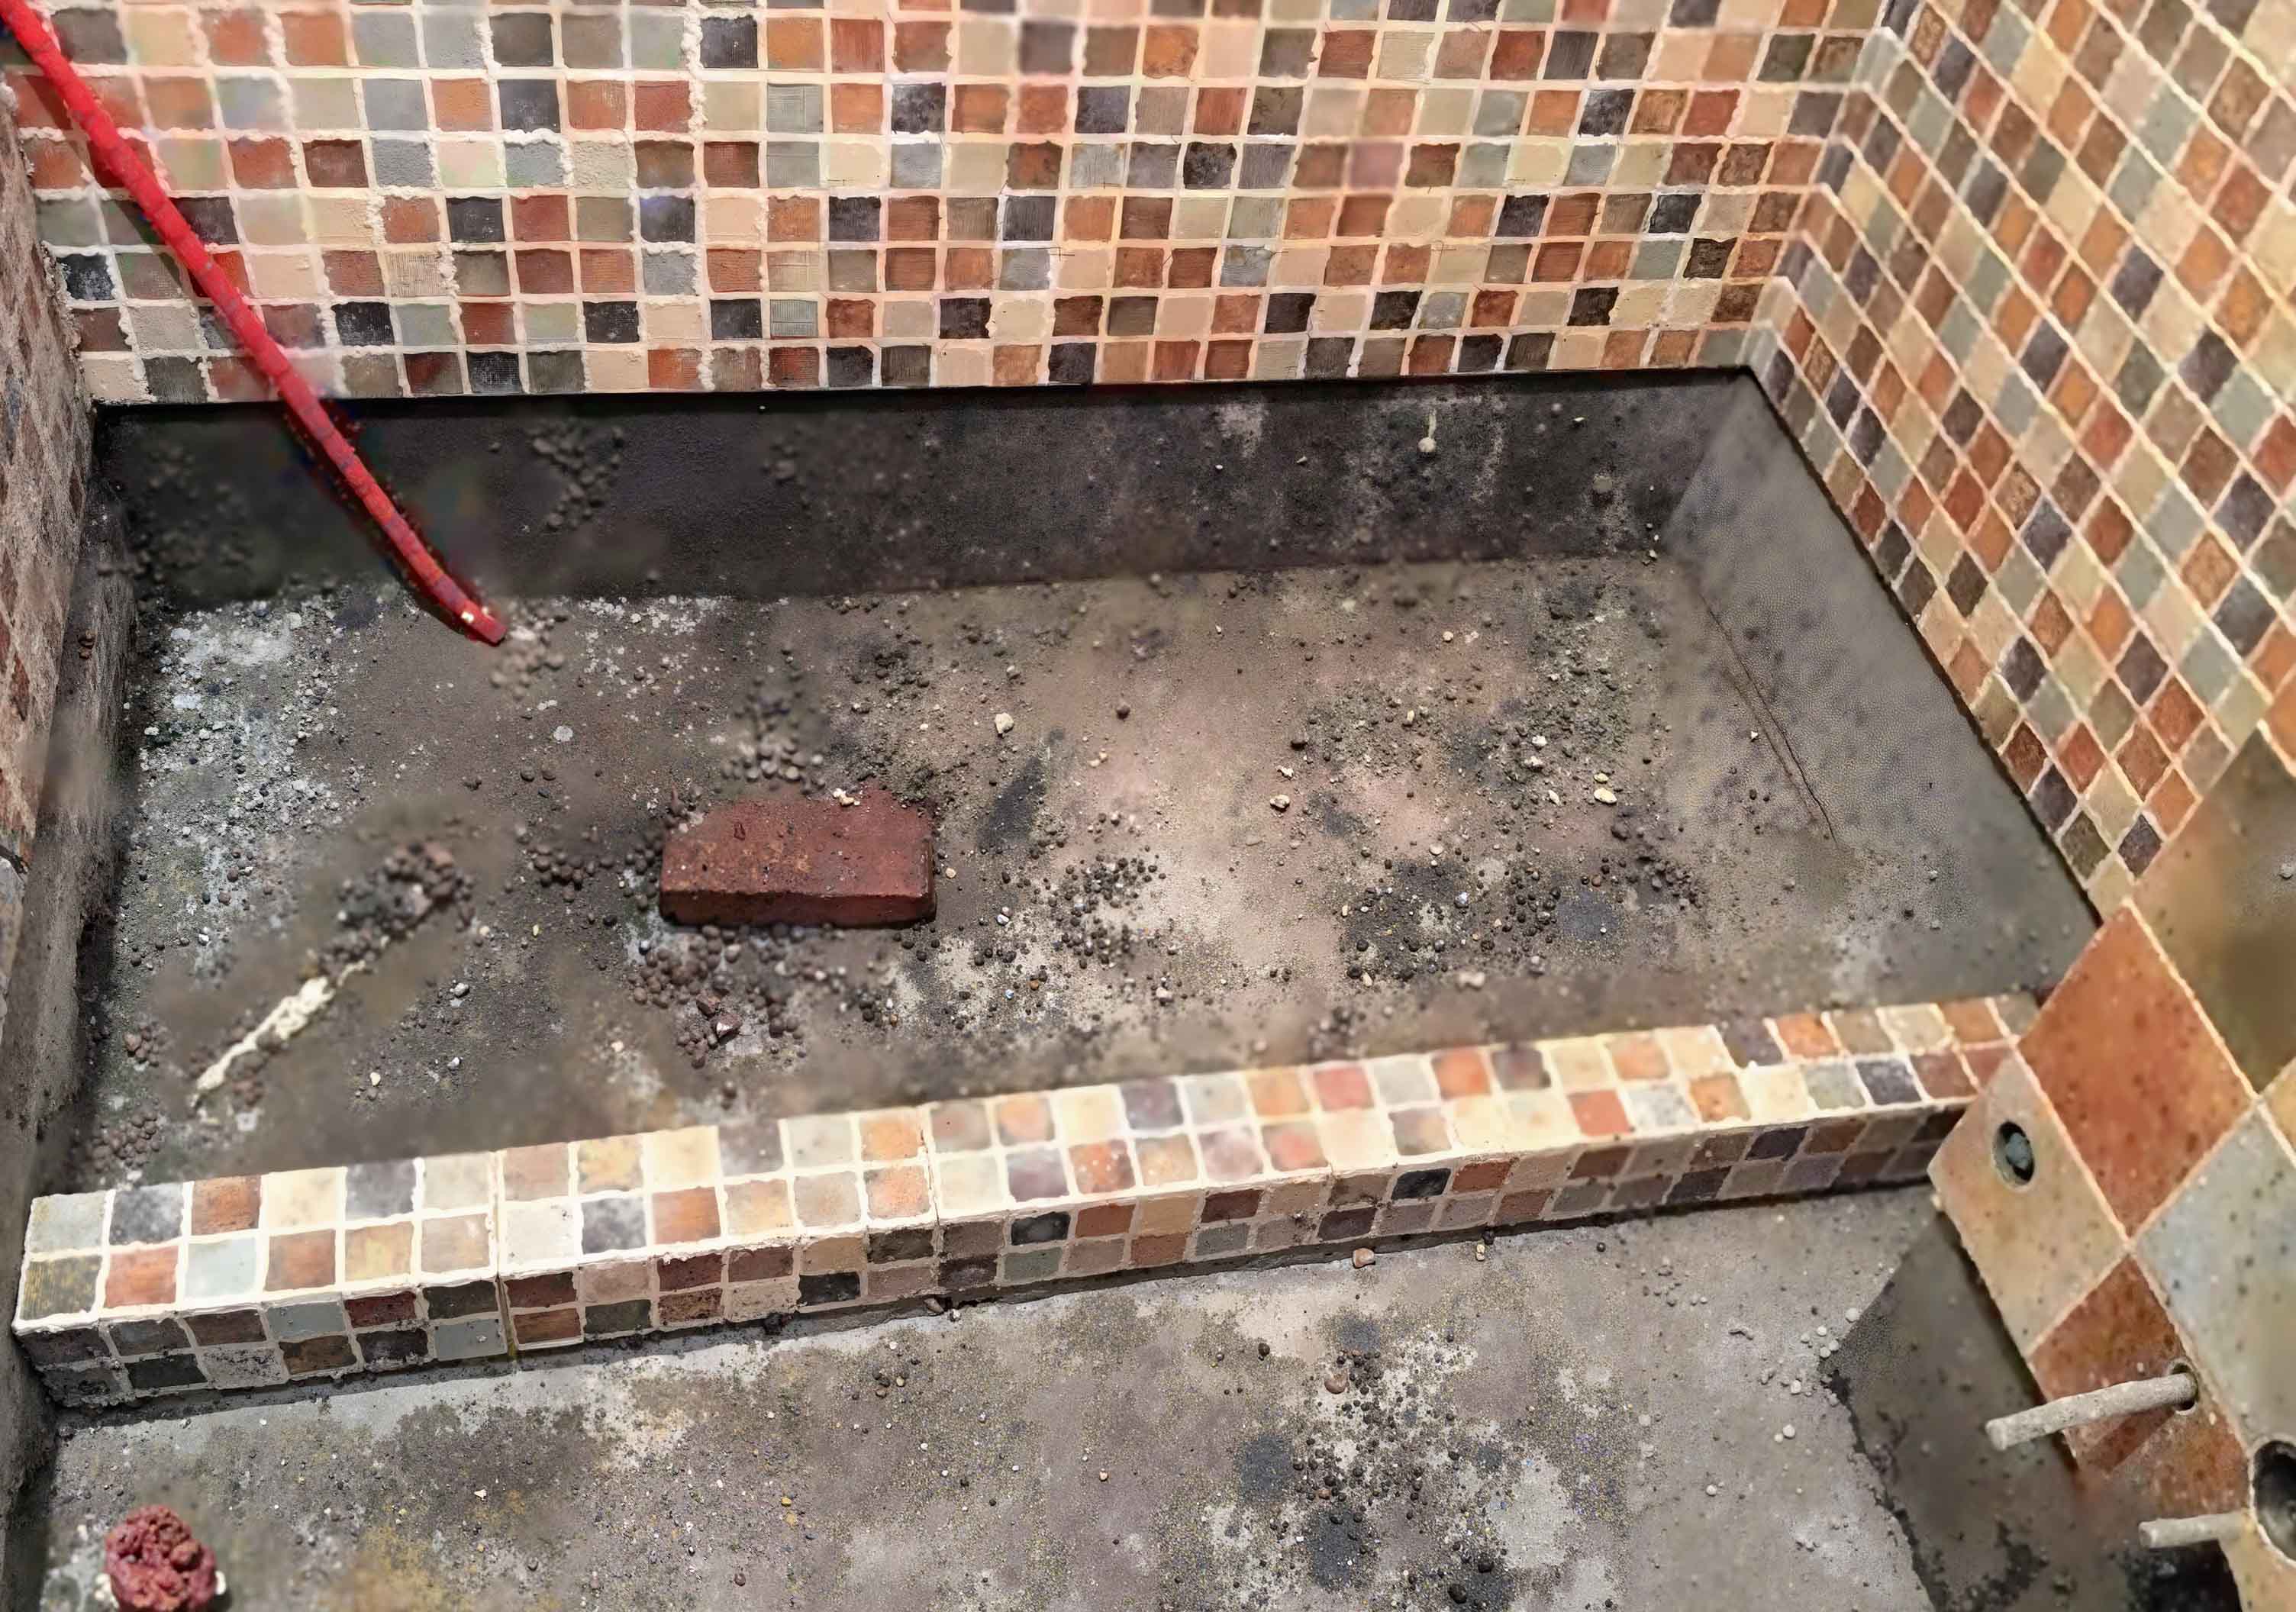
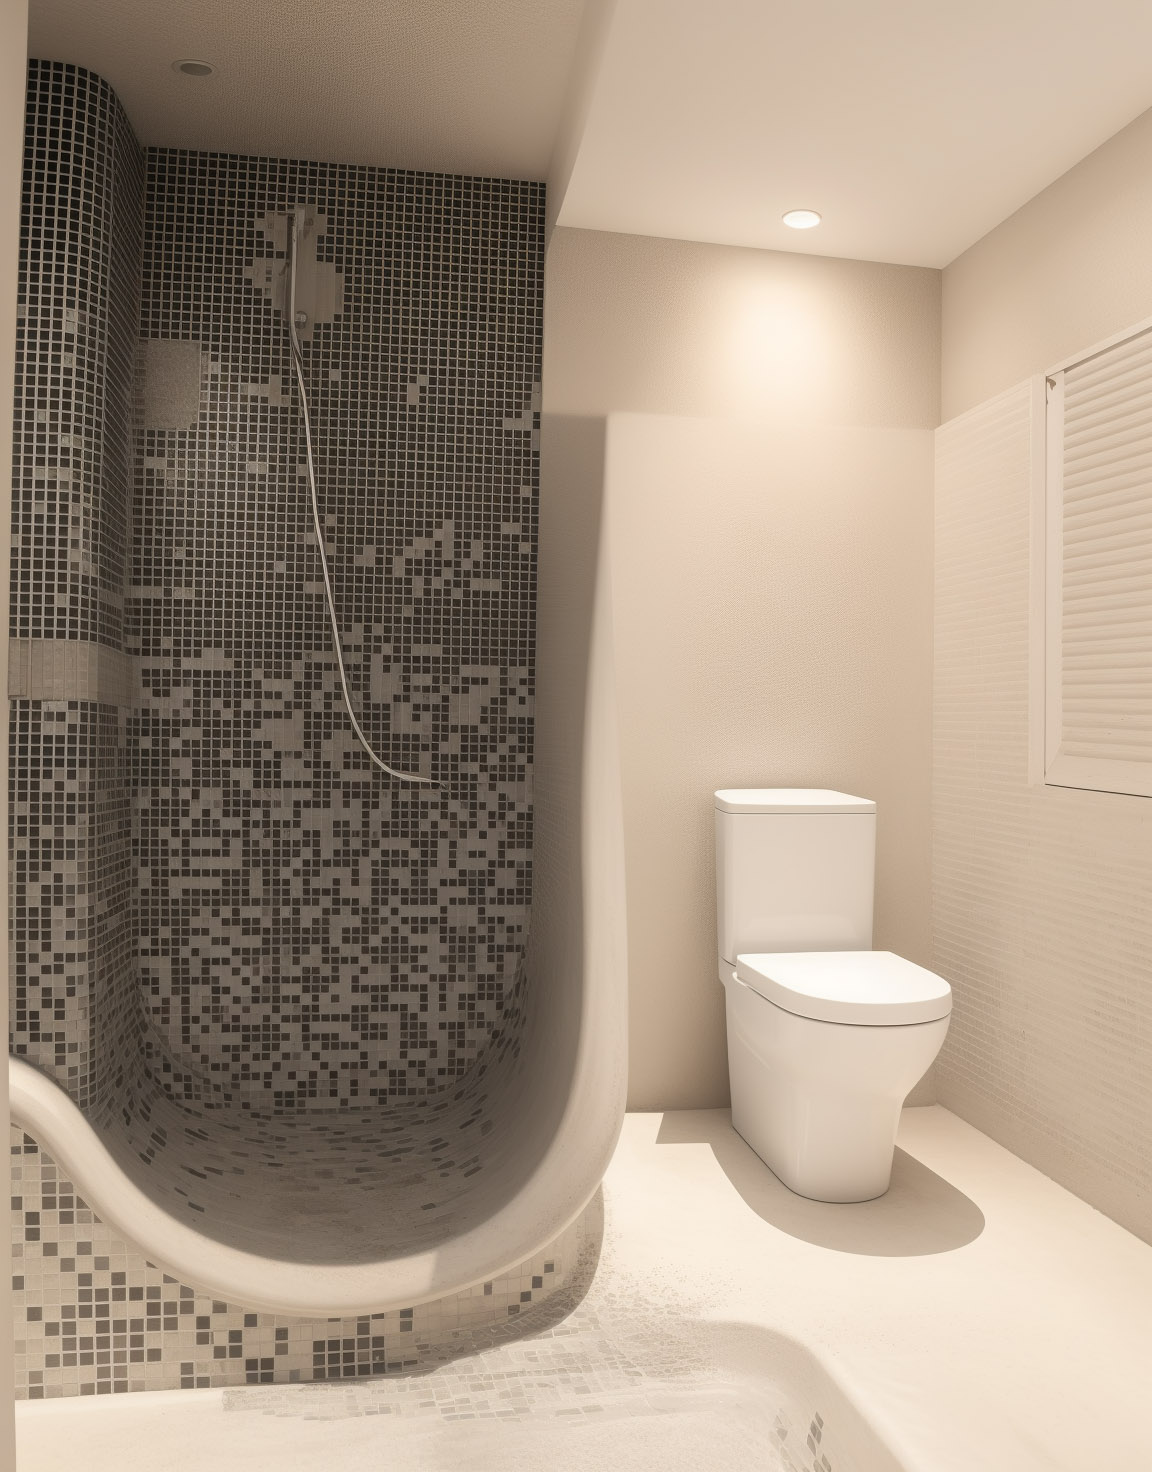
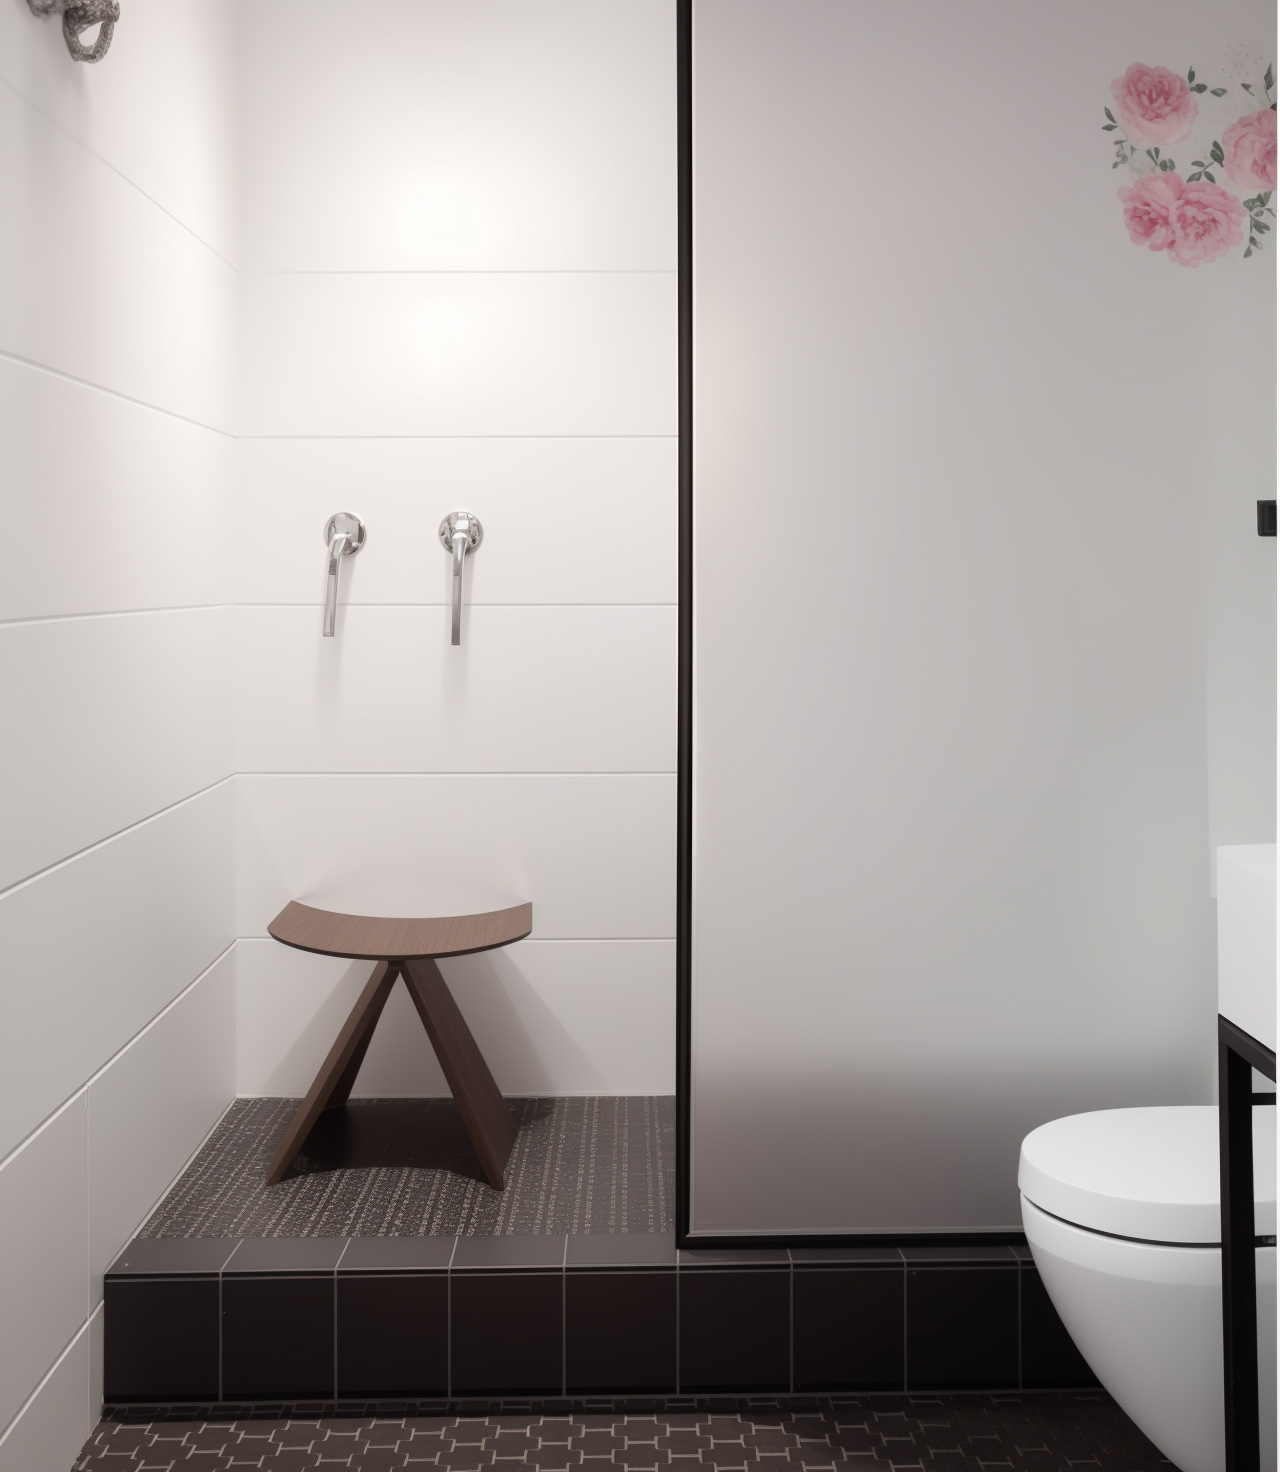
1. Self-built water-retaining walls and niches
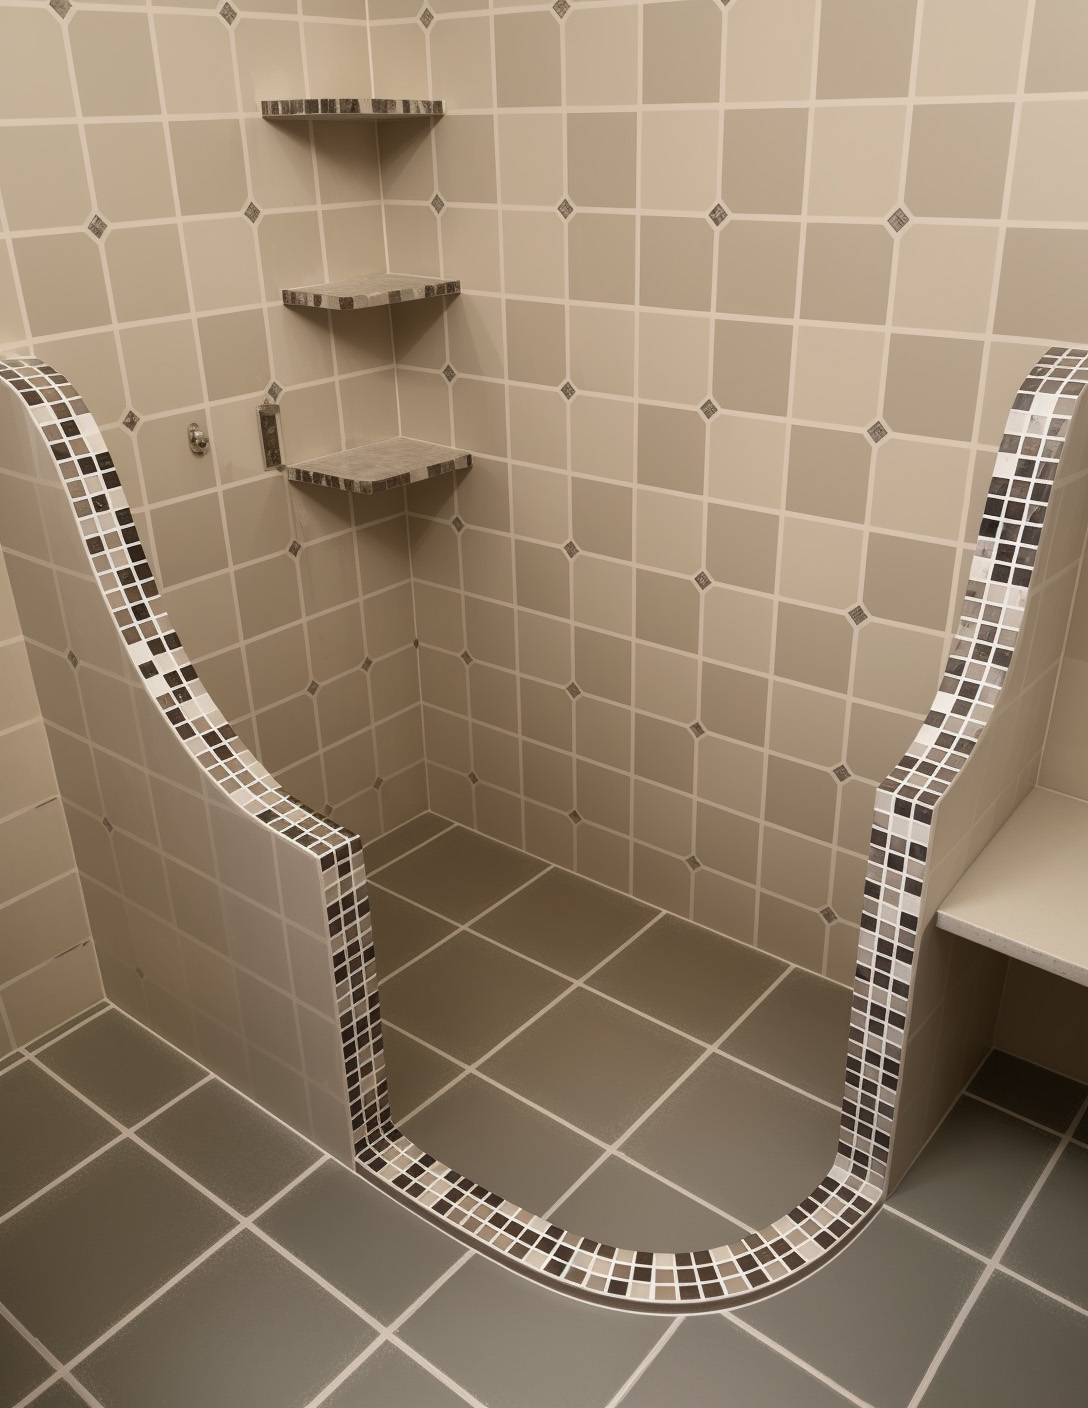
TIPS: There is a specific sequence for brick-built shower room partitions. If bricks are used to build partitions, during decoration, the partitions and water barriers should be built first, followed by the waterproof layer, or a layer of waterproofing should be done first before building the partitions, and finally wall and floor tiles should be laid. Conversely, if partitions are built after the tiles are laid, the waterproof layer will be ineffective and prone to leakage.
2. Self-built water-retaining wall + glass
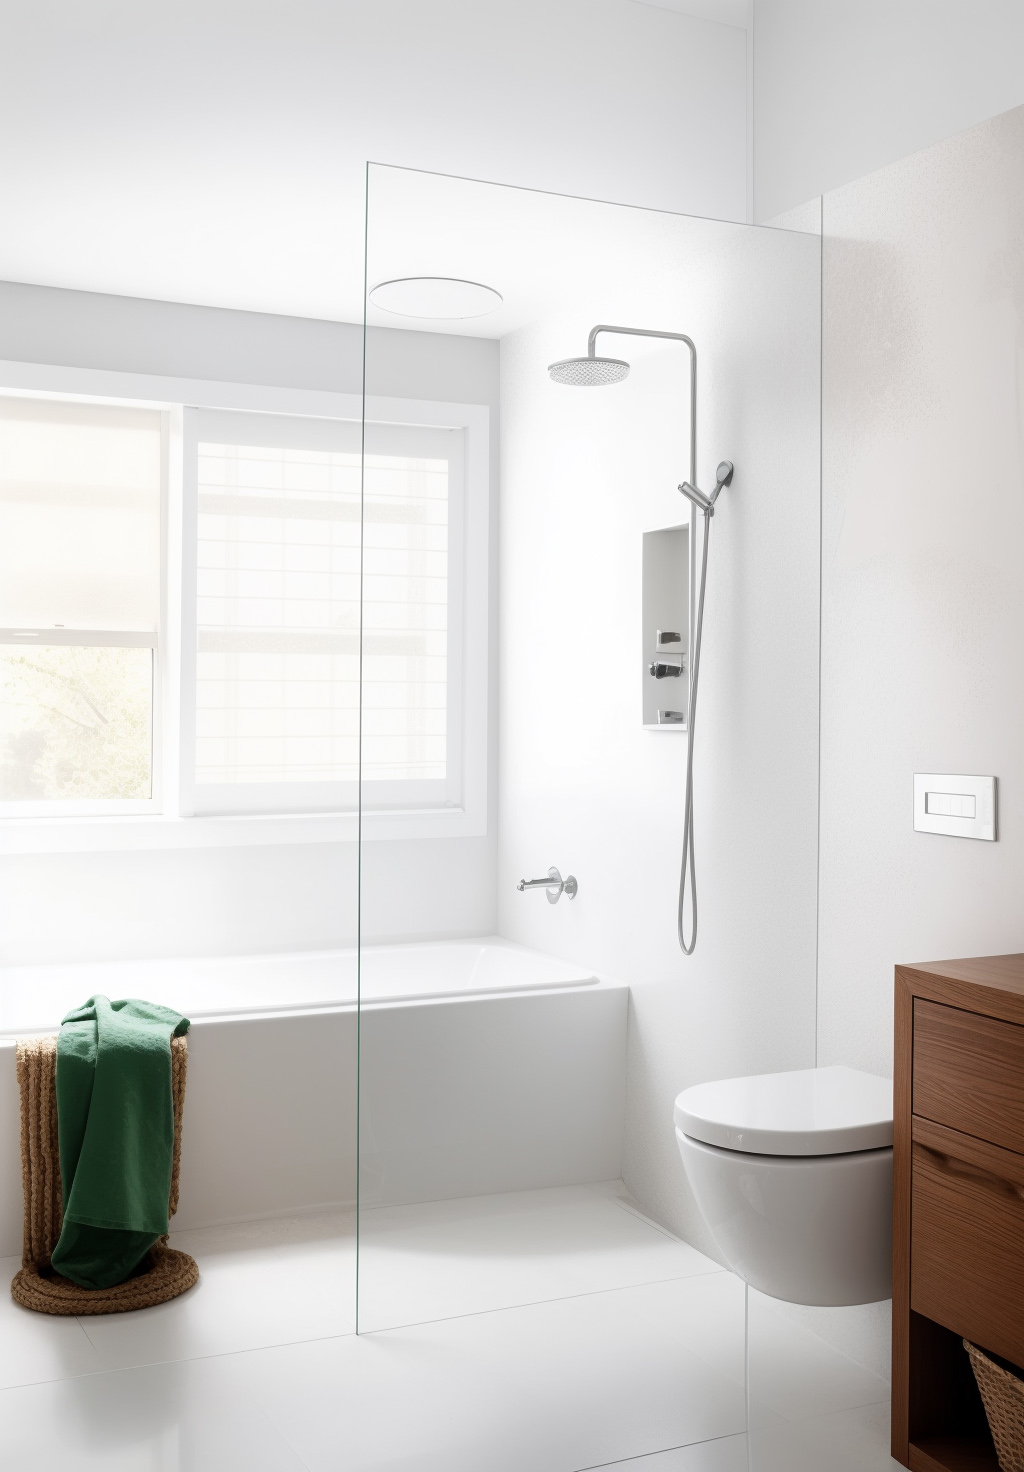
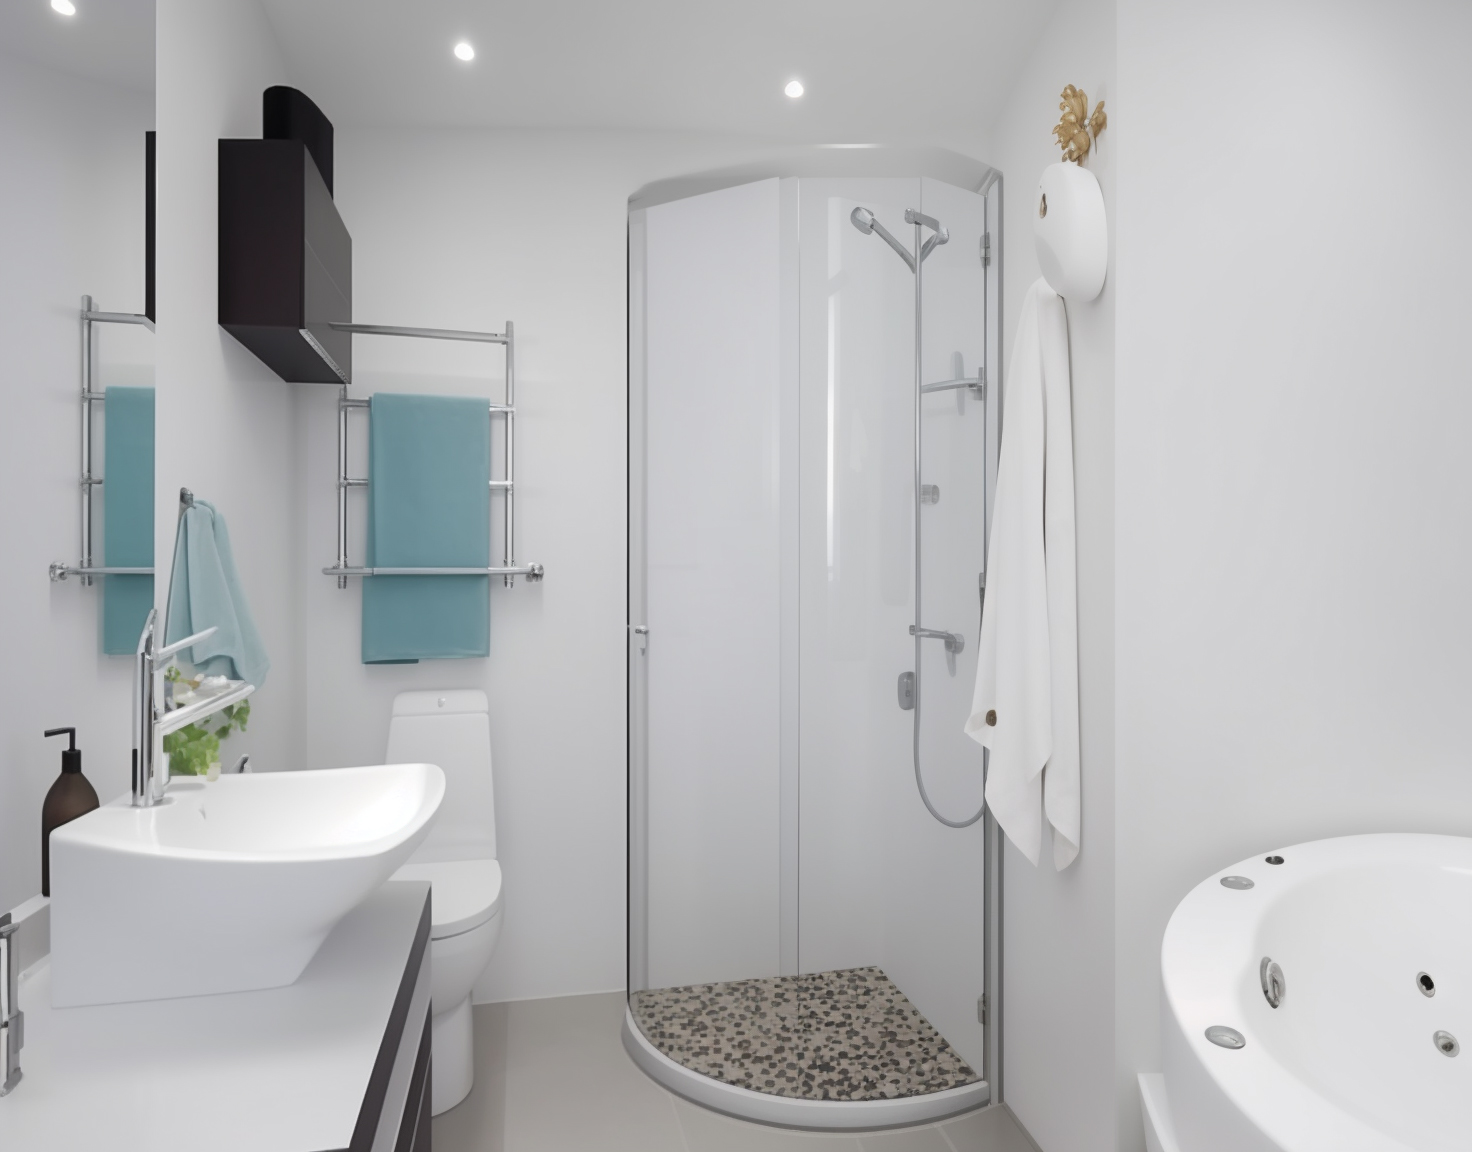
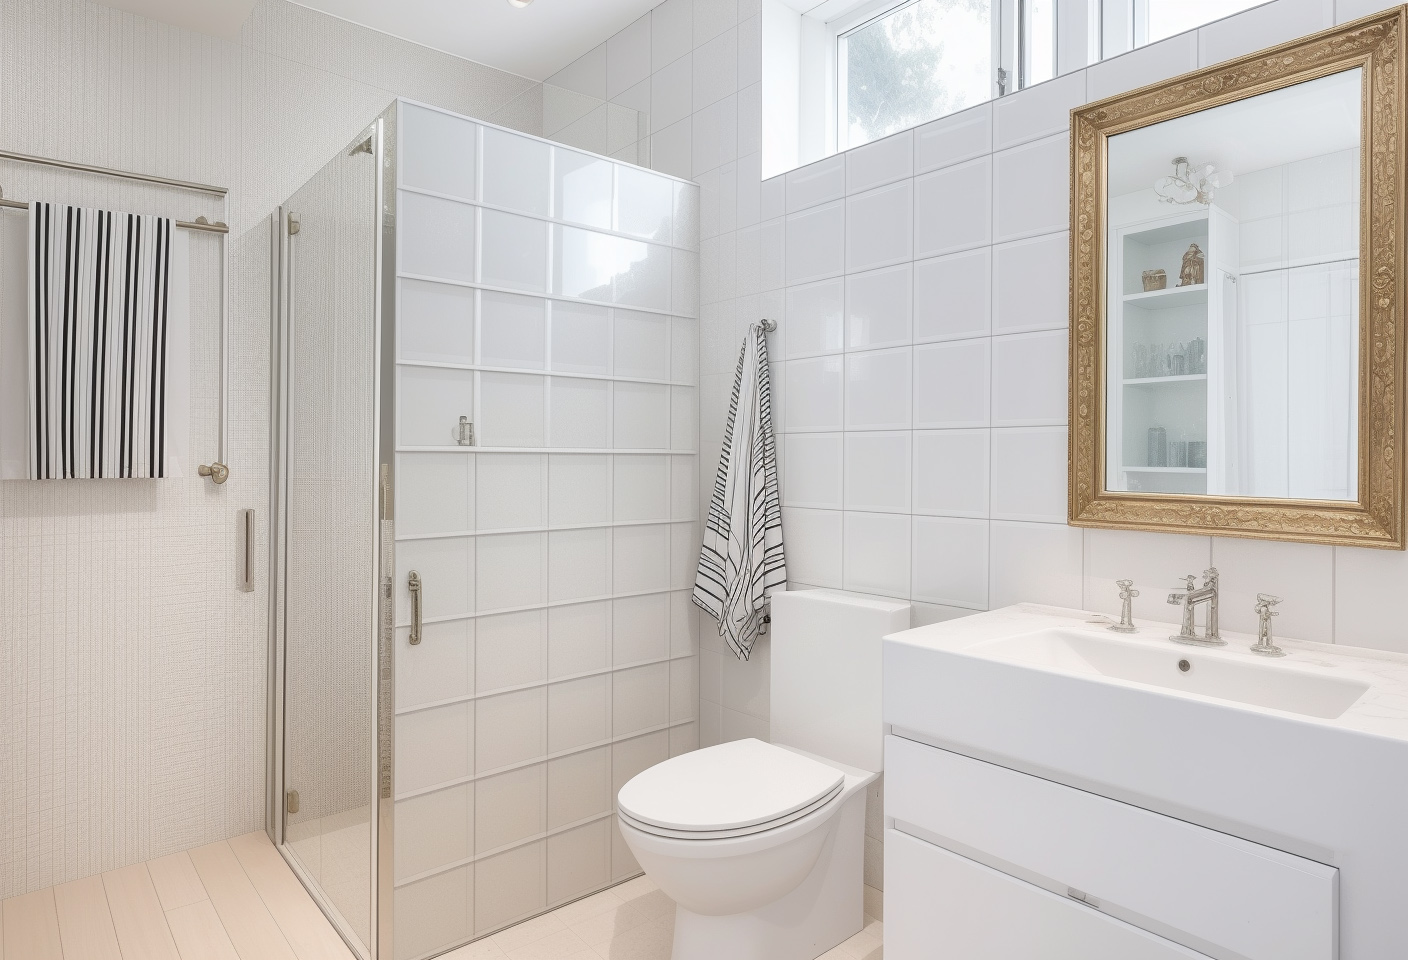
3. Only glass partitions
4. Self-built water barrier strips + shower curtains
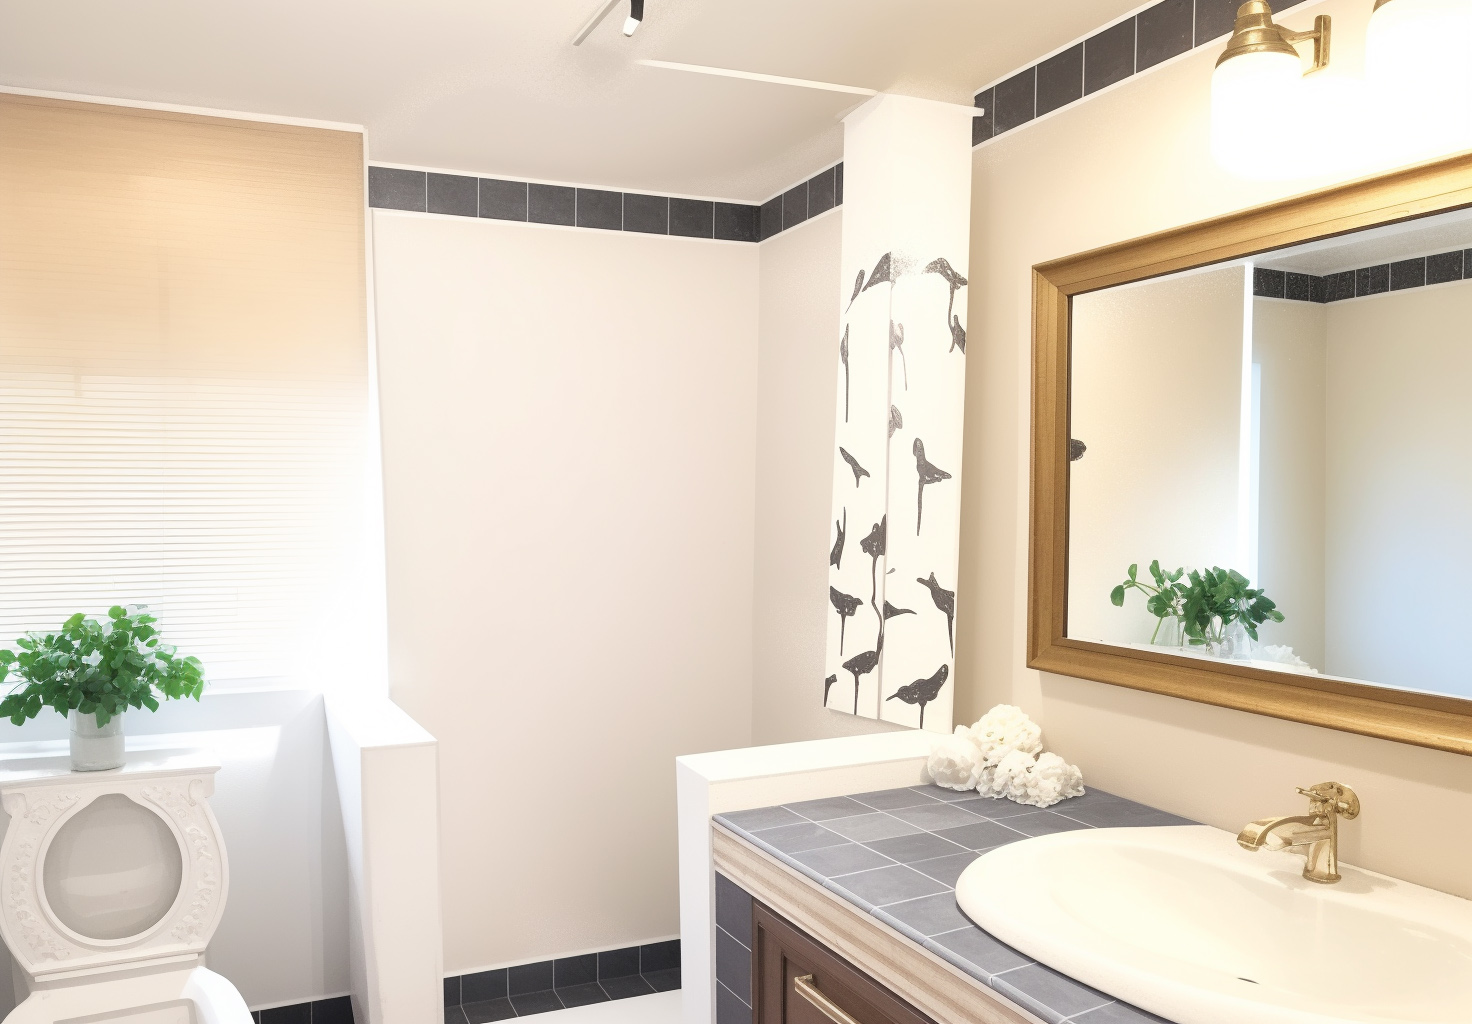
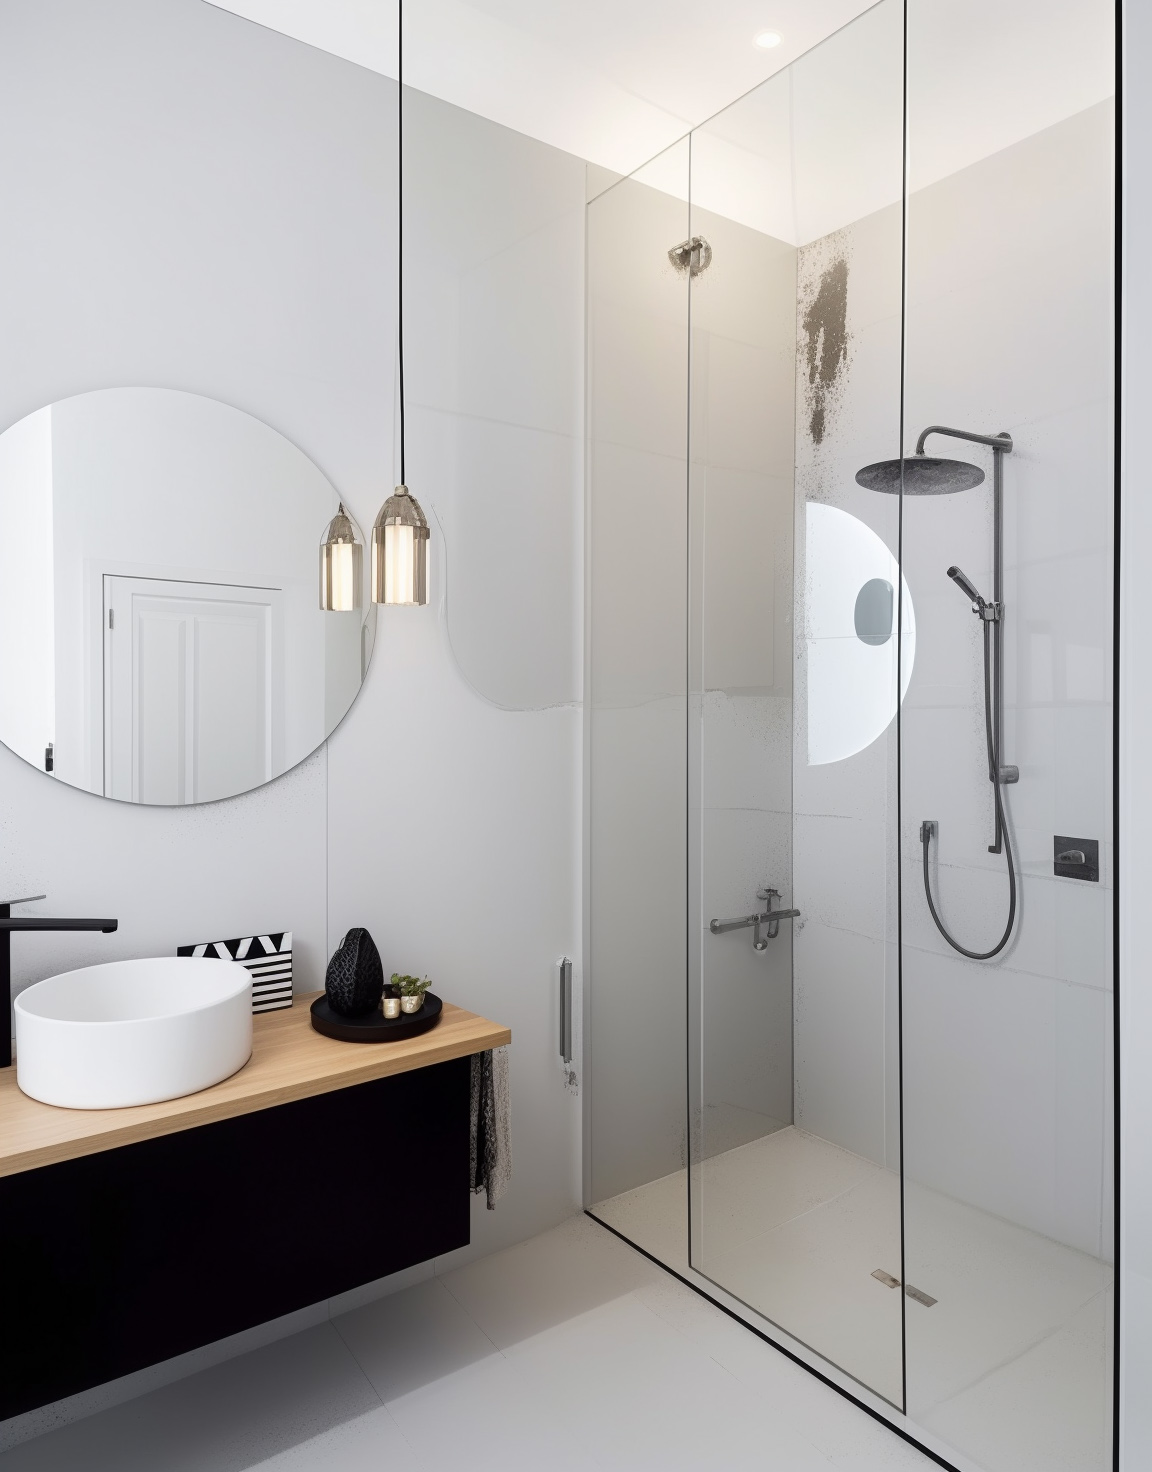
▲The Roman pole bathroom curtain is lightweight and convenient, dividing the space. The walls are covered with small mixed-color tiles, which are easy to clean. The black walnut cabinet pairs well with the white washbasin, making it convenient to use. The wide lens is simple and convenient. The small toilet is right next to the washing machine, making rational use of the space.

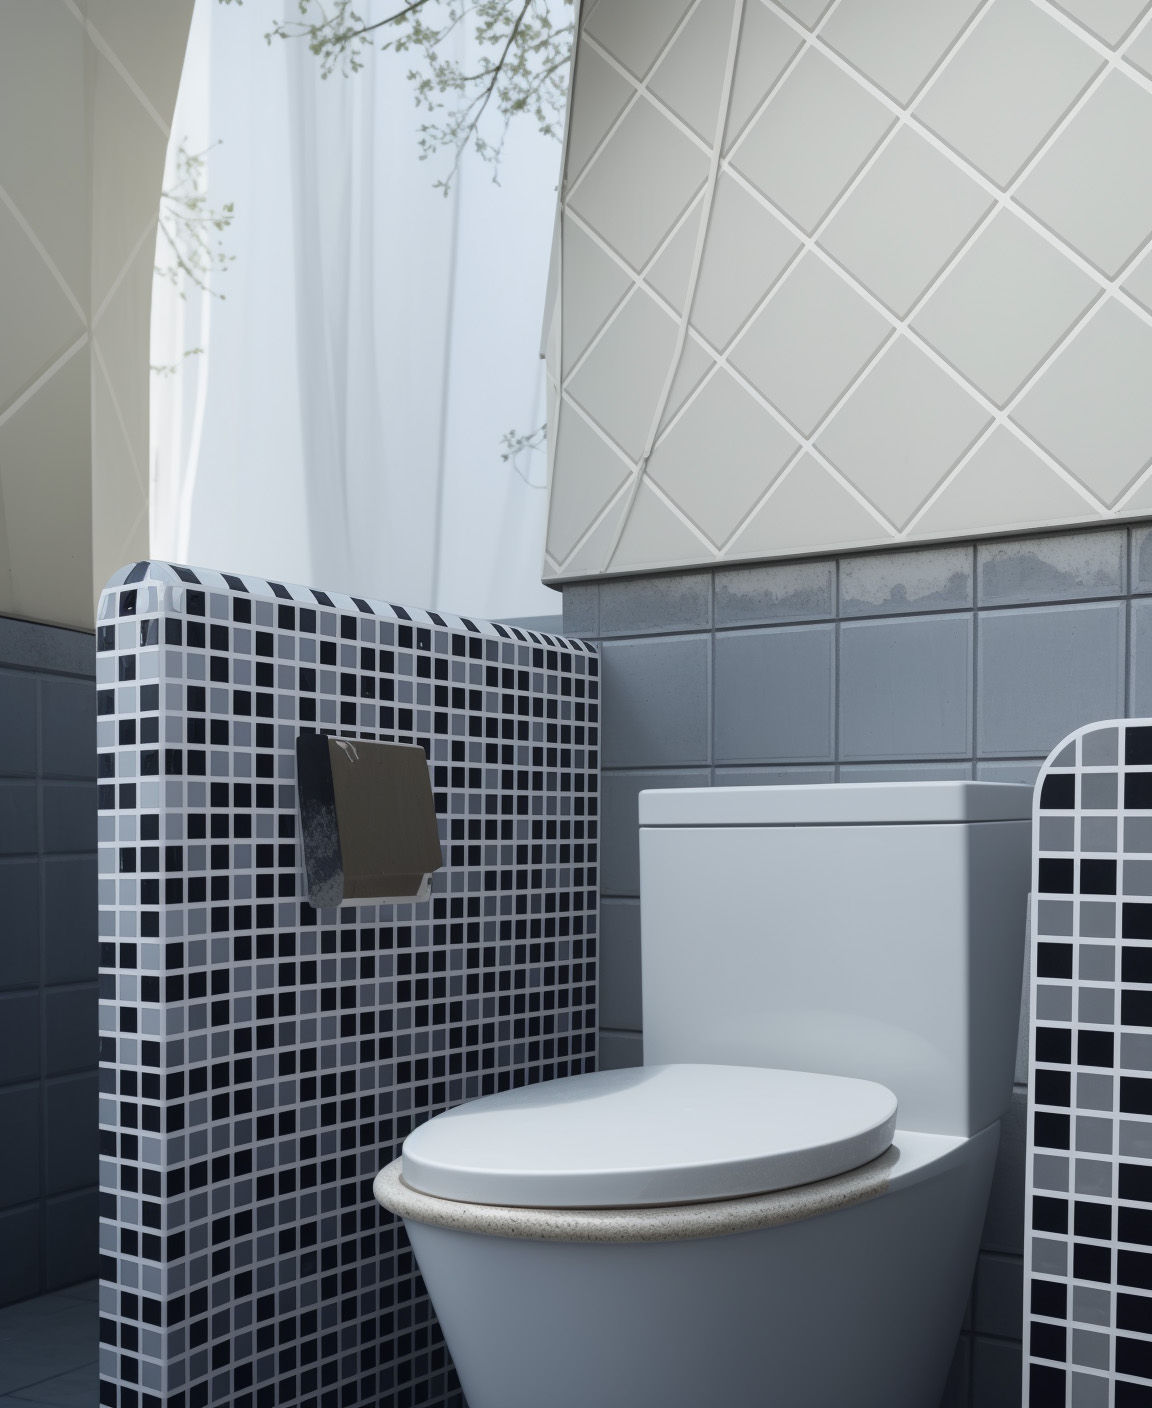
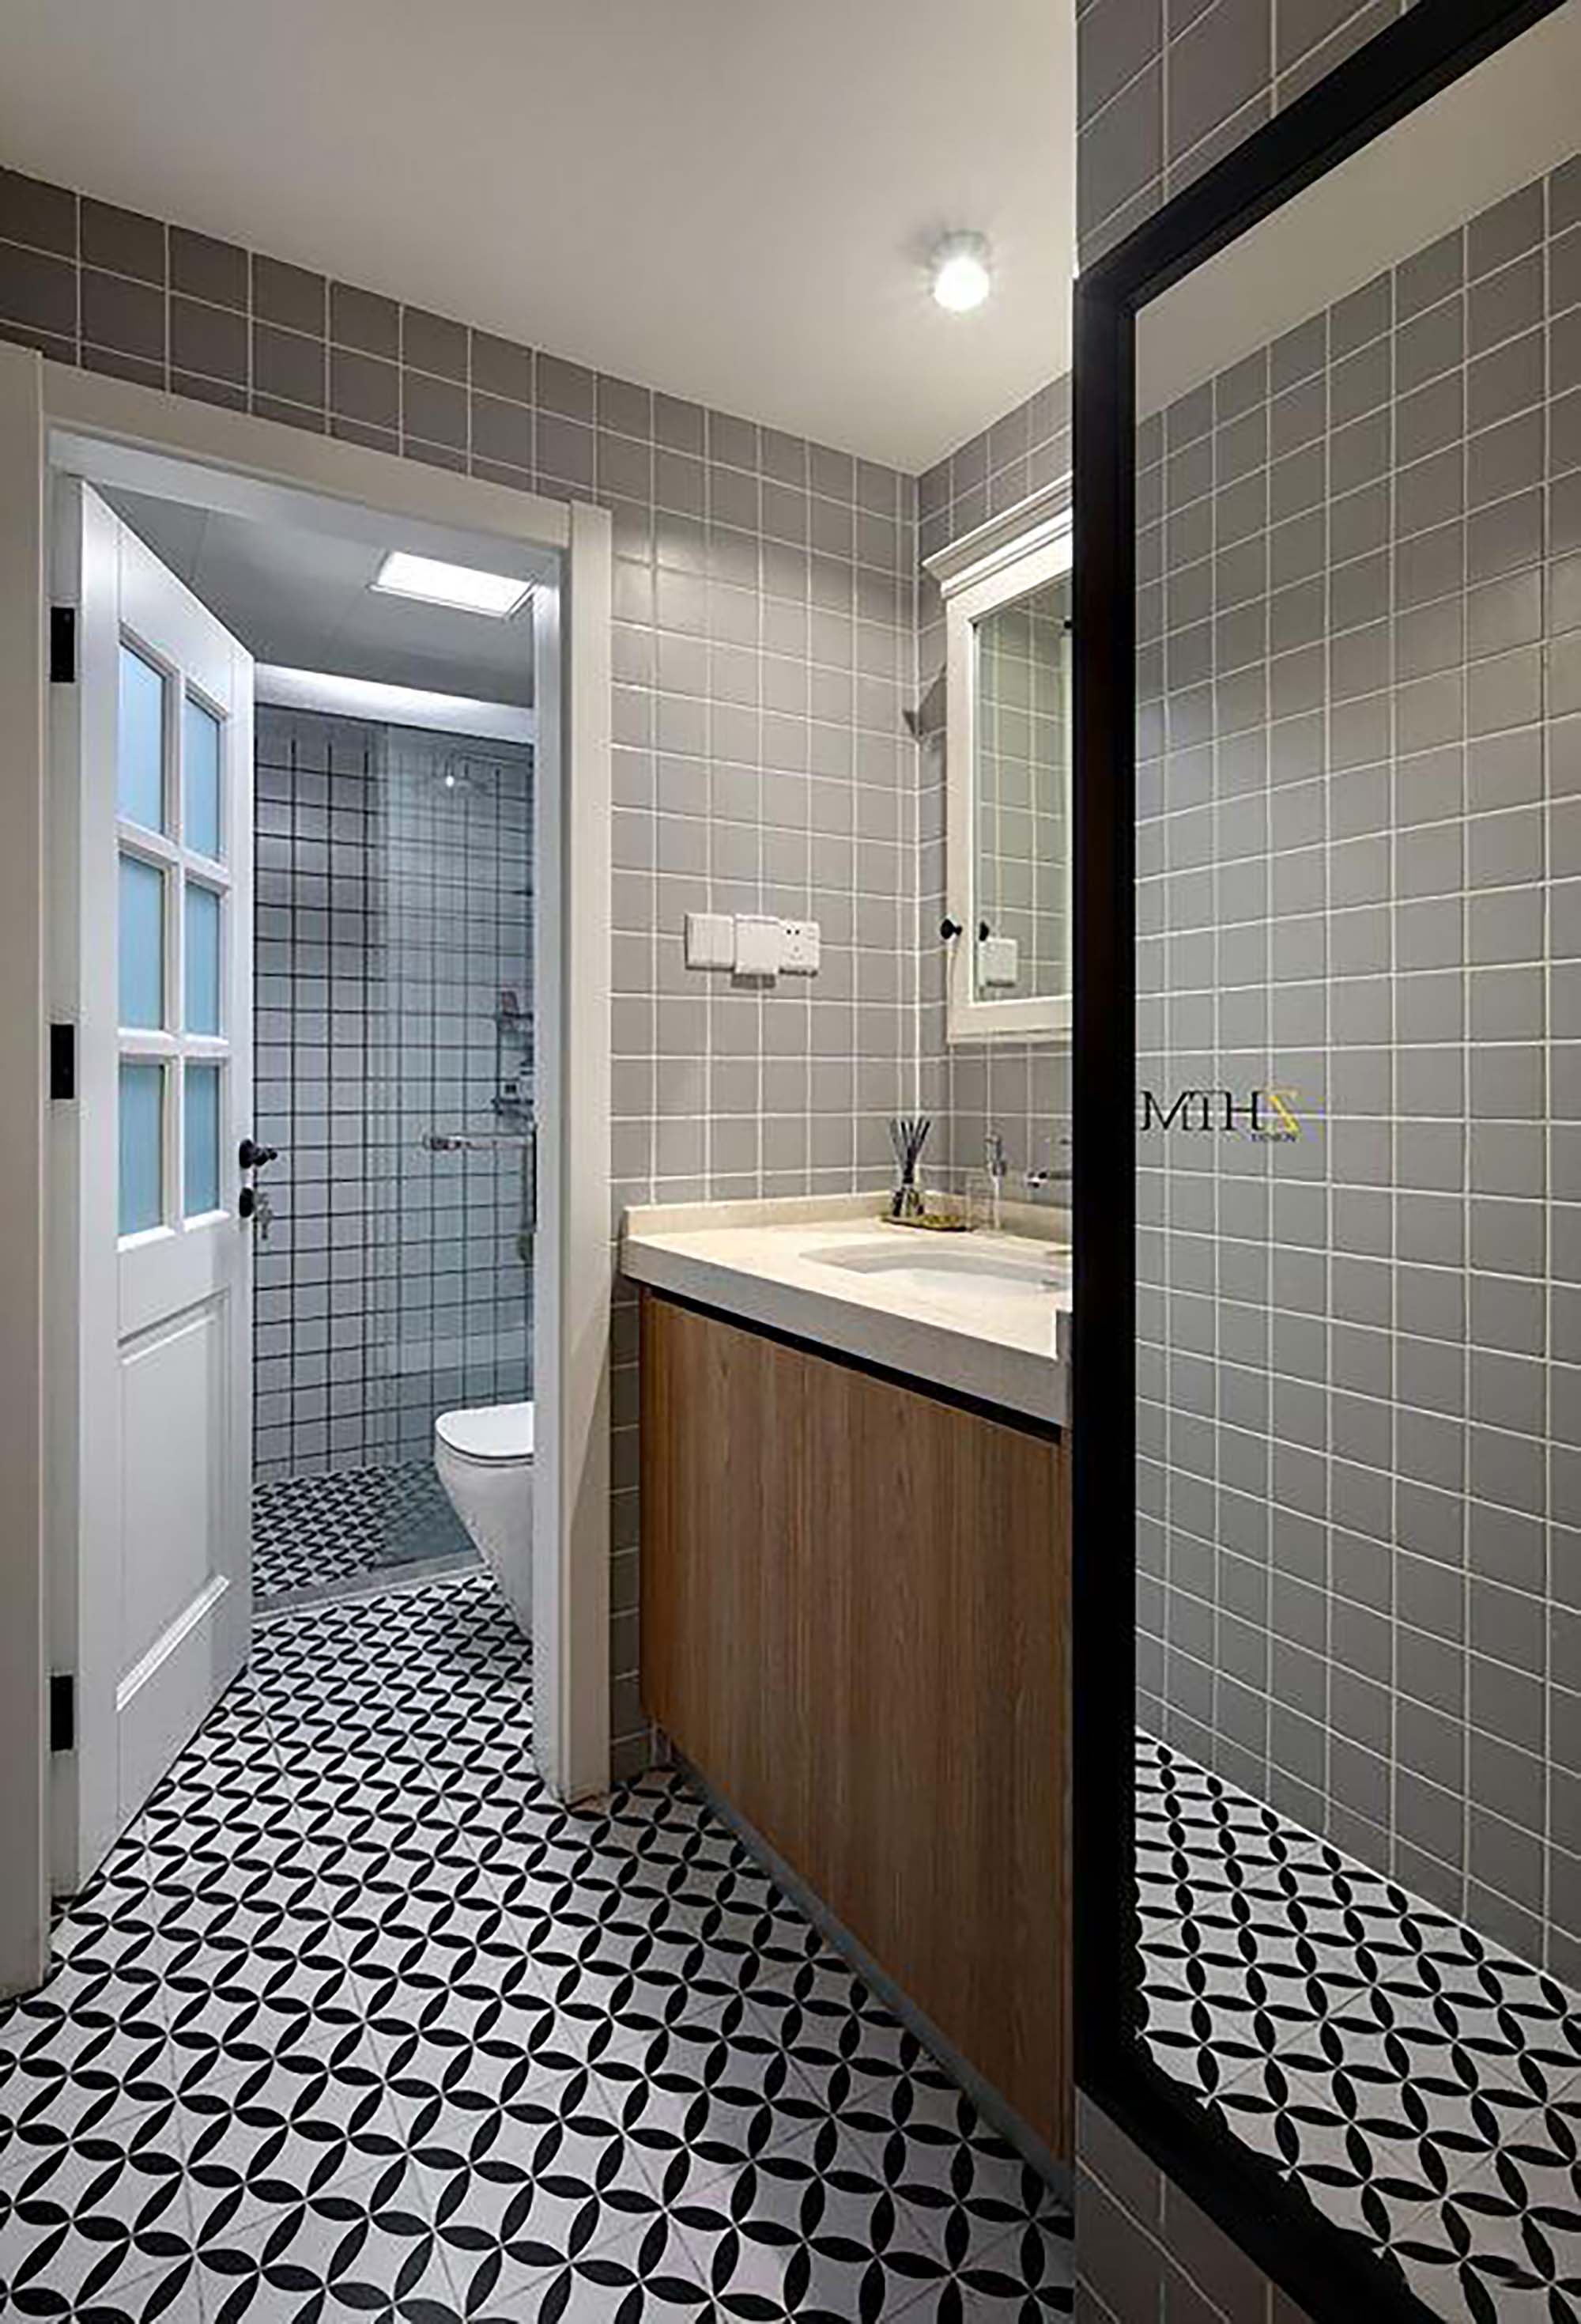
5. Brick water barriers + glass partitions
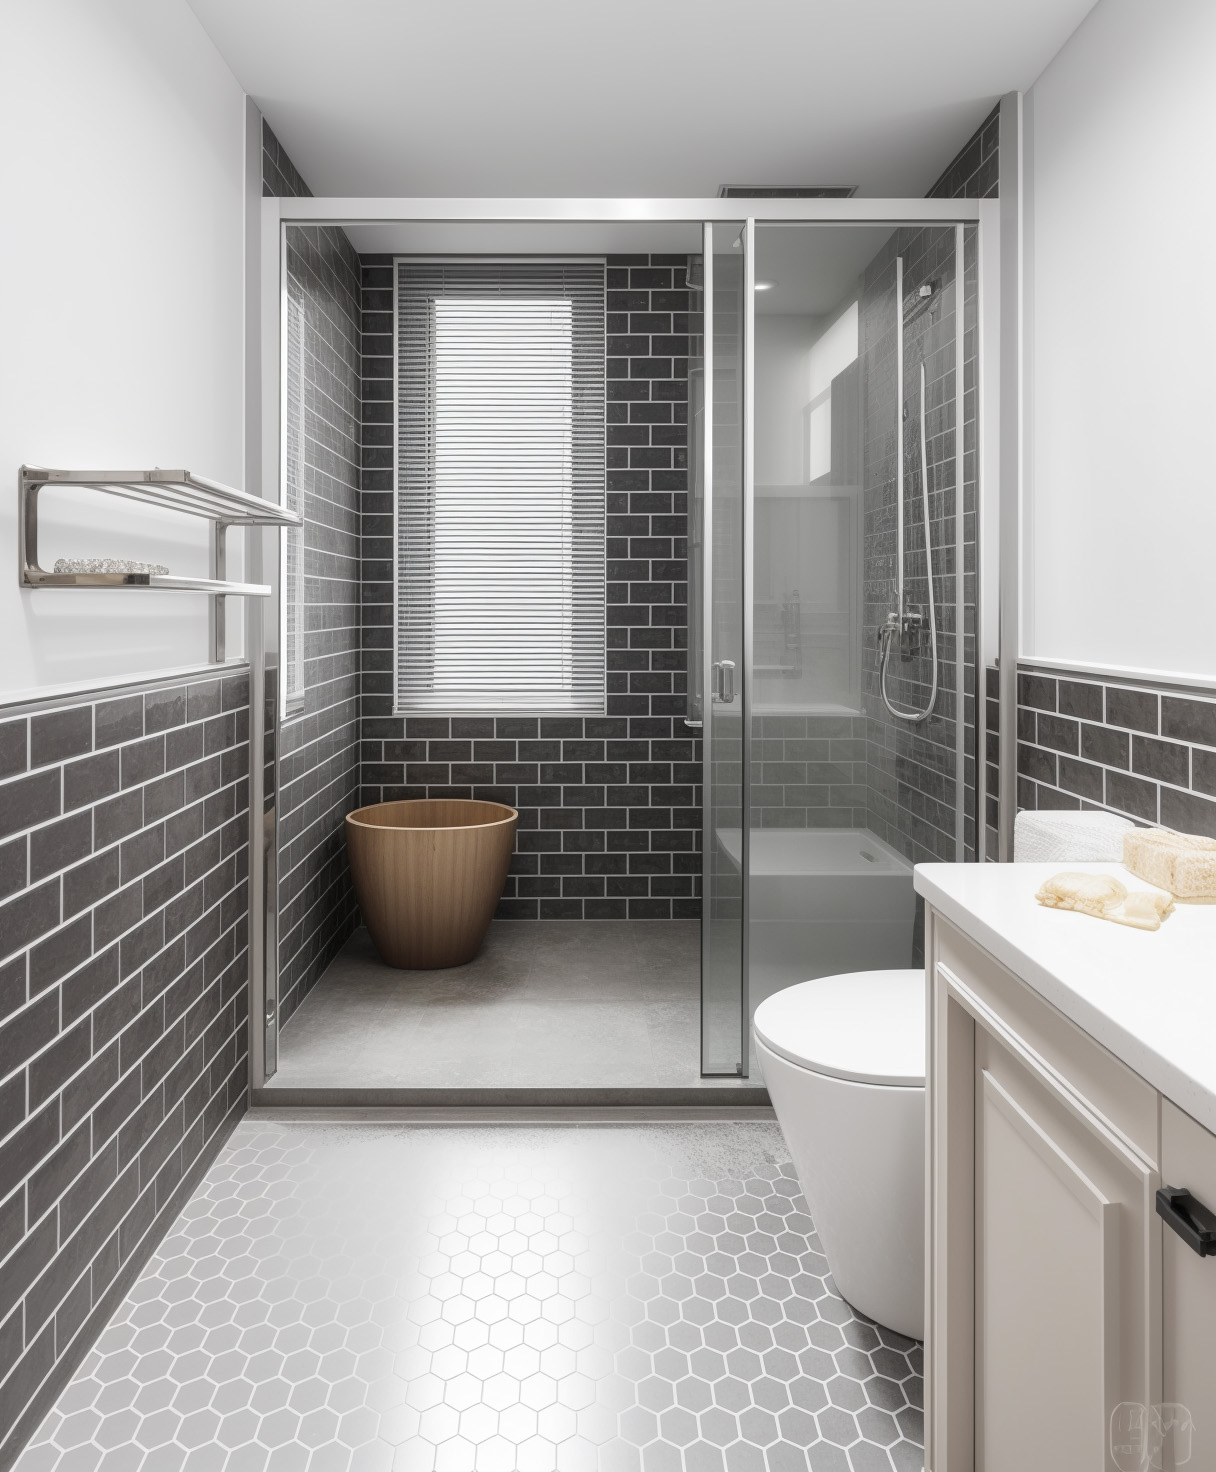
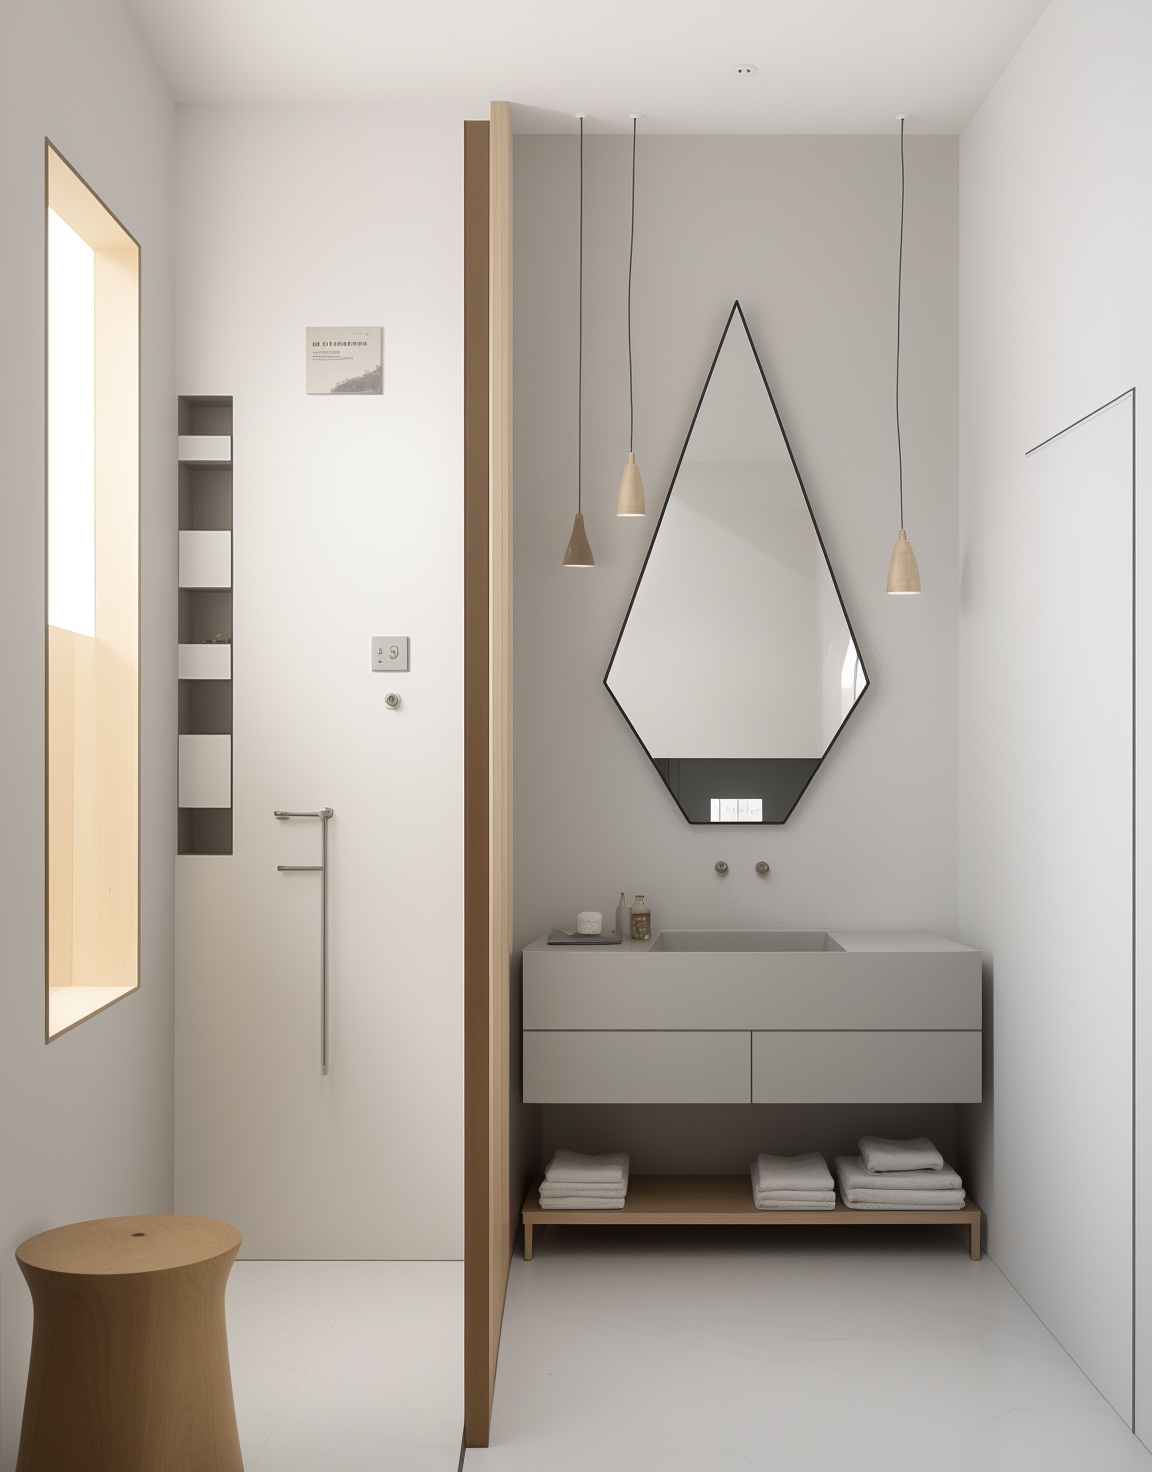
The bathroom is designed with a dry-wet separation. The sliding glass door is made of transparent material to divide the area, providing good insulation. The walls and floors are covered with blue-patterned tiles, which are neat and easy to clean. The white solid wood hand-washing cabinet is stable, with an embedded washbasin, clean and elegant. The large mirror is convenient, and the overall design is refined.

6. Wooden partitions
Hiding the shower rod in the wall is also a highlight
7. Self-built waterproof wall + shower curtain
The style of building only half a wall avoids the oppressive feeling of the wall being raised in the bathroom. Then, using a shower curtain to separate the upper part is also a good approach. My family did it this way.

8. Only use the shower curtain

9. Integrated shower enclosure
10. Self-built water retaining wall with glass bricks
11. Solid walls with dry and wet separation
I hope the above experience is helpful to you!